If there is a liquid crystal cracking of the Macbook A1181, and a display defect, it is necessary to change the LIQUID crystal, so please refer to it.
[Macbook A1181 LCD replacement and decomposition method STEP 1]
Replacing the LCD panel of the A1181 is very long and difficult compared to other models.
We recommend that you consult a repair shop if you feel it is difficult to see the following contents before disassembling.
On the other hand, because decomposition is complicated, I think that it is content that you can confidently if you can replace the liquid crystal of The A1181 by yourself.
It is a measure of the time to remove the panel, but I think that it takes more than 30 minutes even if you are used to disassembling, so I think it will take at least one hour if you include the work to reassemble it with a new liquid crystal.
[Macbook A1181 LCD replacement and decomposition method STEP 2]
Some of the decomposition methods up to this point have been omitted.
Since the decomposition becomes long, please confirm the contents so far by the keyboard exchange.
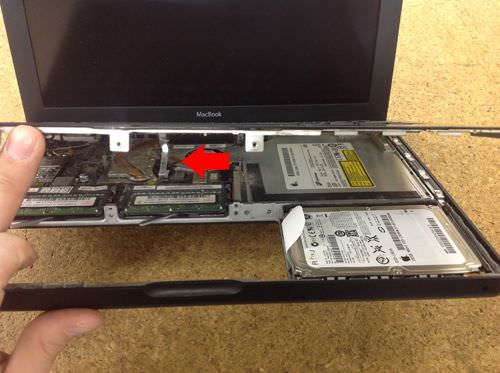
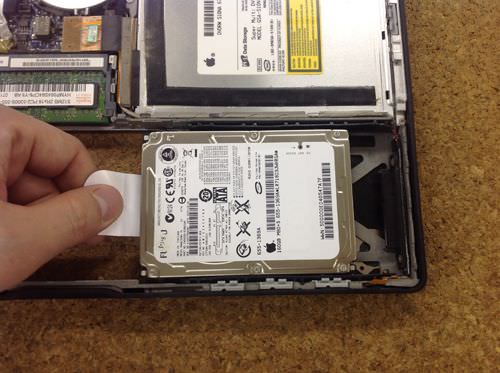
[Macbook A1181 LCD replacement and decomposition method STEP 3]
I think that I can confirm the hard disk immediately, so I will remove it by sliding it.
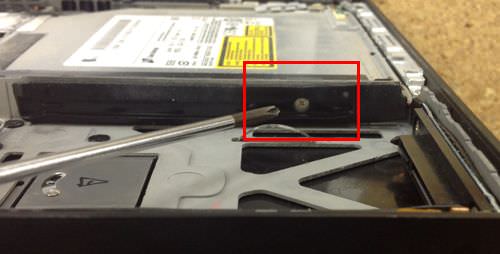
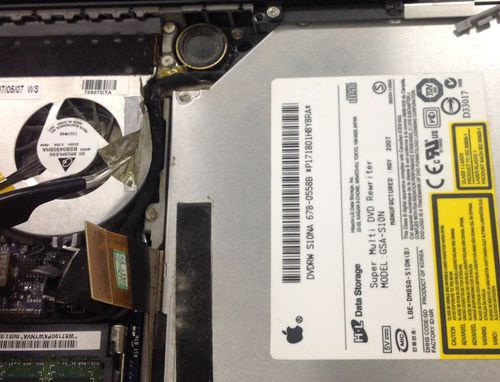
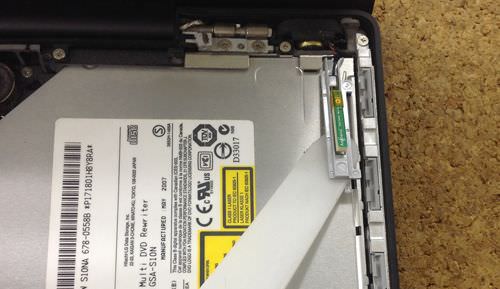
[Macbook A1181 LCD replacement and decomposition method STEP 4]
When the previous hard disk is removed, one screw is hidden next to it, but this will be the screw that secures the DVD drive, so remove it.
[Macbook A1181 LCD replacement and decomposition method STEP 5]
There are three connectors connected to the logic board in this part.
Each of them is a HDD cable, a drive cable, and a liquid crystal cable, so if you try to lift everything from the bottom to the top, you can remove it.
[Macbook A1181 LCD replacement and decomposition method STEP 6]
This is where the hard disk cable is disconnected.
[Macbook A1181 LCD replacement and decomposition method STEP 7]
I think that aluminum tape is attached to the connector immediately above the previous, but I will peel off using tweezers.
[Macbook A1181 LCD replacement and decomposition method STEP 8]
If you follow the three connector cables above, just one screw is hidden on the aluminum tape, so don't forget to remove it!
[Macbook A1181 LCD replacement and decomposition method STEP 9]
If you can remove the screw, you can confirm that the cable is stuck in a bundle, but one small screw is stopped just below it, so it will be removed.
This small screw is the screw that secures the drive.
[Macbook A1181 LCD replacement and decomposition method STEP 10]
Next, peel off the bluetooth antenna on the drive.
Because it is only fixed with light double-sided tape, it can be peeled off by inserting a spatula etc. to the lower side.
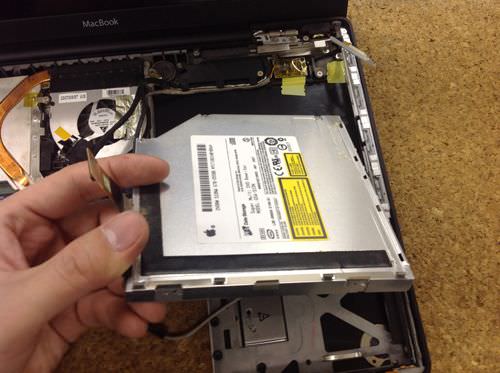
[Macbook A1181 LCD replacement and decomposition method STEP 11]
I was able to remove the drive!
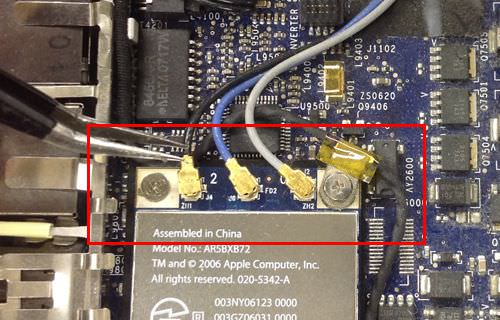
[Macbook A1181 LCD replacement and decomposition method STEP 12]
This is a Wifi cable, but there is an image part on the left side of TOPCASE.
There are three colorful connectors, so you can easily remove them if you lift them from the bottom up.
In this case, it was three, but there is a case of two in the same Macbook A1181.
Because it becomes the same as the content, please remove it in the same way even in that case.
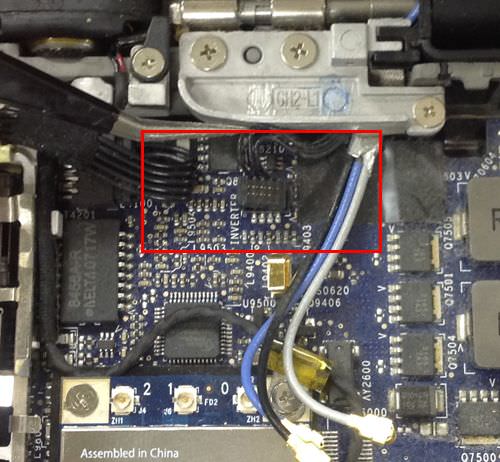
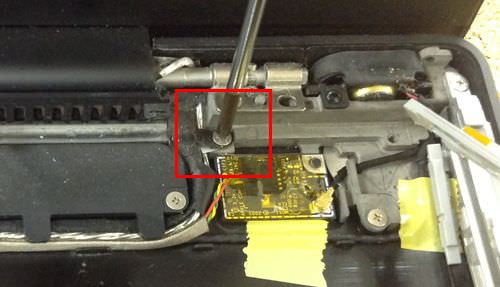
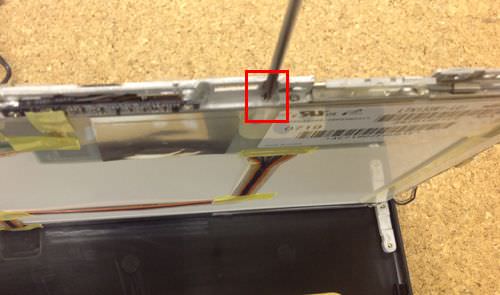
[Macbook A1181 LCD replacement and decomposition method STEP 13]
The red frame part becomes a cable that connects the inverter and the logic board, but you can easily remove it if you wake it up from the bottom.
[Macbook A1181 LCD replacement and decomposition method STEP 14]
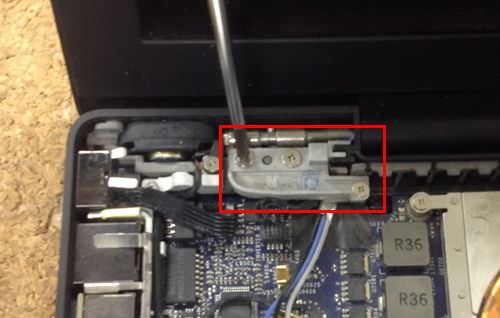
This is the hinge part on the left side, but there are three screws attached, so remove them.
If you can remove the screw, you can remove the gray pedestal and small black parts, so let's remove it at the same time!
[Macbook A1181 LCD replacement and decomposition method STEP 15]
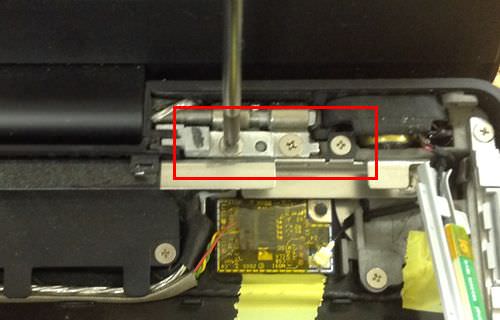
It becomes the hinge of the right part opposite to the previous.
Remove the three screws in the same manner and remove the pedestal.
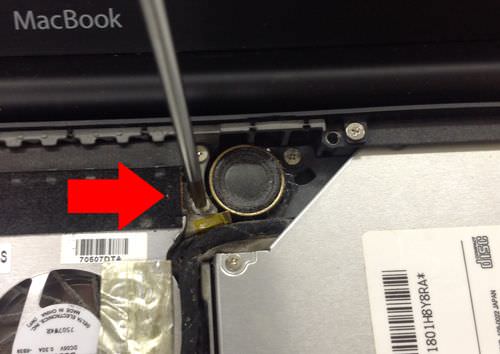
[Macbook A1181 LCD replacement and decomposition method STEP 16]
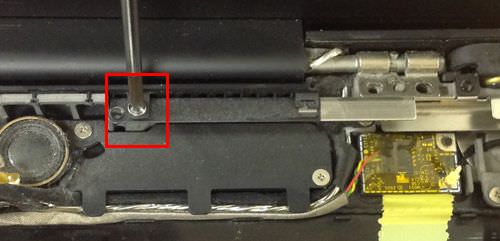
There is one screw just to the left of the right hinge, so don't forget to remove it!
[Macbook A1181 LCD replacement and decomposition method STEP 17]
There are screws here too, so don't forget to remove them.
[Macbook A1181 LCD replacement and decomposition method STEP 18]
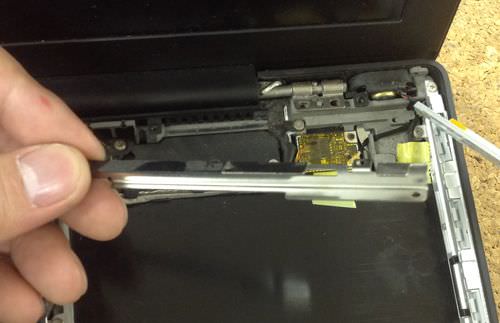
I was able to remove the iron plate.
[Macbook A1181 LCD replacement and decomposition method STEP 19]
When the iron plate can be removed, there is one screw that bundles the cable below, so remove it.
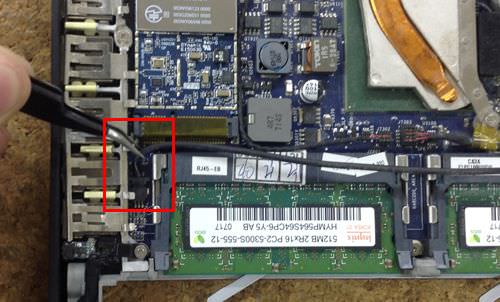
[Macbook A1181 LCD replacement and decomposition method STEP 20]
The connector next to the memory is removed, but this cable becomes the camera cable attached to the liquid crystal side.
If you can remove the cable, there is nothing that secures the liquid crystal side, so you can remove only the upper body.
It is not difficult if you try to remove it while watching the movement of the left and right hinges, but please remove it with care!
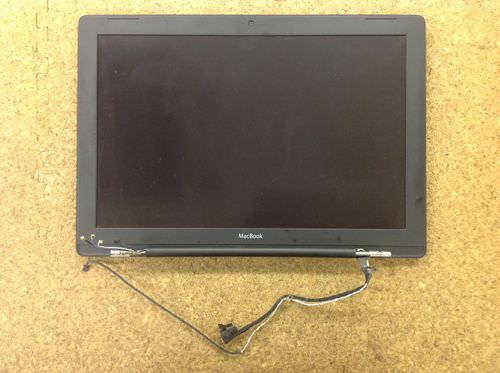
[Macbook A1181 LCD replacement and decomposition method STEP 21]
I think that it was possible to remove the upper body from the main body side if the process up to this point was able to be done accurately.
If you want to replace each upper body, if you go back to this process in the reverse procedure, the work will be completed.
If you want to replace only the panel, it is necessary to disassemble from here, so please continue to check.
[Macbook A1181 LCD replacement and decomposition method STEP 22]
Since there is not a single screw that is fixed, the frame of a1181 is disassembled as it is, but there is a plastic claw on the inside of the frame and is fixed to the rear panel side.
Use a spatula as shown in the image to insert it into the gap between the rear panel and the frame.
This work can be removed by doing this on one lap of the liquid crystal.
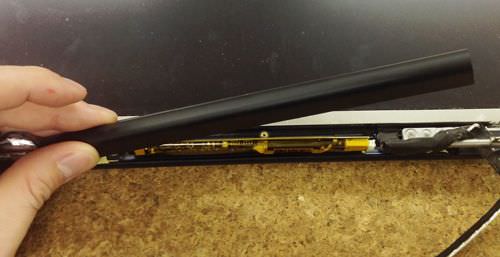
[Macbook A1181 LCD replacement and decomposition method STEP 23]
You can check the image part when you can remove the frame, but because there is an inverter in this, the screw of the red frame part will be removed.
[Macbook A1181 LCD replacement and decomposition method STEP 24]
The cover covering the inverter is a little stiff, but you can remove it if you slide it.
For the time being, this part is OK as it is.
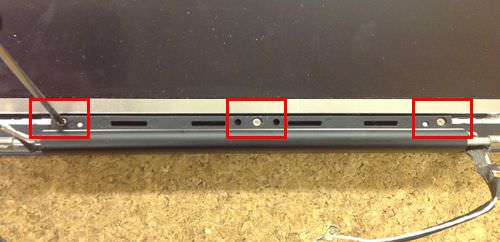
[Macbook A1181 LCD replacement and decomposition method STEP 25]
The panel is removed, but all screws are removed because there are a large number of screws in the red frame part.
Leave it as it is because you don't have to remove it if it's not enclosed in red.
If all screws can be removed, it will be possible to cause each iron frame.
[Macbook A1181 LCD replacement and decomposition method STEP 26]
I was able to see the back of the LCD panel, but please understand the structure.
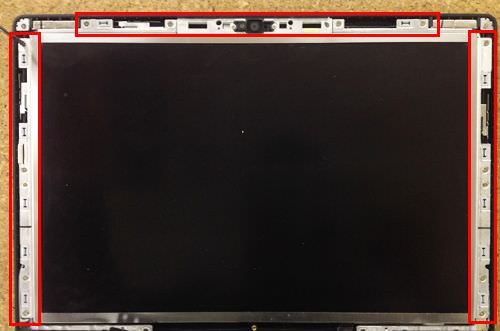
[Macbook A1181 LCD replacement and decomposition method STEP 27]
The LCD panel itself is secured with an iron frame and has screws on the left and right sides.
The red frame part of the image becomes the upper side, but there are screws on the left and right, so please remove it.
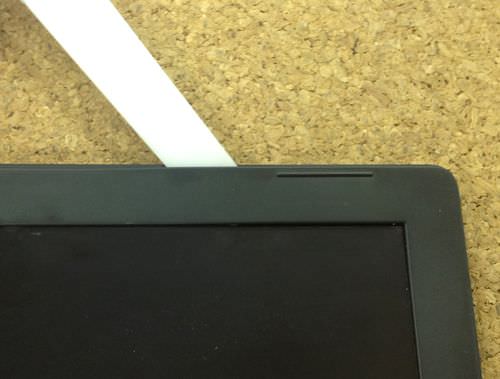
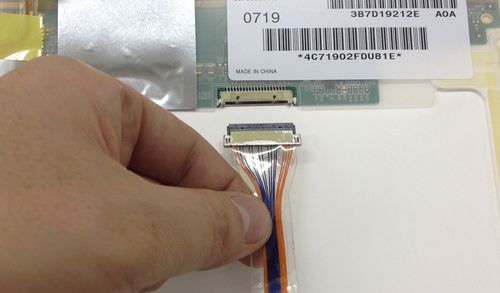
[Macbook A1181 LCD replacement and decomposition method STEP 28]
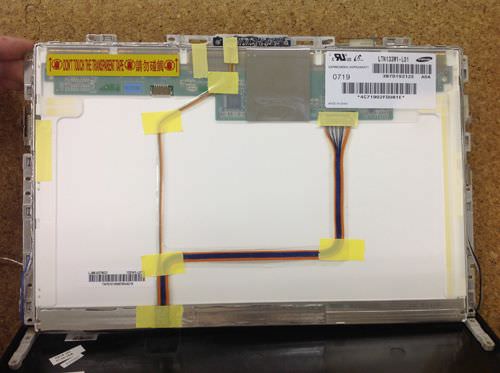
The LCD cable is removed, but it has a yellow tape on top, so you can remove it by removing it and then sliding the cable.
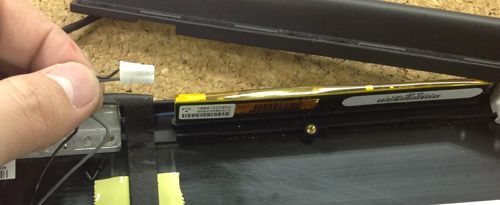
[Macbook A1181 LCD replacement and decomposition method STEP 29]
This part becomes the inverter of STEP24 of the previous, but there is a backlight cable in the liquid crystal panel and it is attached to the inverter.
It is possible to remove it if you let it slide sideways.
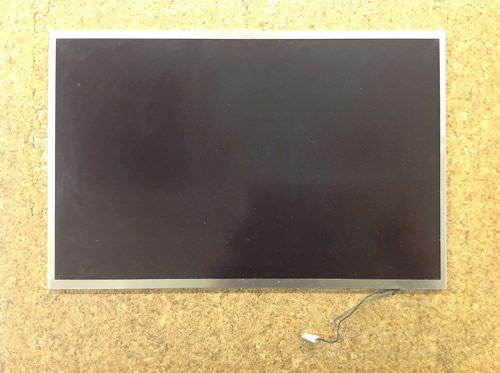
[Macbook A1181 LCD replacement and decomposition method STEP 30]
Only the LCD panel was able to be removed from the main body.
If you replace it with a new LCD panel and incorporate it with the original procedure, the LCD replacement is complete.
If you want to replace the backlight, the difficulty of working is high because it will decompose the panel itself further from here.
[Macbook A1181 LCD replacement and decomposition method STEP 31]
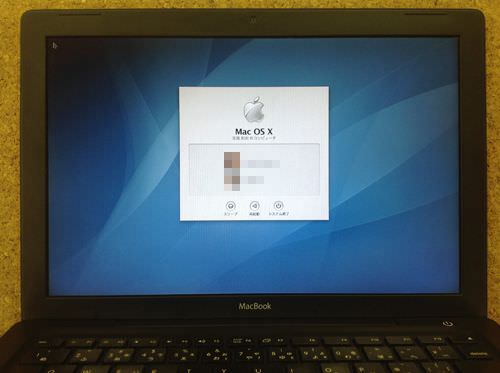
I think that it can be confirmed that the liquid crystal is stuck in the side when the plate of the previous is removed.
It is a state that built up to the original state and turned on the Macbook.
I was able to confirm that it is displayed normally!

 If there is a liquid crystal cracking of the Macbook A1181, and a display defect, it is necessary to change the LIQUID crystal, so please refer to it.
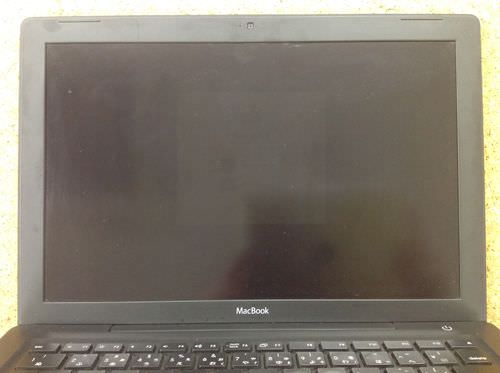

 When the previous hard disk is removed, one screw is hidden next to it, but this will be the screw that secures the DVD drive, so remove it.
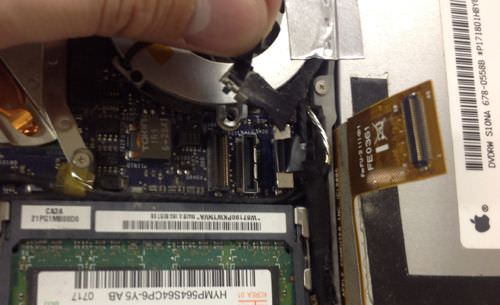
 There are three connectors connected to the logic board in this part.
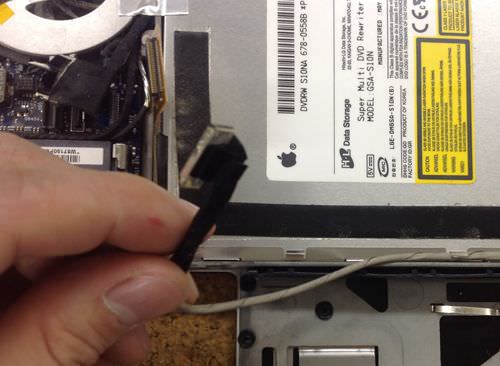


コメントを残す