How to repair the Macbook A1181 keyboard doesn't work, doesn't respond, or is hit in a row, and how to disassemble it
This is a part replacement procedure if the macbook A1181 keyboard does not work or does not respond.
[Macbook A1181 Keyboard Replacement STEP 1]
The Macbook A1181 has the only black laptop on your Mac, and the keyboard replacement is not a keyboard-only replacement, but a TOPCASE replacement that includes a keyboard or touchpad.
[Macbook A1181 Keyboard Replacement STEP 2]
First of all, remove the battery, but you can check that there is a battery when you make the back side of the body.
You can remove the side part by using coins and spatulas, but removing the battery is the first thing to do when disassembling the PC.
[Macbook A1181 Keyboard Replacement STEP 3]
After removing the battery, remove all screws that are enclosed in red in the inside out.
[Macbook A1181 Keyboard Replacement STEP 4]
Next, I will remove the screw of the hinge side, but let's remove the Phillips screwdriver because there are four in all!
[Macbook A1181 Keyboard Replacement STEP 5]
Next, I will remove two screws next to the DVD drive insertion port, but let's take and manage such as by memo so that the location of the screw is not lost later.
[Macbook A1181 Keyboard Replacement STEP 6]
This is the opposite of the previous drive, and the screw is attached in the same way, so I remove it.
[Macbook A1181 Keyboard Replacement STEP 7]
There is also a screw inside where the battery was removed.
This screw only secures the iron plate, but let's loosen all three screws!
However, the screw itself has a structure that does not come off.
[Macbook A1181 Keyboard Replacement STEP 8]
If you can loosen the screw of the previous, you can remove the plate.
[Macbook A1181 Keyboard Replacement STEP 9]
It is a state in which the metal fittings of "L-shaped" are removed.
When removed, the screw stops further on the inside, but please do not understand it because the length and shape of the screw are slightly different here.
[Macbook A1181 Keyboard Replacement STEP 10]
There are screws on the side of the inside of the battery, so remove them.
[Macbook A1181 Keyboard Replacement STEP 11]
This is also the side of the battery without as before, but remove all screws.
Now I can remove all the screws that secure the keyboard.
[Macbook A1181 Keyboard Replacement STEP 12]
As shown in the image, if you insert a spatula (tool) into the gap between the keyboard and the main body side and make it work lightly, you will be able to float the TOPCASE.
At this time, please wake up from the trackpad side to the liquid crystal side.
[Macbook A1181 Keyboard Replacement STEP 13]
If you can float TOPCASE to some extent, it will be in a state like an image, but I think that you can check the cable (red arrow) that connects the keyboard and logic board internally.
While lifting TOPCASE with one hand, put the other hand in the gap and remove it.
Because I think that I was able to remove all TOPCASE if I can remove this cable, the keyboard replacement will be completed if I replace it with the parts that I have prepared and incorporate it in the original procedure.

 This is a part replacement procedure if the macbook A1181 keyboard does not work or does not respond.
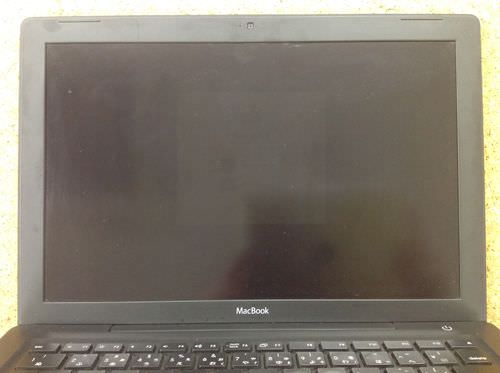

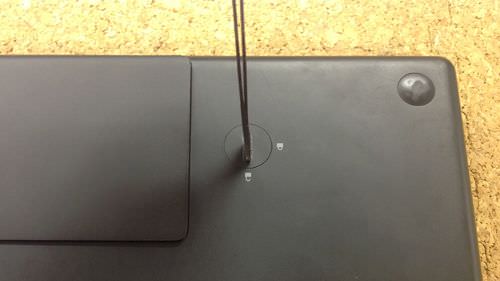
 First of all, remove the battery, but you can check that there is a battery when you make the back side of the body.
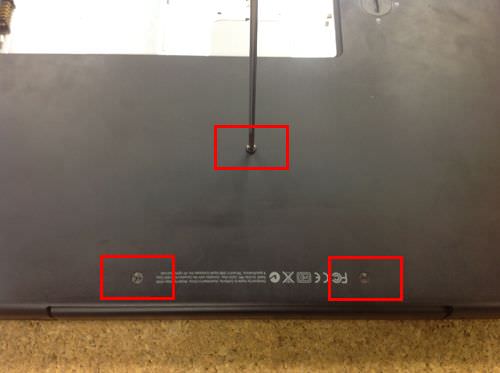
 After removing the battery, remove all screws that are enclosed in red in the inside out.
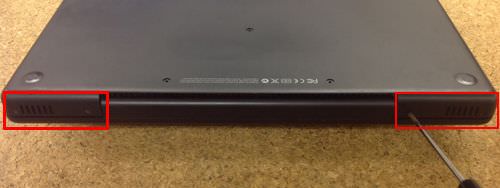
 Next, I will remove the screw of the hinge side, but let's remove the Phillips screwdriver because there are four in all!
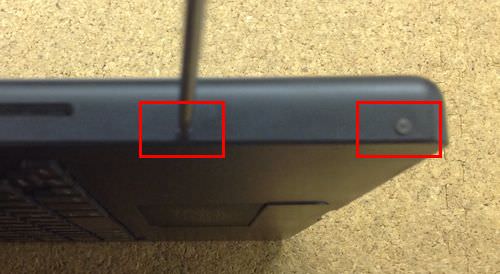
 Next, I will remove two screws next to the DVD drive insertion port, but let's take and manage such as by memo so that the location of the screw is not lost later.
 This is the opposite of the previous drive, and the screw is attached in the same way, so I remove it.
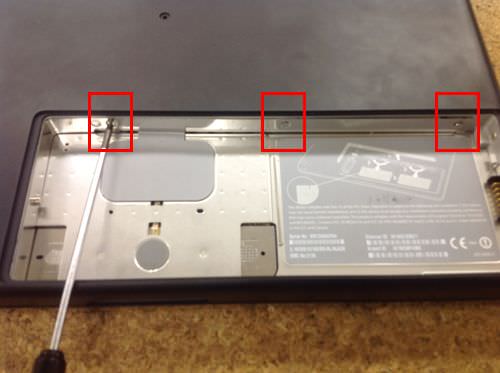
 There is also a screw inside where the battery was removed.
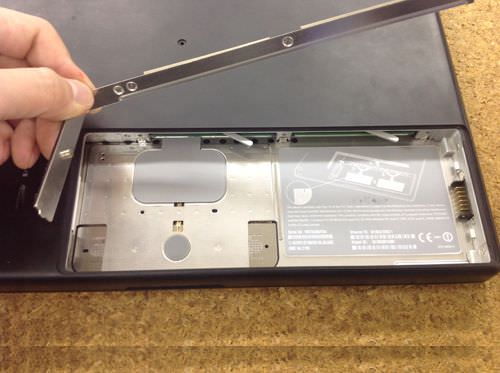
 If you can loosen the screw of the previous, you can remove the plate.
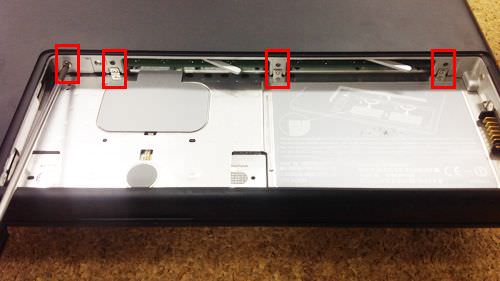
 It is a state in which the metal fittings of "L-shaped" are removed.
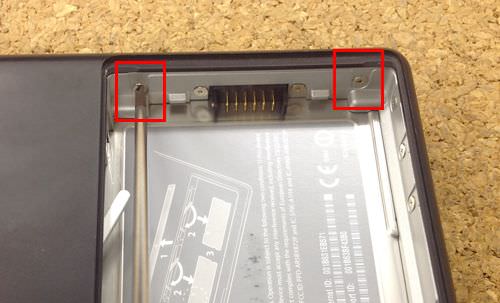
 There are screws on the side of the inside of the battery, so remove them.
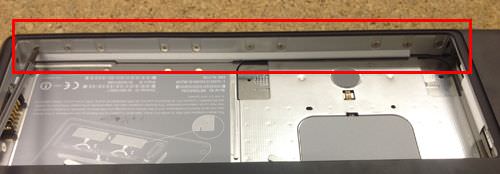
 This is also the side of the battery without as before, but remove all screws.
 As shown in the image, if you insert a spatula (tool) into the gap between the keyboard and the main body side and make it work lightly, you will be able to float the TOPCASE.
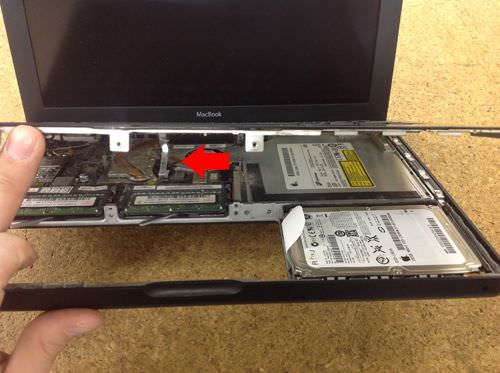


コメントを残す