The following decomposition method will be helpful when replacing the MACbook A1342 LCD!
[Macbook A1342 LCD replacement STEP 1]
There is a model that the battery can be taken out immediately depending on the personal computer, but in the case of macbook A1342, it becomes a built-in model, so the main body is made to the back side, and the back cover is removed.
You can remove the eight red circle parts by removing them with a Phillips screwdriver.
[Macbook A1342 LCD replacement STEP 2]
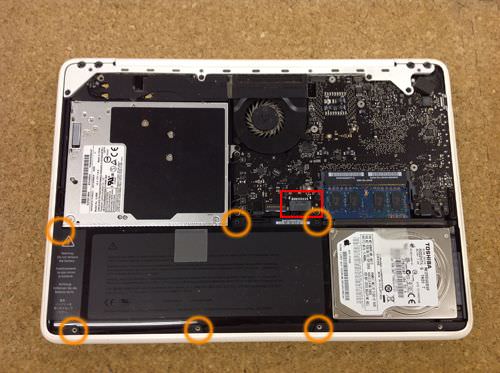
When the back cover is removed, it becomes the following state, and the big black thing in the lower left becomes the battery of the A1342.
Because the part enclosed in red becomes a connector that connects the battery and the logic board, I remove it with the feeling that It wakes up.
The orange part is a screw, and you can remove the battery by removing six screws in all places.
Up to this point, the battery can be replaced in 5 minutes of work time.
This time it will be a liquid crystal panel replacement, so it is OK just to remove the red part of the battery.
[Macbook A1342 LCD replacement STEP 3]
When you have finished removing the battery connector, close the back cover again. I will attach the screw as in the time of [step 1].
Please be careful not to get the cable connection into the back cover at this time.
It seems easier to remove all the LCD upper body, but it takes time, so in this procedure I want to proceed with the work that does not remove the upper body, so I have returned the back cover for that.
[Macbook A1342 LCD replacement STEP 4]
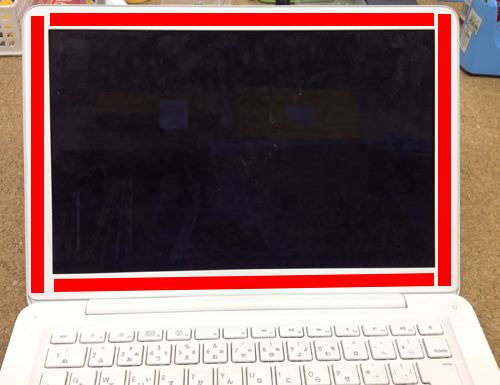
The reason to close the back cover is that there is a possibility that the logic board will stick below in this state. The following is a state in which the body of the macbook is opened, but a strong double-sided tape is attached to the red part.
This part is warmed with a heat gun, a dryer, etc., and then removed using a spatula.
[Macbook A1342 LCD replacement STEP 5]
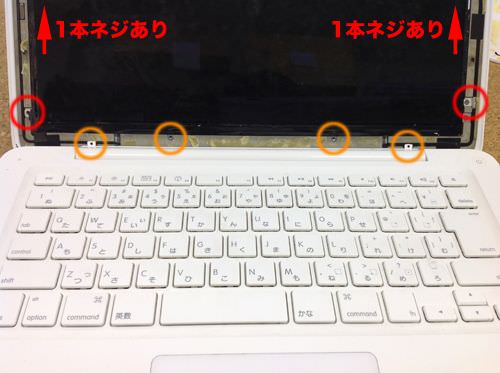
When you finish removing the LCD frame with [step4], it will be the following image. In the image, the upper half has been cut, but the LIQUID CRYSTAL panel itself is fixed with six (four red sand, two orange centers) screws.
Since the outer two of the orange part become a hinge cover, when the screw is finished, it will remove the spatula.
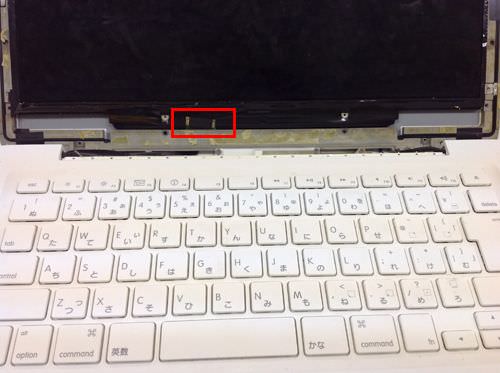
[Macbook A1342 LCD replacement STEP 6]
I removed eight screws in all of them in the previous journey, but when I finished removing them all, the liquid crystal moves, so I lift them up a little.
Then, the part which is enclosed in red comes out from the bottom, but this part is removed because it becomes the connector part which connects the liquid crystal panel and the liquid crystal cable.
It is relatively easy to remove, but it is more difficult to install again.
[step6] is the most important, so please work carefully.
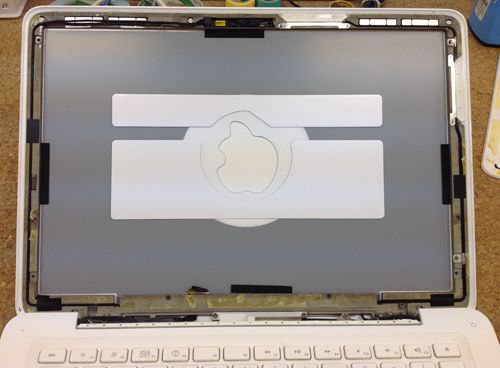
[Macbook A1342 LCD replacement STEP 7]
When lifted up with [step6], it comes off, but the liquid crystal panel is removed. I think that the apple mark can be seen in the center, but it is a mechanism that the apple mark shines beautifully by using the light of the liquid crystal.
In the customization of the light of the apple mark, you can change the color of the apple light if you put a color film on this part.
But the white light is still MAC.
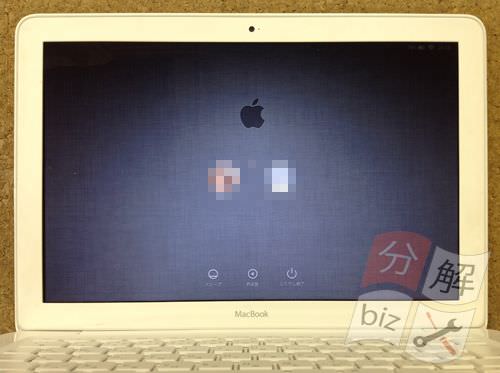
[Macbook A1342 LCD replacement STEP 8]
Since we have replaced the LCD panel, the login screen is now displayed normally.

 The following decomposition method will be helpful when replacing the MACbook A1342 LCD!
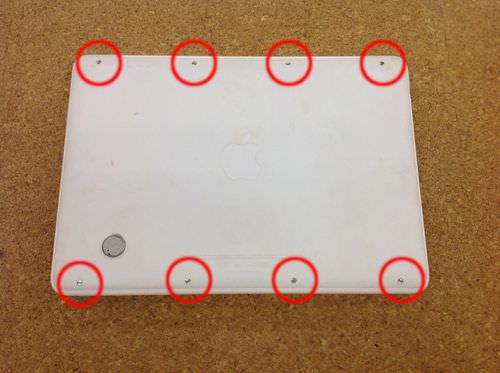


コメントを残す