Repair method, disassembly method such as DC jack failure that does not power on the Macbook 12 A1534
Macbook 12 A1534 EMC2746 2015 model USB-C port replacement
[Macbook 12 A1534 USB-C port replacement and disassembly method STEP 1]
Please refer to the USB-C port newly installed from Macbook12 because you can remove it if you can perform the following procedure accurately!
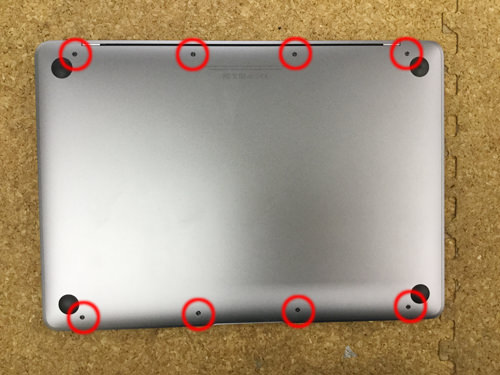
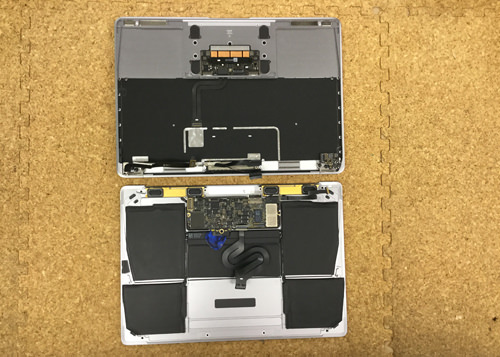
First of all, the work of removing the inside cover by turning the inside out of the main body is done first.
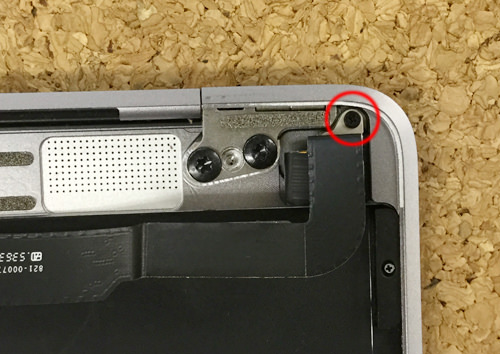
Because there is a screw in the place which is enclosed in a red circle, it removes all, but it is not possible to open it with a Phillips screwdriver because it becomes a screw of a special shape.
Pentabebe driver (star type), can be opened by using the Torx screwdriver, but we have used the driver of BEST 8800C 1.2.
[Macbook 12 A1534 USB-C port replacement and disassembly method STEP 2]
If all screws can be removed, it will be possible to remove the back cover, but care must be taken.
When disassembling MacbookAir and MacbookPro, we will remove the back cover in the same way, but it is necessary to open it from the opposite direction from those models, but here we will only work to lift lightly using a spatula.
[Macbook 12 A1534 USB-C port replacement and disassembly method STEP 3]
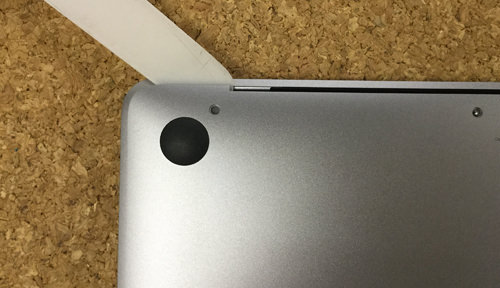
The side side is also lightly lifted as well, but this part has a feeling that comes off because it has a hook.
[Macbook 12 A1534 USB-C port replacement and disassembly method STEP 4]
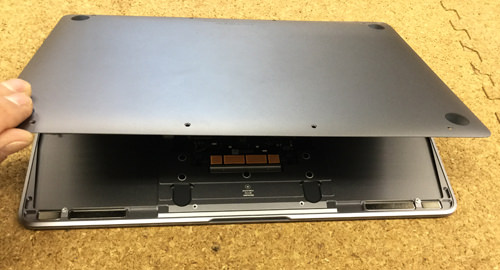
If it floats overall, I will open it, but please be sure to lift it from the same position as the image.
If you open from the opposite side, there is a possibility of disconnection because there is a cable, so be careful.
[Macbook 12 A1534 USB-C port replacement and disassembly method STEP 5]
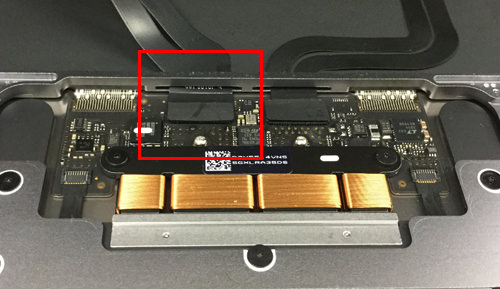
When the back cover is lifted in the previous process, it becomes the first visible part (trackpad), but we will work to remove the connector that is enclosed in a red frame.
[Macbook 12 A1534 USB-C port replacement and disassembly method STEP 6]
Because the seal is attached to the connector, it is the place where it peels off using the spatula.
[Macbook 12 A1534 USB-C port replacement and disassembly method STEP 7]
There is a connector under the seal above, but I try to raise the nail with a spatula as shown in the image, but when I raise the nail, it lifts up to 90 degrees.
Please note that if it is more than 90 degrees, it may come off or malfunction.
[Macbook 12 A1534 USB-C port replacement and disassembly method STEP 8]
You can remove it if you pull out the cable while the nail is raised.
[Macbook 12 A1534 USB-C port replacement and disassembly method STEP 9]
I was able to remove the cable.
[Macbook 12 A1534 USB-C port replacement and disassembly method STEP 10]
I was able to open the back cover somehow with this, but it has not been completed yet.
Now it knocks it backwards from the image.
If you want to explain clearly, wake up the lower side (trackpad side) in the image so that the opposite side (battery side) is put to sleep.
If it is difficult to do, please put the thing which becomes the back rest in the back so that it does not fall down.
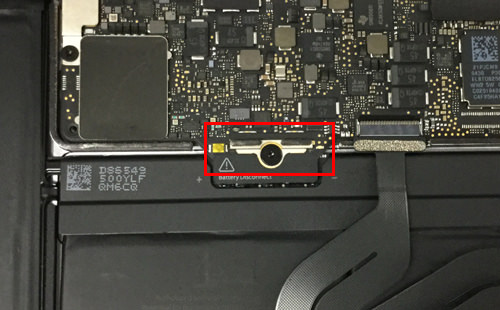
[Macbook 12 A1534 USB-C port replacement and disassembly method STEP 11]
This part is connected to the battery and the logic board, but remove the screw attached to the red circle part.
When the screw can be removed, the iron plate under it can also be removed.
There is a reset button on the left side of the red frame, but you can also reset it by pressing here.
We explain in a method to remove it in order to decompose more reliably.
[Macbook 12 A1534 USB-C port replacement and disassembly method STEP 12]
I was able to remove the screw and the plate.
Please keep it so as not to lose it because there are a lot of fine parts.
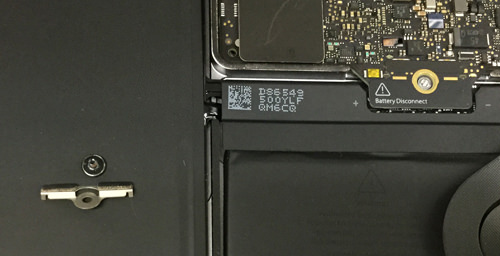
[Macbook 12 A1534 USB-C port replacement and disassembly method STEP 13]
The pick and the spatula (plastic) are sandwiched into the gap where the screw was removed, and the electricity is cut off.
Then, let's remove two screws of the red circle part which is in the immediate vicinity.
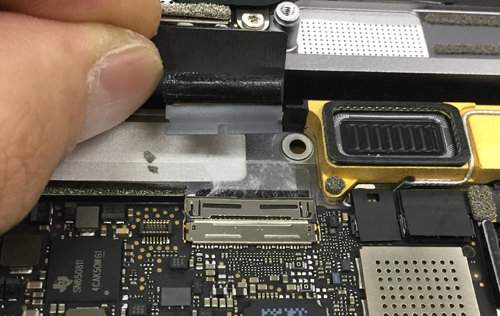
[Macbook 12 A1534 USB-C port replacement and disassembly method STEP 14]
This part has become a connector, so you can easily remove it if you try to lift it from the bottom to the top with a spatula.
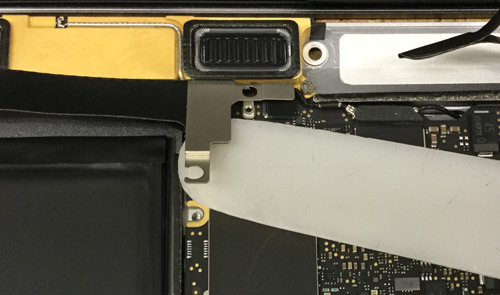
[Macbook 12 A1534 USB-C port replacement and disassembly method STEP 15]
This part is called Audio Jack Board, but it becomes the earphone part.
Since a fluent cable is connected from the logic board, you can pull out the cable if you lift the black nail of the arrow part and slide it.
[Macbook 12 A1534 USB-C port replacement and disassembly method STEP 16]
I was able to remove the cable.
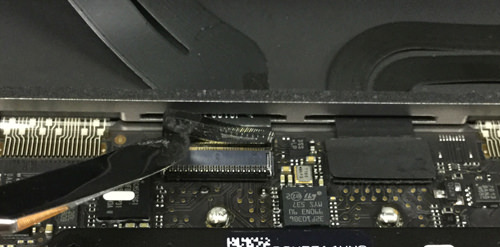
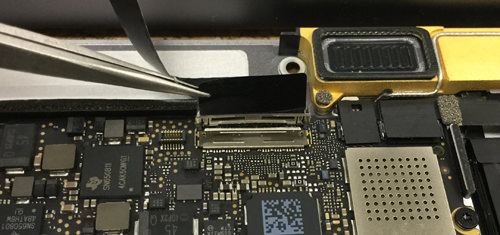
[Macbook 12 A1534 USB-C port replacement and disassembly method STEP 17]
This part becomes a cable connected to the logic board from the liquid crystal panel, but because a black seal is affixed to the connector, I peel it off first.
Since the structure of the connector has changed a little, please disassemble after understanding the structure without forcibly proceeding with the decomposition.
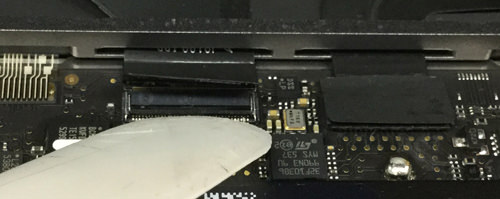
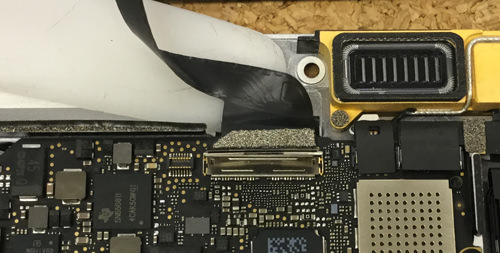
[Macbook 12 A1534 USB-C port replacement and disassembly method STEP 18]
The black cable part is attached to the main body with light double-sided tape, so it is a place where a spatula is used and peeled off.
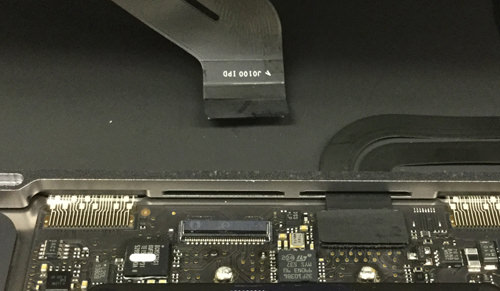
[Macbook 12 A1534 USB-C port replacement and disassembly method STEP 19]
It is possible to remove it by lifting the pin of the connector and sliding the cable.
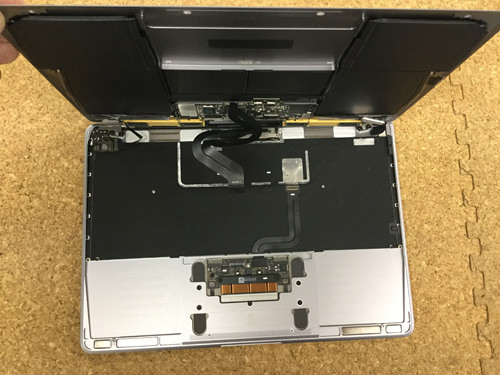
[Macbook 12 A1534 USB-C port replacement and disassembly method STEP 20]
I was able to halve the lower half of my lower body.
If you can disassemble it so far, the rest is easy.
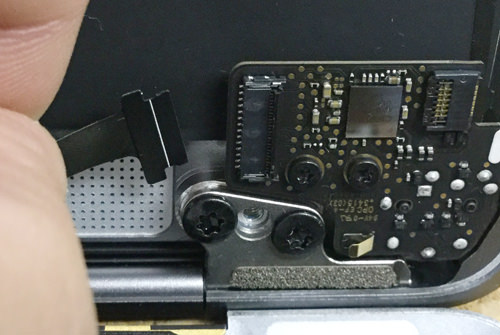
[Macbook 12 A1534 USB-C port replacement and disassembly method STEP 21]
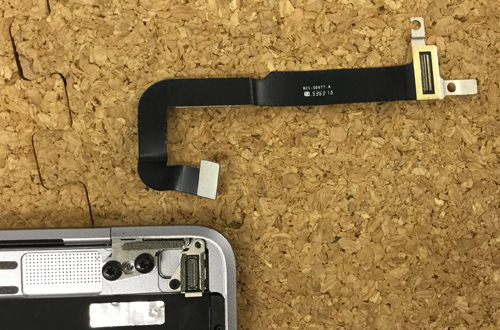
There is a USB-C port right next to the right hinge, but the screw enclosed in a red circle is removed.
Then, keep the iron plate to come off immediately.
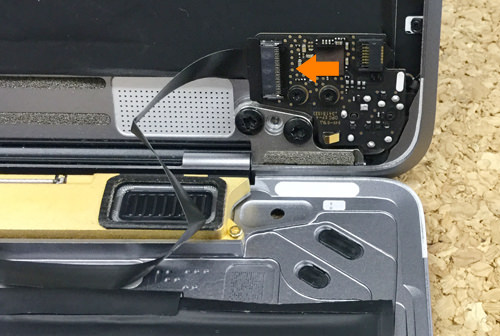
[Macbook 12 A1534 USB-C port replacement and disassembly method STEP 22]
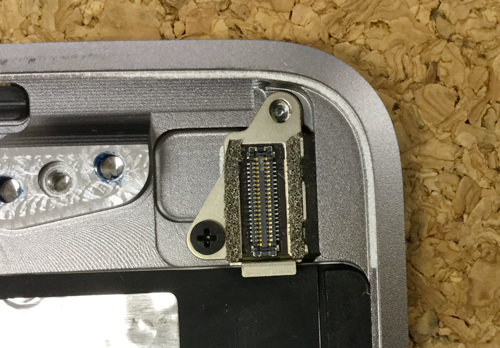
It is easy to understand when i rotate the wiring as shown in the image.
I think that it is understood that there is a connector in the red arrow part, but you can remove the connector if you try to lift from the bottom to the top.
[Macbook 12 A1534 USB-C port replacement and disassembly method STEP 23]
I was able to remove the cable.
[Macbook 12 A1534 USB-C port replacement and disassembly method STEP 24]
The image part connected to the previous wiring becomes a USB-C port.
Because only one screw is attached, it will be removed.
You can remove it by sliding the USB-C port.
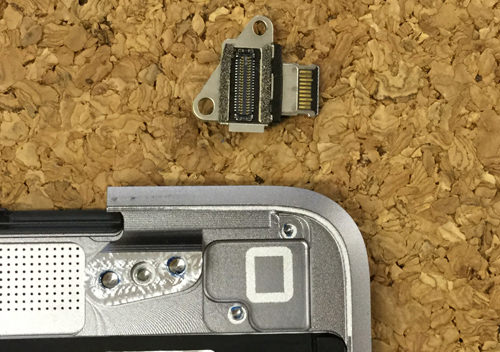
[Macbook 12 A1534 USB-C port replacement and disassembly method STEP 25]
Only USB-C port was removed from the Macbook12 body.


コメントを残す