MacbookPro Retina A1398 does not turn on, does not start, how to repair submerged, disassemble
If your Mac is submerged or powered on, there is a possibility of logic board failure.
[Macbook Pro Retina A1398 Logic Board Replacement STEP 1]
The logic board on the main computer board is located under the keyboard.
It becomes one of the important parts of the Mac which becomes the base that a very fine chip etc. are dense.
Depending on the specs, the parts are very expensive.
There are various causes such as cases where it breaks down due to liquid contamination or spillwater (submerged), and cases where dust and dirt cause heat and break down, but there is no doubt that if the logic board fails, it will become expensive repairs at the manufacturer.
Such an important part MacBook Pro Retina Model No.A1398 Please refer to the method of disassembling when removing and replacing the logic board in 2013.
[Macbook Pro Retina A1398 Logic Board Replacement STEP 2]
Since the process so far has been omitted, please confirm the details by SSD replacement. Since the liquid crystal cable and logic board are connected near the main plug of the power adapter (MagSafe), pull out by raising the pin of the shape of the connector co.
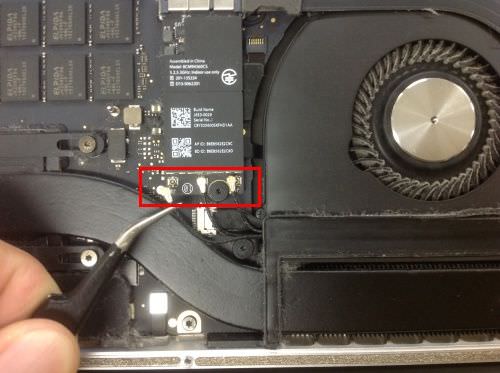
[Macbook Pro Retina A1398 Logic Board Replacement STEP 3]
Next, three WiFi antenna cables from the upper body of the LCD are connected to the WiFi card next to the right FAN by looking the battery up.
Remove all three places so that you can gently lift them up using tweezers.
This small pin connector has a very delicate structure, so be careful.
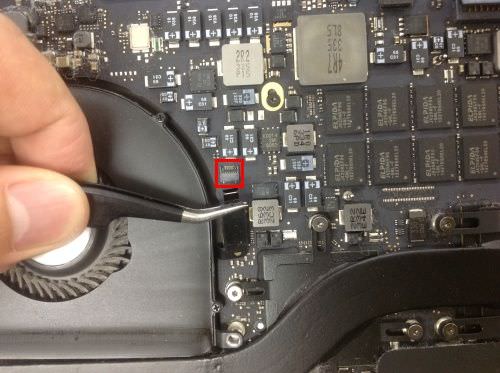
[Macbook Pro Retina A1398 Logic Board Replacement STEP 4]
The cable of the webcam is attached from the upper body of the liquid crystal, and it pulls it carefully because it is connected to the logic board.
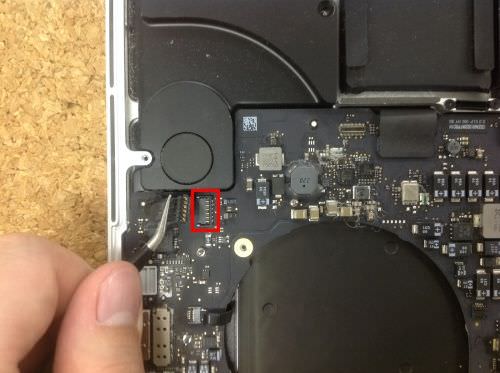
[Macbook Pro Retina A1398 Logic Board Replacement STEP 5]
The logic board and USB and HDMI units are connected by cable.
Because the place of the red mark is a connector, remove it so that it lifts it on top.
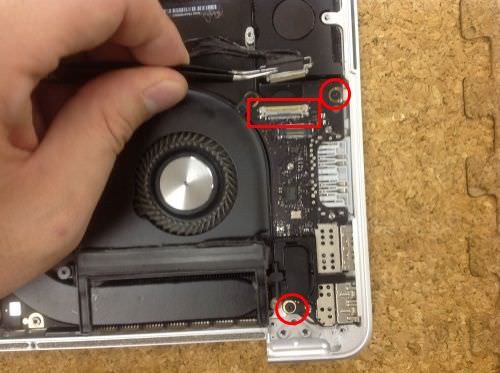
[Macbook Pro Retina A1398 Logic Board Replacement STEP 6]
The cable can be easily removed by removing the connector.
[Macbook Pro Retina A1398 Logic Board Replacement STEP 7]
Pull out the cable by raising the co-shaped pin of the connector connected to the USB or HDMI unit.
When the cable is removed, the unit is stuck with two screws, so remove the screw and remove the unit.
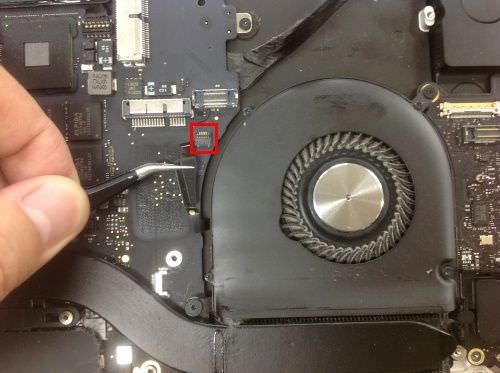
[Macbook Pro Retina A1398 Logic Board Replacement STEP 8]
Remove the WiFi card to make it easier to remove the FAN.
Remove the red torx screw and gently lift it while pulling it out.
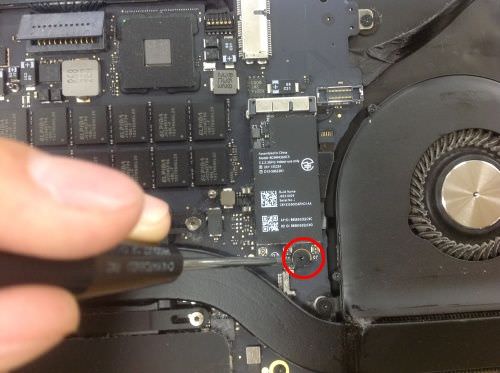
[Macbook Pro Retina A1398 Logic Board Replacement STEP 9]
Since the FAN cable is connected to the logic board with a small connector, pull the pin up so that it does not damage the cable with tweezers.
[Macbook Pro Retina A1398 Logic Board Replacement STEP 10]
Since the FAN is secured in three Torx screws, remove all red-marked screws.
[Macbook Pro Retina A1398 Logic Board Replacement STEP 11]
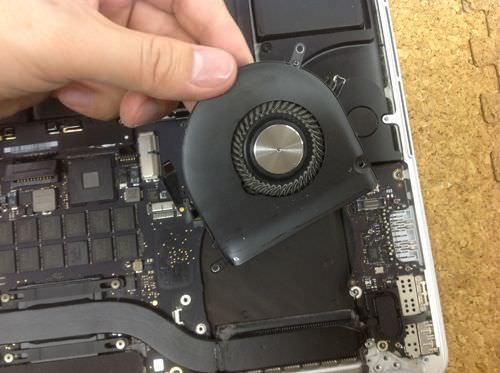
You can easily remove the FAN body by removing all cables and screws.
[Macbook Pro Retina A1398 Logic Board Replacement STEP 12]
The thin cable of the LED sheet under the keyboard is connected by a connector to the front side of the logic board, so remove it so that it goes up.
[Macbook Pro Retina A1398 Logic Board Replacement STEP 13]
Take the battery up and remove it because there is a small black rubber cap next to the FAN on the left.
The screw is hidden in the place of the red mark.
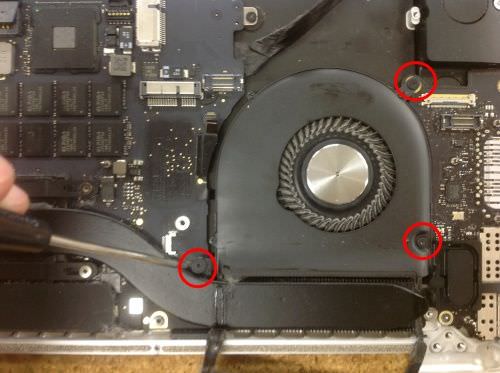
[Macbook Pro Retina A1398 Logic Board Replacement STEP 14]
Looking at the battery on top, the FAN on the left side is secured at three Torx screws.Let's take it all off.
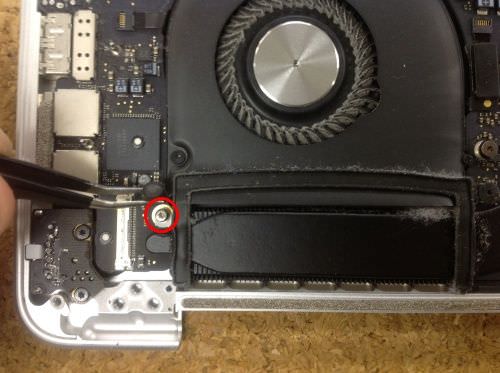
[Macbook Pro Retina A1398 Logic Board Replacement STEP 15]
The FAN cable is connected by a small connector on the logic board, so lift the connector pin and carefully pull out the cable to remove the FAN.
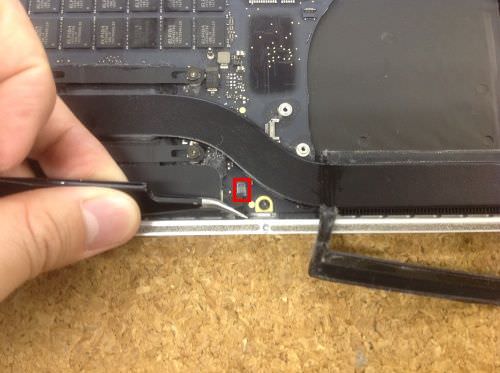
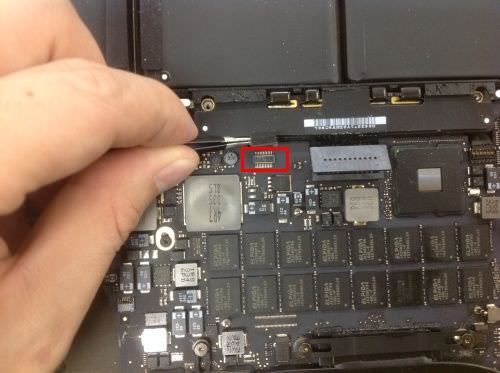
[Macbook Pro Retina A1398 Logic Board Replacement STEP 16]
Next, a thin microphone cable is connected to the logic board at the red mark of the image, but please pull out the cable by raising the pin with tweezers.
[Macbook Pro Retina A1398 Logic Board Replacement STEP 17]
Remove the cable connector on the left speaker with the battery up.
[Macbook Pro Retina A1398 Logic Board Replacement STEP 18]
Then remove the trackpad cable so that it lifts the connector as well.
[Macbook Pro Retina A1398 Logic Board Replacement STEP 19]
This time, the right speaker also removes the connector in the same way as the left side.
[Macbook Pro Retina A1398 Logic Board Replacement STEP 20]
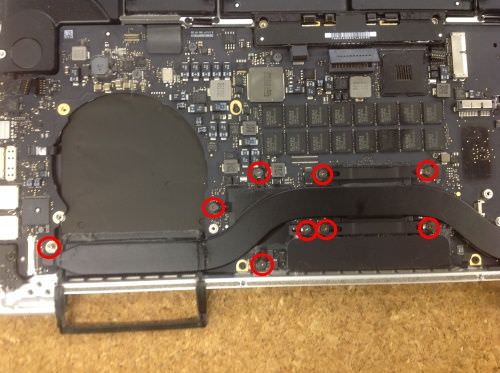
Next, it is an important part to finally lower the temperature of the CPU!
Remove the heat sink, but remove all Torx screws marked with red.
[Macbook Pro Retina A1398 Logic Board Replacement STEP 21]
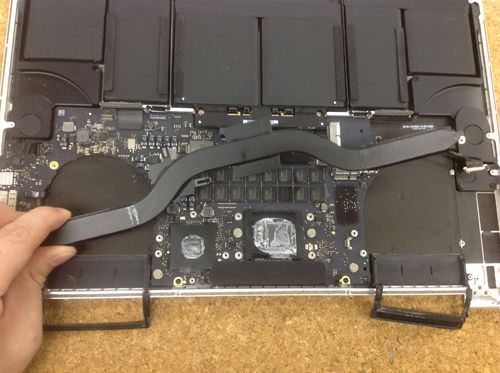
When all screws are removed, grease is painted, so there is a feeling that it is sticking a little, but you can remove the heat sink by lifting it.
[Macbook Pro Retina A1398 Logic Board Replacement STEP 22]
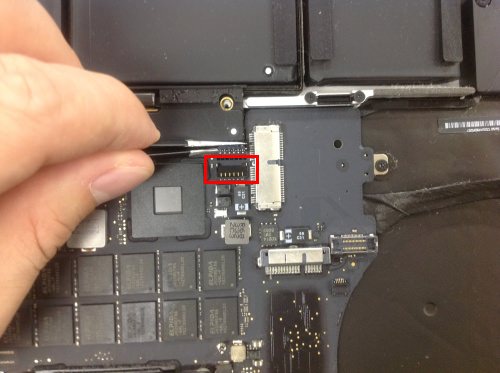
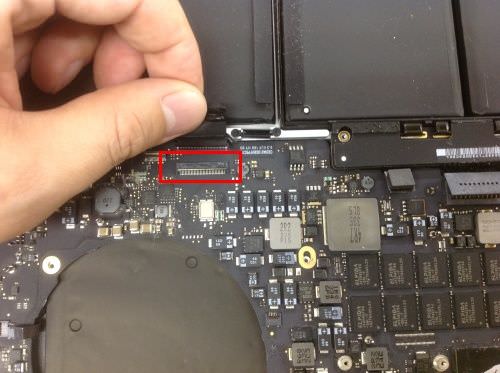
Since the keyboard cable is connected by a connector to the red mark part, raise the pin as before and pull it carefully so as not to damage the cable.
[Macbook Pro Retina A1398 Logic Board Replacement STEP 23]
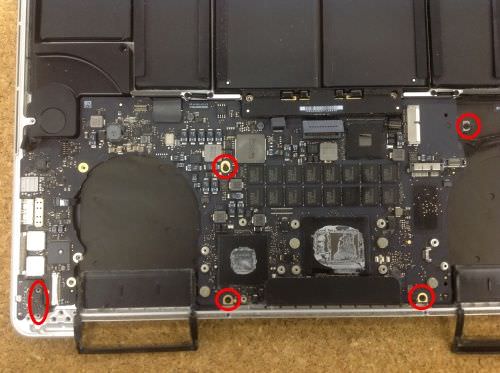
Finally, it is the final stage of the logic board disassembly and removal, but remove all the screws that secure the logic board of the red mark part of the image.
[Macbook Pro Retina A1398 Logic Board Replacement STEP 24]
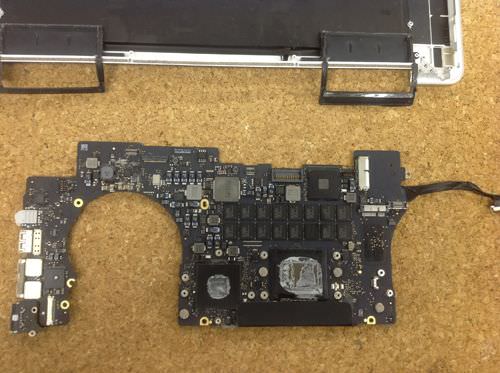
When all screws are removed, the logic board can be removed as shown in the image, but in the case of liquid contamination or submersion, special alcohol cleaning is performed in this state.
After replacement or repair, carefully restore it with the reverse procedure!

 If your Mac is submerged or powered on, there is a possibility of logic board failure.
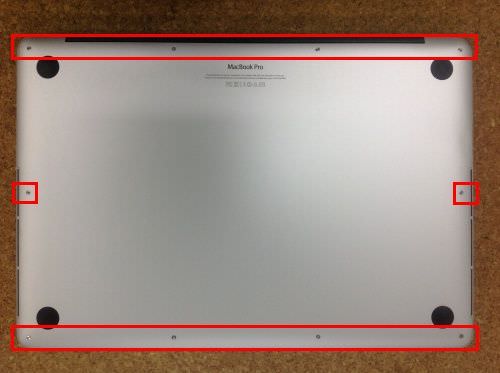
 The logic board on the main computer board is located under the keyboard.
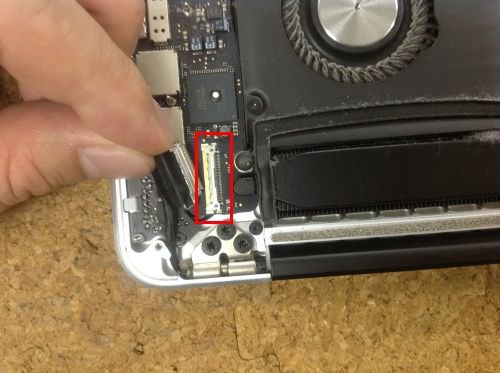
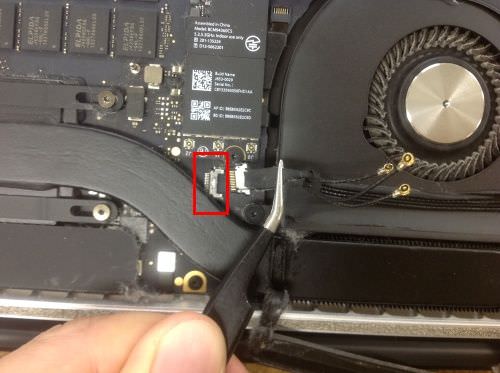
 The cable of the webcam is attached from the upper body of the liquid crystal, and it pulls it carefully because it is connected to the logic board.
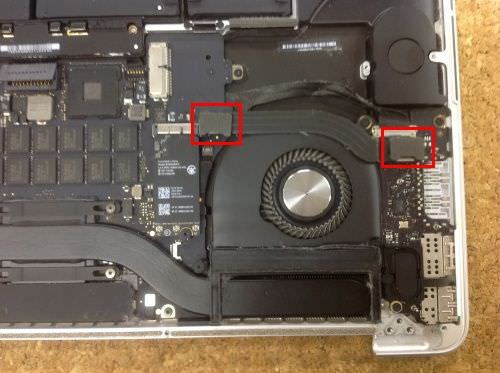


コメントを残す