Macbook Air keyboard does not work, can not hit, keyboard change is required if it is hit in a row
We can repair it at about half the estimated price of the AppleStore!
Currently, both Macbook Air 11" and 13 inches can be replaced with a keyboard for 20,000 yen.
It is a Japanese keyboard that is very difficult to obtain parts, but we have received a large quantity.
Please hurry if you are in trouble due to a breakdown because the next arrival is undecided!
With the launch of the new Macbook Air 2018, there is a great possibility that parts will no longer be distributed.


How to do a MacbookAir 11-inch keyboard replacement
- [MacbookAir A1465 Keyboard Replacement STEP 1]
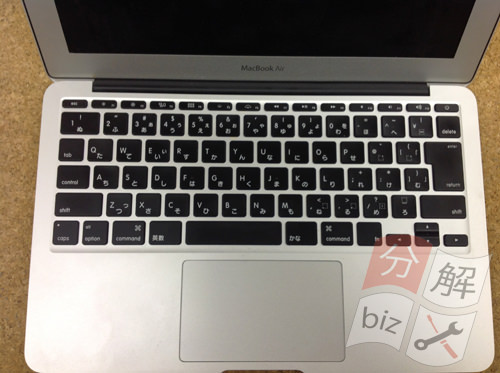
- The MacbookAir 11" (A1465) water-spilled keyboard malfunction, but i don't know if it's out of order.
Because it can be used normally by performing a keyboard exchange, I want to disassemble MacbookAir immediately.
Since the disassembly process is longer than any repair of MacbookAir, we recommend that you send it to the repair shop without hesitation if it seems difficult to check the following decomposition procedure.
Please prepare a Torx screwdriver because it is necessary to disassemble.
- [MacbookAir A1465 Keyboard Replacement STEP 2]
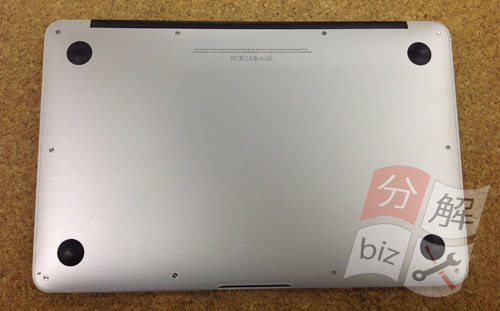
- First, remove the battery and then work.
The MacbookAir 11-inch battery has a built-in type, so you have to open the bottom case before you can remove the battery.
Because there are 10 screws in all on the back of the main body, all will be removed.
Because of the special shape called Torx screw, it is not possible to remove it with a Phillips screwdriver, but please prepare a screwdriver called a Torx screwdriver sold at the home center.
If all screws can be removed, the bottom case can be removed.
- [MacbookAir A1465 Keyboard Replacement STEP 3]
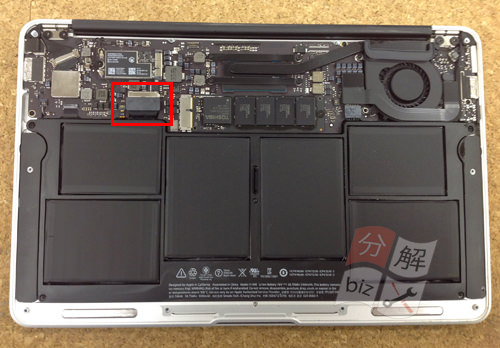
- The red frame is connected to the logic board and the battery, but it can be removed if it wakes up from the bottom.
- [MacbookAir A1465 Keyboard Replacement STEP 4]
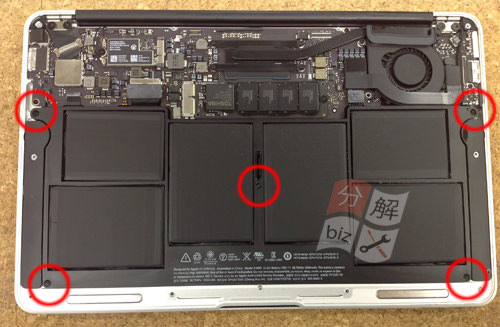
- I removed the connector part earlier, but this time I will remove the battery itself.
Because the screw is attached to the red circle part, the battery can be removed by removing five places.
- [MacbookAir A1465 Keyboard Replacement STEP 5]
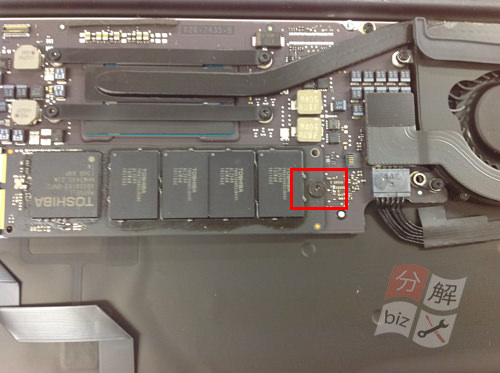
- The next step is to remove the SSD.
If you can remove one screw in the red frame, you can slide the SSD sideways to pull it out.
- [MacbookAir A1465 Keyboard Replacement STEP 6]
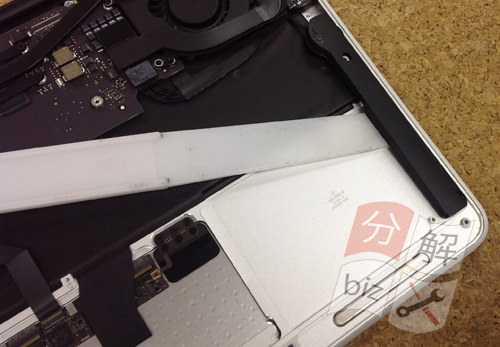
- The next thing to do is to remove the speakers.
The speaker is next to the battery, but it is fixed with double-sided tape, so it peels off from the bottom using a spatula like the image.
Since the connector of the tip part is connected to the logic board, it is removed by causing it from the bottom to the top.
The image is the right part, but let's remove the left side in the same way.
- [MacbookAir A1465 Keyboard Replacement STEP 7]
- Next is the power supply relationship.
The yellow connector is a part that supplies power to the logic board, but can be removed if it is raised from the bottom up.
The red part can be removed by sliding it.
- [MacbookAir A1465 Keyboard Replacement STEP 8]
- Next, the camera cable will be removed, but you can remove it by sliding it too.
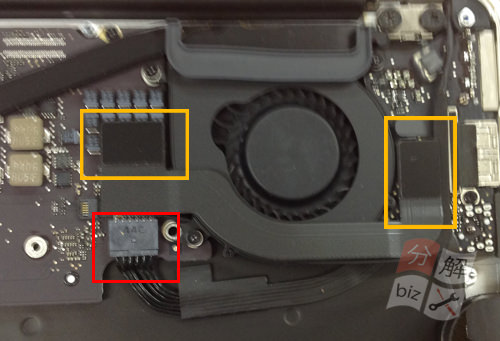
- [MacbookAir A1465 Keyboard Replacement STEP 9]
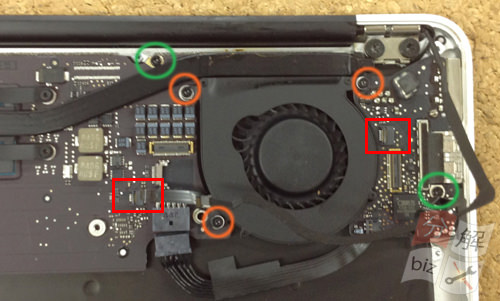
- Because the green part is a screw of the logic board, it will be removed.
The orange part will be a FAN mounting screw, so i will remove it here.
FAN has a ribbon cable in the left red frame in addition to the screw, so you can remove it by sliding it.
In addition, the red frame on the right side will be the ribbon cable of the microphone, so let's remove it.
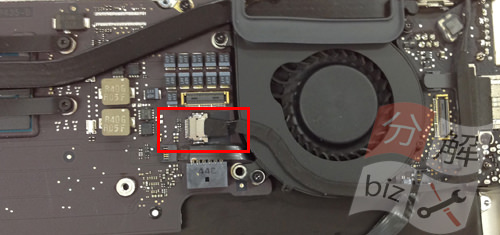
- [MacbookAir A1465 Keyboard Replacement STEP 10]
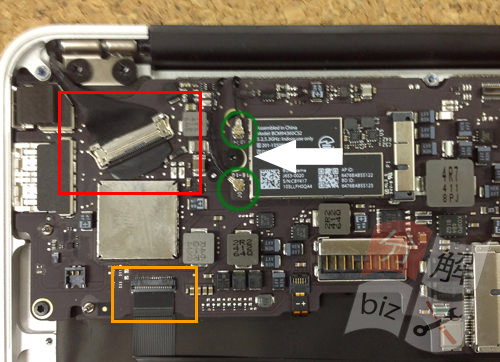
- The part surrounded by a red circle becomes a liquid crystal cable, but it can be removed by raising a "co-shaped" hook and then sliding it.
The orange part is the cable that connects the keyboard and the logic board, but it pulls out the wiring of the keyboard after raising the knob on the side of the logic board.
The green part will be a wifi cable, but remove it from the bottom to the top.
There is only one screw between the wifi cables (white arrow), but you can remove the wifi terminal when you remove it.
- [MacbookAir A1465 Keyboard Replacement STEP 11]
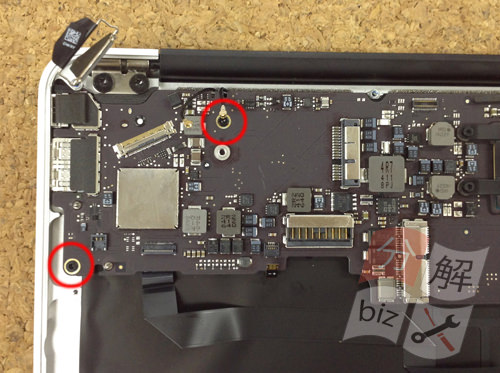
- Because there is a screw which secures the logic board to the red circle part, remove each.
Now you can remove the logic board.
Please check once that you have forgotten to remove the parts.
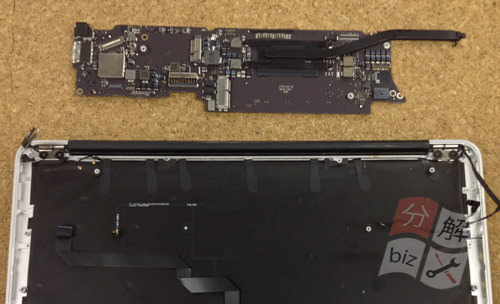
- [MacbookAir A1465 Keyboard Replacement STEP 12]
- The logic board could be removed.
Now that you can see the keyboard that is the purpose of disassembly, the black sheet becomes a backlight sheet that illuminates the keyboard from the bottom.
- [MacbookAir A1465 Keyboard Replacement STEP 13]
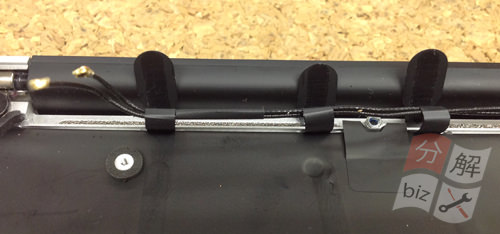
- Since the wiring of wifi is along the rail, lift the black part a little and relax the wiring.
- [MacbookAir A1465 Keyboard Replacement STEP 14]
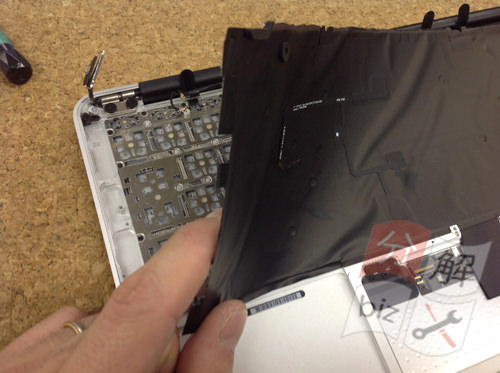
- The backlight seat is being removed.
There are no screws, but they are stopped with light double-sided tape.
Let's remove the backlight sheet slowly from the end because the backlight will not shine later if you cut it.
- [MacbookAir A1465 Keyboard Replacement STEP 15]
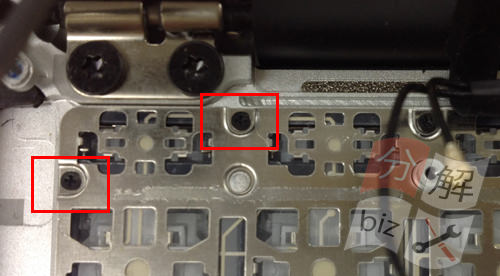
- When the backlight seat can be removed, the back side of the keyboard can be seen.
There are a number of small screws on the entire keyboard as there is in the red frame, so please remove all them so that you don't forget to remove them.
- [MacbookAir A1465 Keyboard Replacement STEP 16]
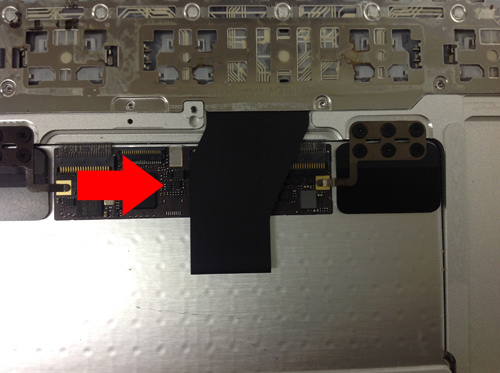
- Next, the connector of the keyboard is removed, but the keyboard is connected to the back of the trackpad and the cable is woven in and connected.
Let's remove the connector because I think that the structure can be understood when the inside of the cable is seen.
- [MacbookAir A1465 Keyboard Replacement STEP 17]
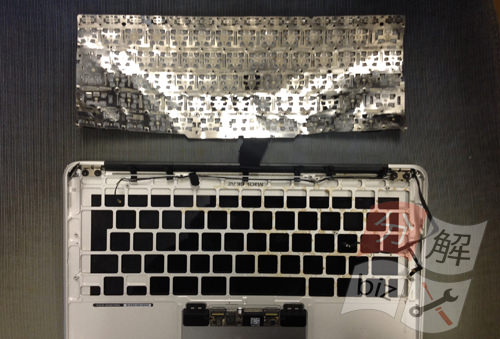
- I've removed the keyboard, but I think you can see that it's getting messy.
The MacbookAir keyboard is secured with plastic other than screws, so it needs to be removed by force from here.
If it can be peeled off from the end, it can be removed as in the image.
Please note that once you remove the keyboard, you will not be able to return it to its original state.
- [MacbookAir A1465 Keyboard Replacement STEP 18]
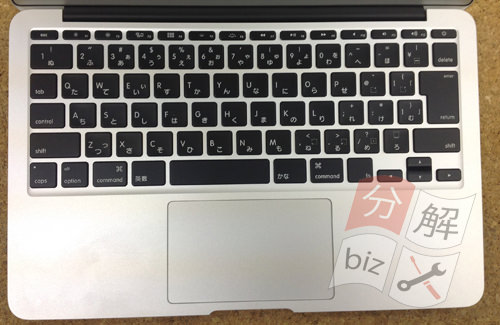
- It has been replaced with a new keyboard.
MacbookAir keyboard replacement is the longest as a disassembly procedure to do all the barracks.
As I explained at the beginning, because the repair difficulty is high, it will be a very excellent person if you can replace the keyboard of MacbookAir.
After that, it is completed to check whether the keyboard works properly.
- [Summary]
- The keyboard replacement of MacbookAir seems to be relatively high as a difficulty.
There is work to remove the logic board in the middle of disassembly, but care must be taken if the logic board needs to be removed.
It will be the most expensive of all repairs of MacbookAir, so please work carefully if you want to change the keyboard by yourself.
Currently (2018/3), Macbook Air 11-inch Japanese keyboard is becoming difficult to obtain worldwide, but I feel that it will be more difficult to obtain parts in the future because 11 inches are gone on Apple's official website.
So if your MacbookAir 11-inch keyboard breaks down, hurry up!


コメントを残す