This is an effective decomposition method when there is a liquid crystal crack, a bad display, or a line.
With regard to the tools used in disassembly, there are some things that can be substituted in the home, and some things that must be prepared.
Special screws are used for iMacs, so be prepared so that you cannot remove the LCD panel without a Torx screwdriver.
- [iMac A1224 LCD replacement, disassembly and repair method STEP 1]
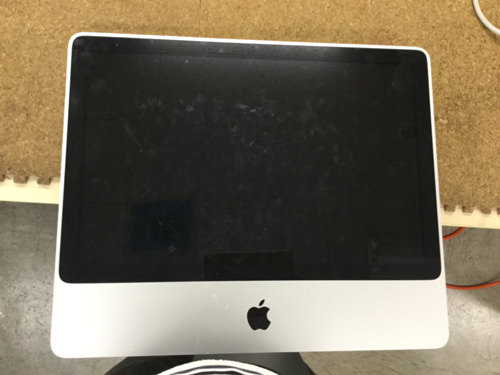
- There are many models on the iMac, but the A1224 EMC2110 will be the iMac released in 2008.
In addition, the A1224 is an iMac released in 2007, 2008 and 2009.
Recent iMacs have 5K, etc., the liquid crystal is very thin, but repair cost sbecomes expensive because it becomes a replacement for each unit if the screen fails, in the case of a model that the glass of the surface such as A1224 comes off, Because the liquid crystal glass and the monitor can be separated, the repair cost can be repaired cheaply.
If the repair difficulty is 5 in the model of the recent iMac in five-stage evaluation, this iMac A1224 seems to be about 1.5 or 2, so I think that it is relatively easy to disassemble repair, so I think that there is no problem if you work carefully, so please try!
- [iMac A1224 LCD replacement, disassembly and repair method STEP 2]
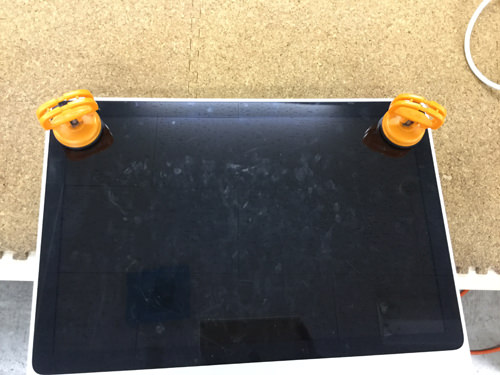
- The A1224 has a two-layer lcd structure, and it is separated from the liquid crystal panel reflected when the protective glass on the surface is turned on.
If there is a tool called suction cup, it is recommended to purchase it because it is very easy to disassemble.
There are various kinds of suction cups, and it is possible to make it to the assistance y corps like the image when there are two though it is enough with the thing which can be purchased for about 1000 yen.
So I will proceed with the story when using two suction cups, but just pull up slowly to the front side to set as in the image.
Even if you have never used a suction cup, you will know how to use it immediately, so I will not be able to use it, but if you pull it slowly, you will have a gap, so if you continue to pull it as it is, you can remove the protective glass.
This protective glass is not fixed at all with screws, etc., and is fixed to the inside of the frame by a magnet.
- [iMac A1224 LCD replacement, disassembly, repair method STEP 3]

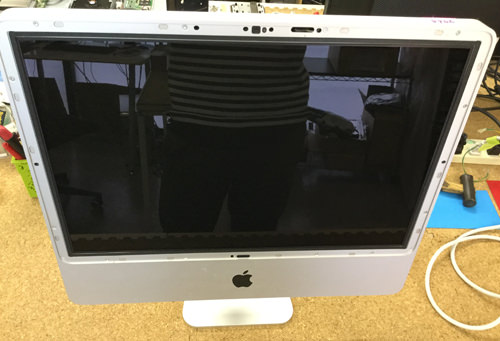
- It looks like an image if you pull it out in front, but if you can remove it to some extent, I think that you can easily remove it if you hold it with both hands instead of a suction cup.
If you remove it with both hands from the middle, it is safe to remove it as it is without removing the suction cup.
Please do not touch the inside of the protective glass as much as possible at the festival to remove.
It does not break if you touch it, but I think that the fingerprint will stand out when you incorporate it later when the fingerprint adheres.
If you knock down the iMac and only the protective glass on the surface is broken, it will be completed by disassembling up to this point.
After that, if you incorporate the panel to be newly installed as the original, it is complete.
If the internal LIQUID panel is broken, we will continue to disassemble it in the future, so please confirm it.
- [iMac A1224 LCD replacement, disassembly and repair method STEP 4]
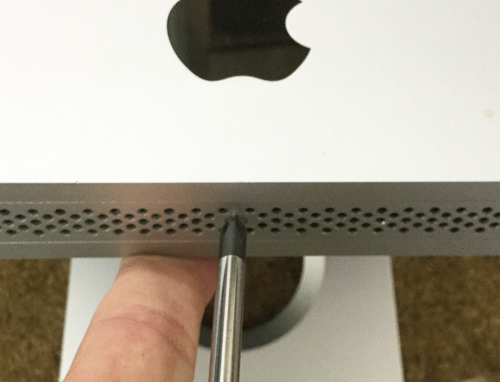
- If it is early until the previous process, it may take about 2 minutes, but the decomposition from here becomes a little complicated, and the screw is also long to short, so please keep it so that the position and length of the screw are not lost.
You will also need a special tool such as a Torx screwdriver, so please prepare your own.
- [iMac A1224 LCD replacement, disassembly and repair method STEP 5]
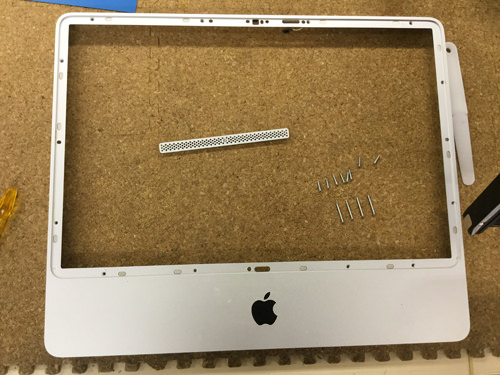
- First of all, the part (lid) just below the liquid crystal is removed, but the memory is contained in this part.
It is a place that can be removed with a Phillips screwdriver, but in order to be between the foot of the main body and the liquid crystal, it is easy to work when you put the iMac to sleep.
I think that the lid comes off when you turn the screw, but the memory inside is safe without removing this time, so please leave it as it is.
- [iMac A1224 LCD replacement, disassembly and repair method STEP 6]
- From here on, we will break down the liquid crystal side, but I think that you can confirm that there are several screws attached to the place where the protective glass was removed earlier.
This part requires a Torx screwdriver, but let's remove all the screws on the left four, the right four, and the bottom four!
- [iMac A1224 LCD replacement, disassembly and repair method STEP 7]
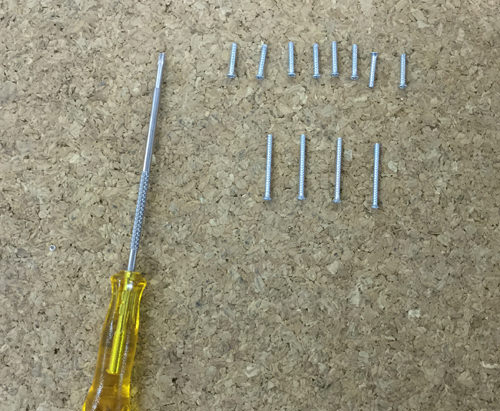
- It is a screw removed in the previous process, but please keep it so that it does not understand because the length of the screw of the side and the bottom is different.
- [iMac A1224 LCD replacement, disassembly and repair method STEP 8]
- This may be the most complex decomposition of the iMac A1224.
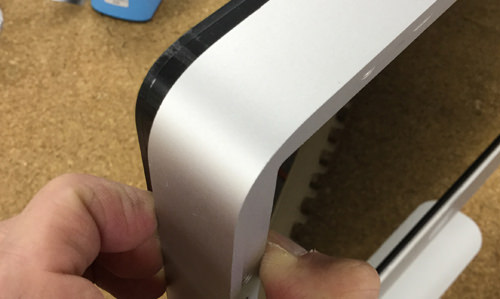
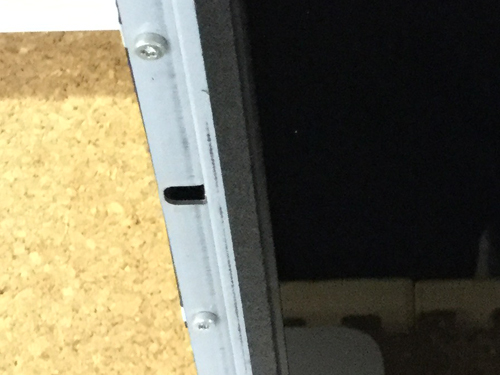
It becomes the work of removing the frame around the liquid crystal and the liquid crystal, but the liquid crystal panel is pushed into the back using the thumb as shown in the image.
Then, the back panel of the main body (black part in the image) will pop out, so I will push out around the liquid crystal little by little.
- [iMac A1224 LCD replacement, disassembly and repair method STEP 9]
- I think that it is caught in the camera part at the top when the previous pushing process is done, but please do not push it out forcibly because the cable is connected to this part.
It becomes a chemera cable, but it can be removed if you hold the knob and pull it to the left and right because it is connected by a connector.
When removing, please remove the connectors together because there is a possibility that it will break if you hold the cable part.
- [iMac A1224 LCD replacement, disassembly and repair method STEP 10]
- I was able to remove the frame of the iMac (frame of the body).
If you can do well in the process so far, I think that there is no problem after that, but please proceed carefully.
- [iMac A1224 LCD replacement, disassembly and repair method STEP 11]
- I think that the display is in a state of bare when i can remove the frame of the previous, but the liquid crystal panel itself is still connected by screws and cables.
Since the image part is a screw that secures the display, please remove all screws on both sides with a Torx screwdriver.
- [iMac A1224 LCD replacement, disassembly and repair method STEP 12]
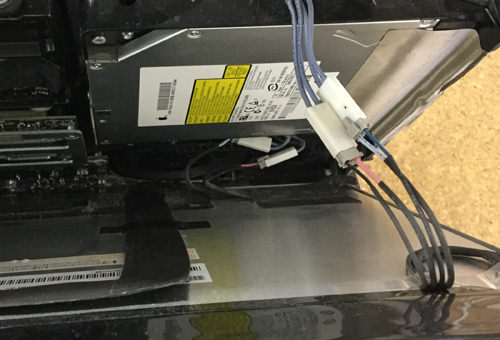
- If you can remove all the screws that were fixed to the iron frame earlier, the display can move to some extent.
However, the backlight and monitor cables are still connected to the back of the display, so do not pull or move them.
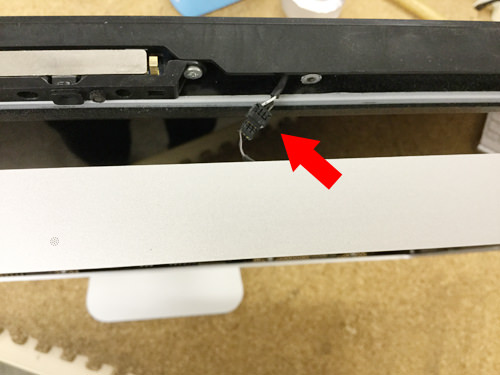
The image was made to knock down the display a little on the front side, but the pink and blue cable of the image is a backlight cable.
I'd like to remove this part.
- [iMac A1224 LCD replacement, disassembly and repair method STEP 13]
- Most of the time when knocking down the display, both hands are used, but both hands are full, making it difficult to remove the backlight cable.
So, if you support the display with your stomach, i think both hands will open, so if you do that method, the work will be much easier to do.
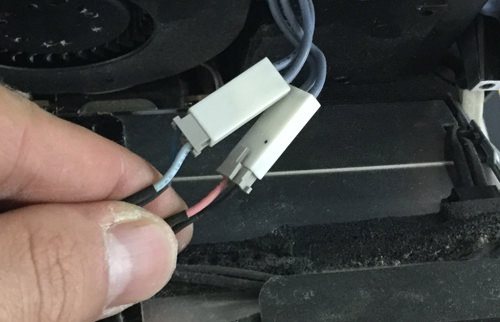
It is how to remove the backlight cable, but it will be removed in exactly the same way as when the camera cable was removed earlier.
In the image, you can easily separate the connector by grasping the gray part and the white part, and pulling it to the left and right respectively.
- [iMac A1224 LCD replacement, disassembly and repair method STEP 14]
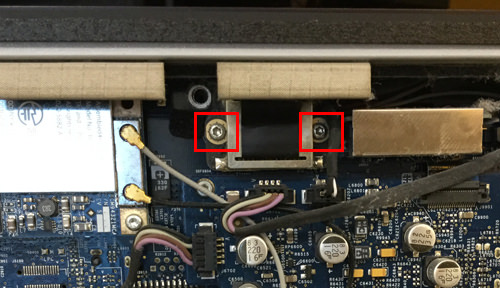
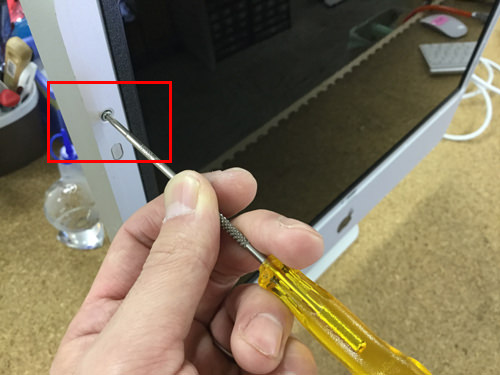
- This part is on the underside of the liquid crystal, but it was a backlight cable earlier, but this is the LCD cable.
The backlight becomes like a fluorescent lamp that produces brightness as the name suggests, but the LCD cable is a part that represents the color, so if you fail, the screen will become blank, Because a line enters the screen, please be careful when handling it.
It is how to remove it, but because two screws are attached to the part which is enclosed by red waku, I use a screwdriver to remove the screw.
Because it becomes a feeling that the cable is fixed to the logic board with a screw, it is possible to remove it easily if the connector is caused in front if it is possible to remove the screw.
This completes the decomposition method of the LCD panel of the iMac A1224.


コメントを残す