Lcd cracking on the screen of DELL inspiron1525, if there is a display failure in the liquid crystal, LCD panel replacement (LCD replacement) is required!
[DELL inspiron1525 LCD repair and disassembly method STEP 1]
The LCD screen is no longer visible at all, but in the case of such symptoms, there are various areas where failure is expected.
There is a failure of the liquid crystal itself, a failure on the motherboard side, etc., but the power supply was displayed normally when connected with an external display with the turn, so it seems that it is probably a liquid crystal failure.
I want to disassemble the personal computer immediately because I can judge what kind of failure if I change the liquid crystal panel.
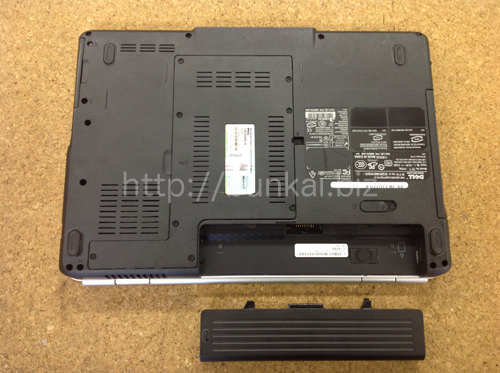
[DELL inspiron1525 LCD repair and disassembly method STEP 2]
Be sure to remove the battery when disassembling your laptop.
Be careful because there is a possibility of shorting if you disassemble with the battery attached.
[DELL inspiron1525 LCD repair and disassembly method STEP 3]
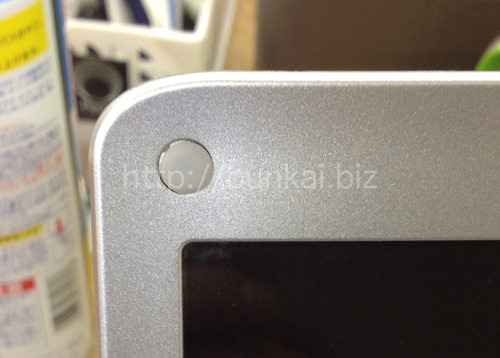
From here on, we will break down the liquid crystal, but the first step is to decompose the liquid crystal frame.The liquid crystal frame is secured with screws and is hidden by a seal called screw concealation.
[DELL inspiron1525 LCD repair and disassembly method STEP 4]
If you use tweezers and peel off the screw strips, the screws will come into view, so all screws attached to the LCD frame will be removed from the Phillips screwdriver.
[DELL inspiron1525 LCD repair and disassembly method STEP 5]
When the screw is removed, the liquid crystal frame is rose.
Since the liquid crystal frame is fixed with plastic claws in addition to screws, it decomposes using spatula as shown in the image.
You can remove the LIQUID frame by putting a spatula in all around the liquid crystal.
[DELL inspiron1525 LCD repair and disassembly method STEP 6]
The next thing to do is to remove the LCD panel.
The LCD panel is screwed to an iron frame called a hinge, so all screws are removed.(Left and right)
If all screws can be removed, the LCD panel can be knocked forward, so slowly turn it down.
[DELL inspiron1525 LCD repair and disassembly method STEP 7]
There is an LCD cable on the back of the LCD panel and is connected.
You can remove it by peeling off the transparent seal and sliding the LCD cable.
[DELL inspiron1525 LCD repair and disassembly method STEP 8]
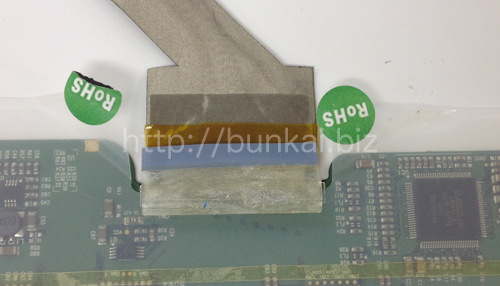
The LCD panel of the DELL inspiron1525 has a backlight connector because it is a CCFL type backlight.
In terms of the image, there is an inverter in the middle, the left side is a liquid crystal cable, and the backlight connector is connected on the right side.
Both are removed from the inverter, but the LCD cable side can be removed with the feeling of lifting up, and the backlight side can be removed by sliding sideways.
Please do not throw away the inverter that you removed because you will use it later.
If it was possible to disassemble up to this point, it was possible to make it to the state of only the liquid crystal panel, but the liquid crystal panel change is completed if it reassembles according to the original procedure.
[DELL inspiron1525 LCD repair and disassembly method STEP 9]
It is hard to understand, but there is no motherboard failure because the liquid crystal is now displayed!

 Lcd cracking on the screen of DELL inspiron1525, if there is a display failure in the liquid crystal, LCD panel replacement (LCD replacement) is required!
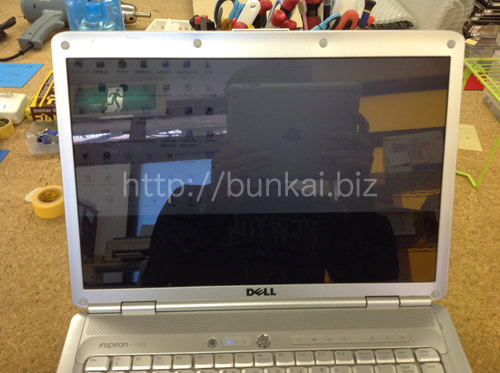

 From here on, we will break down the liquid crystal, but the first step is to decompose the liquid crystal frame.The liquid crystal frame is secured with screws and is hidden by a seal called screw concealation.
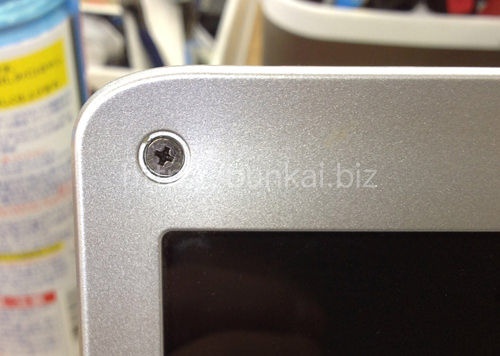
 If you use tweezers and peel off the screw strips, the screws will come into view, so all screws attached to the LCD frame will be removed from the Phillips screwdriver.
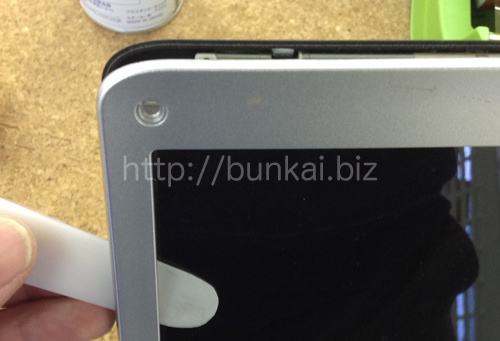
 When the screw is removed, the liquid crystal frame is rose.
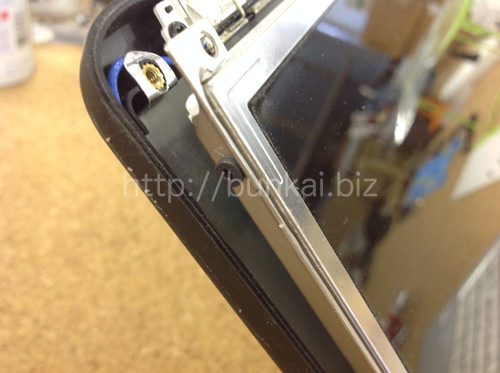
 There is an LCD cable on the back of the LCD panel and is connected.
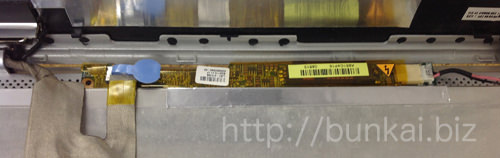
 The LCD panel of the DELL inspiron1525 has a backlight connector because it is a CCFL type backlight.
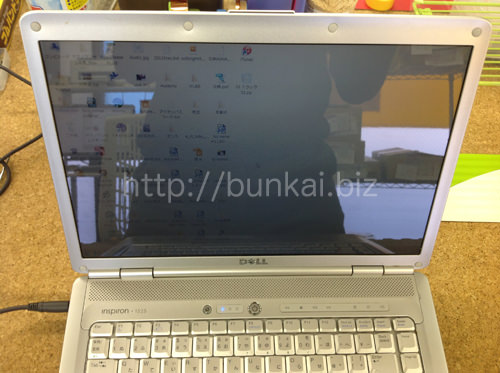


コメントを残す