SCREEN Replacement of LCD Cracking on ASUS K53T Repair Method, Decomposition Procedure
If the screen of the ASUS K53T has a crackin LCD and there is a bad display on the LCD, a liquid crystal panel replacement (LCD replacement) is required!
[ASUS K53T LCD repair and disassembly method STEP 1]
The crack display is defective in the display by dropping the laptop.
Since Windows is started normally in the visible part, you can use it as before if you replace only the LCD panel in this case.
[ASUS K53T LCD repair and disassembly method STEP 2]
Be sure to remove the battery before disassembling your computer.
In the case of the K53T, there is a battery when you turn the main unit over, but you can easily remove it by sliding the knob on the side.
[ASUS K53T LCD repair and disassembly method STEP 3]
When replacing the panel, it is necessary to remove the frame, but there are screws in the two red frame parts, so remove it.
Because the screw is hidden by a black blindfold rubber, I remove it with tweezers etc.
[ASUS K53T LCD repair and disassembly method STEP 4]
Black rubber is only fixed with light double-sided tape, so it can be easily removed.
[ASUS K53T Decomposition STEP 5]
You can remove the left and right rubber, so you can remove the Phillips screwdriver!
[ASUS K53T LCD repair and disassembly method STEP 6]
Once the screw is removed, the frame itself is disassembled this time.
There is a plastic claw on the inside of the frame, and the rear panel and frame are fixed.
When the spatula like the image is inserted into the gap and disassembled, it comes off, so we will do the same work on everything around the liquid crystal.
[ASUS K53T LCD repair and disassembly method STEP 7]
I was able to remove the frame.
When the frame can be removed, the panel becomes bare, but it is still fixed to the rear panel side, so it cannot be moved freely.
Because the screw is attached to the red frame part, let's remove it!
[ASUS K53T LCD repair and disassembly method STEP 8]
If you can remove the screws on the top two of the previous, you can knock the panel forward a little bit.
The LCD panel itself is also fixed to an iron frame called a hinge, and is fixed with screws to the left and right.
There are four screws on one side, so let's remove them all!
When the screw can be removed, only the panel is knocked down to the keyboard side, but the LCD cable is still connected to the back of the panel, so be careful not to break it.
[ASUS K53T LCD repair and disassembly method STEP 9]
The LCD cable on the back is disconnected, but you can easily remove it by sliding it.
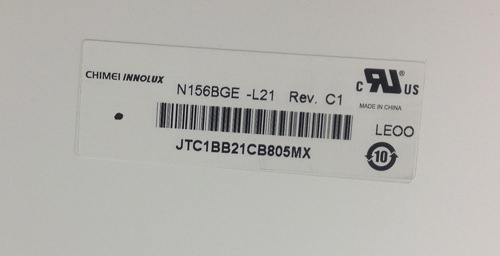
[ASUS K53T LCD repair and disassembly method STEP 10]
It is a genuine liquid crystal panel that was used in ASUS K53T.
The model number is N156BGE-L21 Rev.C1.
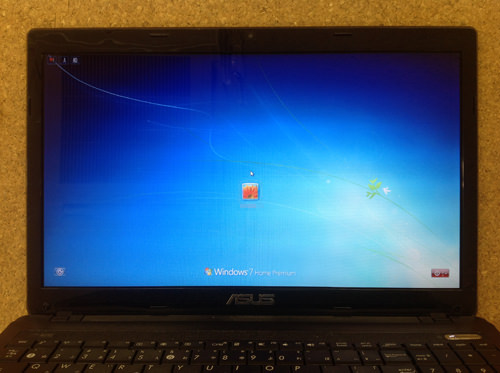
[ASUS K53T LCD repair and disassembly method STEP 11]
It is a state in which the new LCD panel is replaced and the power is turned on.
You can see the difference immediately compared to before the repair!

 If the screen of the ASUS K53T has a crackin LCD and there is a bad display on the LCD, a liquid crystal panel replacement (LCD replacement) is required!
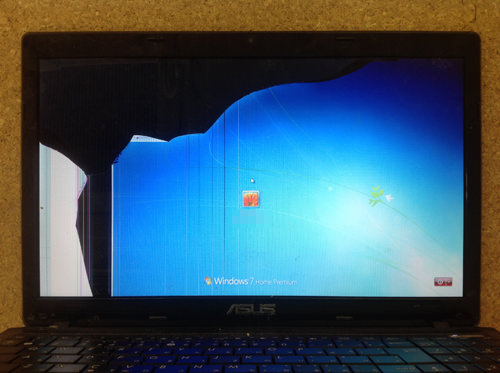
 The crack display is defective in the display by dropping the laptop.
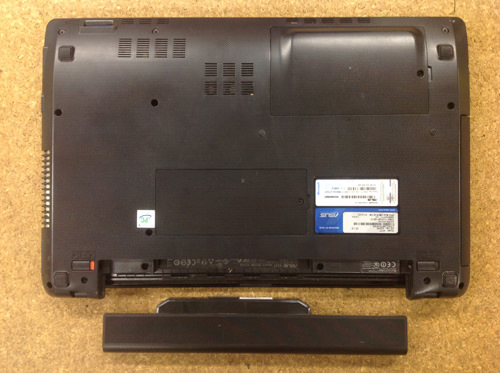
 Be sure to remove the battery before disassembling your computer.
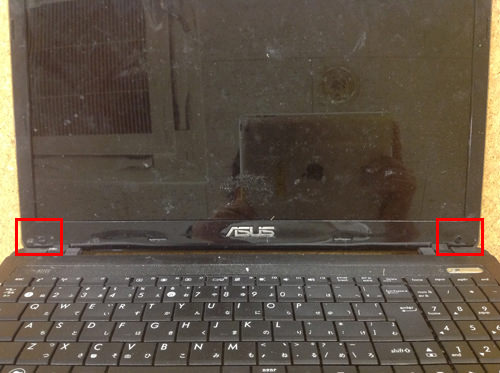
 When replacing the panel, it is necessary to remove the frame, but there are screws in the two red frame parts, so remove it.
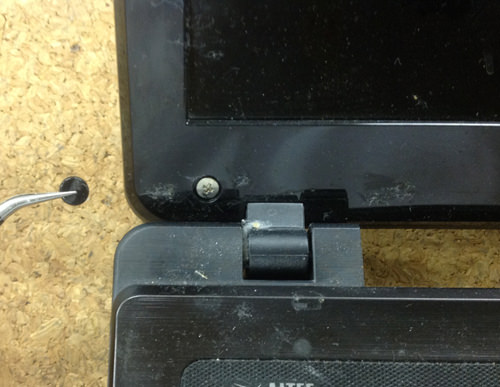
 Black rubber is only fixed with light double-sided tape, so it can be easily removed.
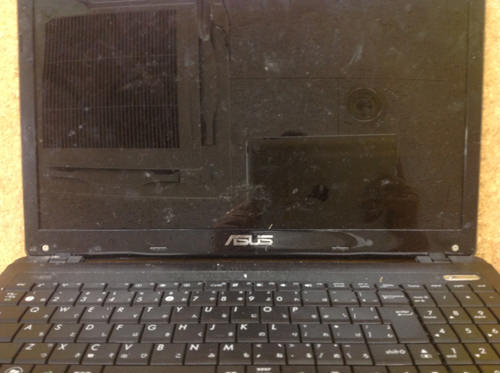
 You can remove the left and right rubber, so you can remove the Phillips screwdriver!
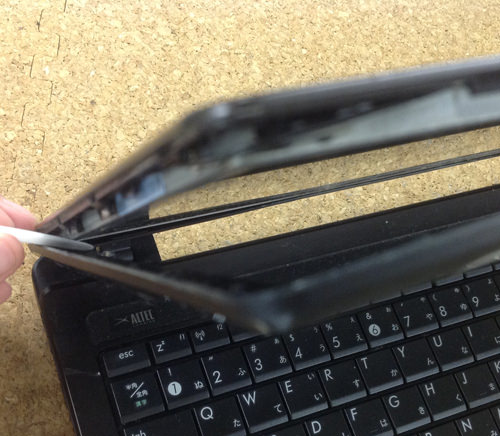
 Once the screw is removed, the frame itself is disassembled this time.
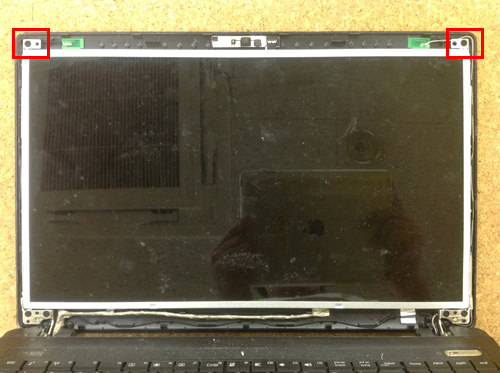
 I was able to remove the frame.
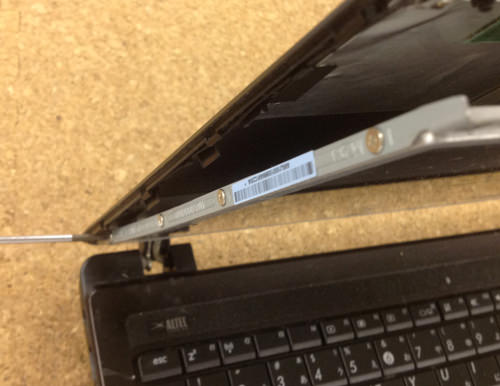


コメントを残す