If the LENOVO G550 screen has a crackin LCD and there is a bad display on the LCD, a liquid crystal panel replacement (LCD replacement) is required!
[LENOVO G550 LIQUID Crystal Repair and Decomposition Method STEP 1]
There is a crack in the display, a display failure, but if it becomes this state, it is necessary to change the LCD panel.
If you are worried about whether the data is left, you can check whether it remains at the present time by using an external monitor.
In this case, i was able to confirm that the data is alive by using an external monitor, so if you replace only the panel, you can use the laptop without changing the environment up to now.
I want to enter the decomposition immediately.
[LENOVO G550 LIQUID Crystal Repair and Decomposition Method STEP 2]
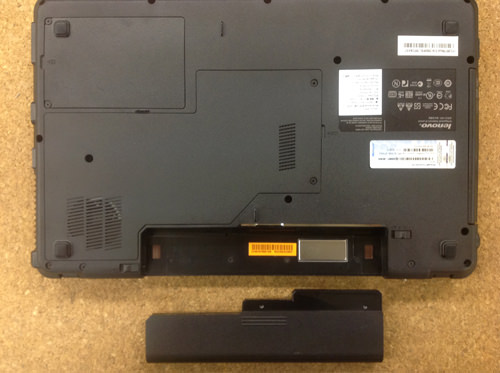
Be sure to remove the battery first when disassembling.
In the case of G550, you can easily find the battery if you turn the main unit inside out, but you can remove it by sliding the knob next to the battery.
[LENOVO G550 LIQUID Crystal Repair and Decomposition Method STEP 3]
From here, we will decompose the liquid crystal side of the G550.
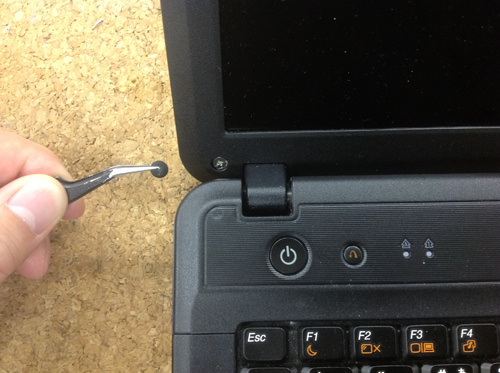
As in the image part, several screws and rubber stop in the liquid crystal frame.
First of all, the rubber is peeled off with a pointed thing such as tweezers.
Then, it will be removed from the Phillips screwdriver because it can be confirmed that there is a screw in the inside.
[LENOVO G550 LIQUID Crystal Repair and Decomposition Method STEP 4]
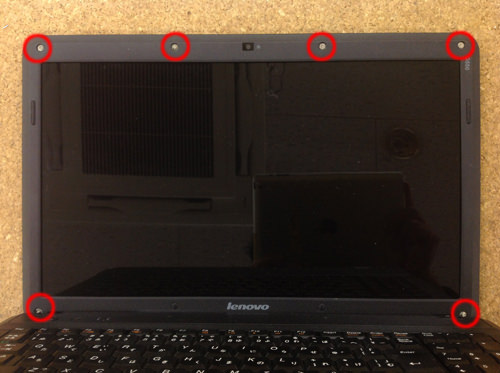
There are six parts of the screw that I removed earlier, so please remove all the screws and rubber of the red circle part.
Fine parts such as screws and rubber will be reused later, so please keep them so as not to lose them!
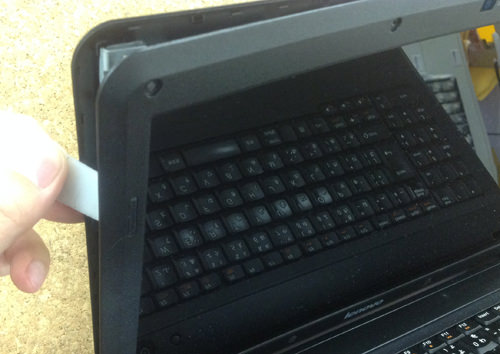
[LENOVO G550 LIQUID Crystal Repair and Decomposition Method STEP 5]
After removing all screws, remove the frame.
You can remove the frame if you insert a spatula into the gap between the rear panel and the frame as shown in the image and make it become light.
This work should be done one lap around the liquid crystal.
I think that the lower side is a little hard, but please note that there is a possibility that it will crack if you try to disassemble forcibly.
Because it is easy structurally, I think that it is easy to understand if I check it while seeing what it is making before disassembling.
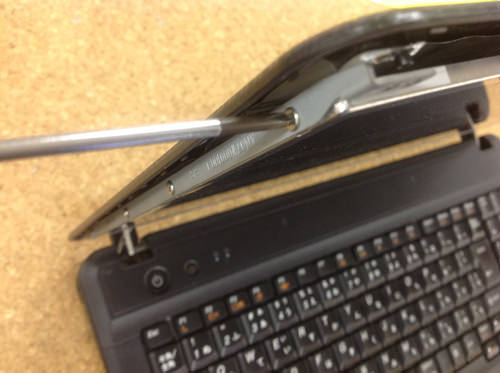
[LENOVO G550 LIQUID Crystal Repair and Decomposition Method STEP 6]
The panel itself is fixed to a metal fitting called a hinge, but because four screws on one side are stopped, all are removed.
In the image, it will be on the left side, but there are screws on the right side as well, so please remove all with a Phillips screwdriver.
After removing all the screws, it is possible to move the liquid crystal itself, so slowly let it lie to the front direction (keyboard side).
At this time, the cable is connected to one place on the back of the panel, so let's knock it down while carefulnot to damage it!
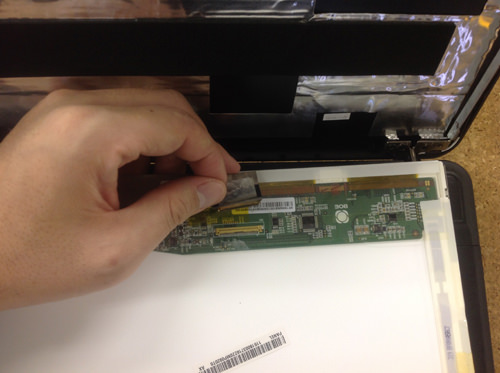
[LENOVO G550 LIQUID Crystal Repair and Decomposition Method STEP 7]
The cable on the back of the panel can be removed from the panel by sliding it parallel while peeling off the transparent tape.
I think that only the liquid crystal panel was able to be removed from the laptop body if the decomposition method up to this point was able to be done accurately.
If you replace the newly prepared parts and incorporate them in the original procedure, the liquid crystal replacement will be completed.
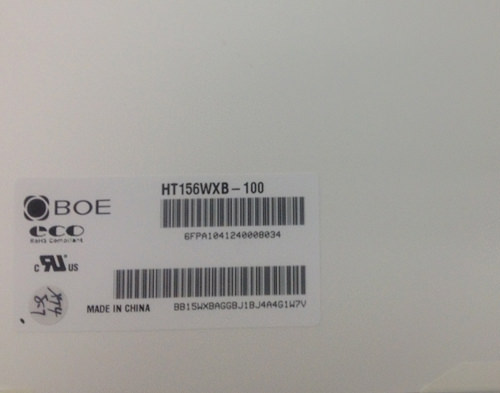
[LENOVO G550 LIQUID Crystal Repair and Decomposition Method STEP 8]
The image is the LCD panel part used for the Lenovo G550.
In this case, the HT156WXB-100 is the model number of the part.
[LENOVO G550 LIQUID Crystal Repair and Decomposition Method STEP 9]
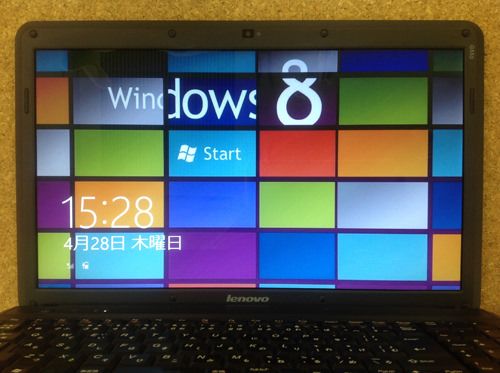
It is a state in which the assembly is made and the power is turned on.
I think that I was able to confirm that it is displayed normally.

 If the LENOVO G550 screen has a crackin LCD and there is a bad display on the LCD, a liquid crystal panel replacement (LCD replacement) is required!
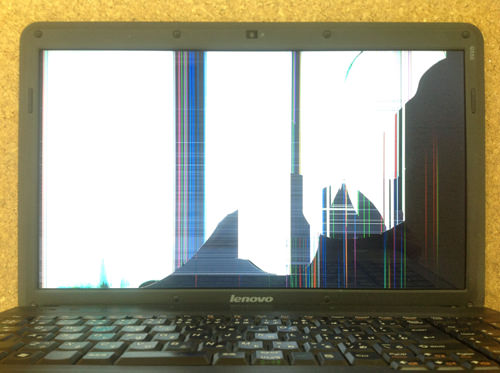


コメントを残す