Screen replacement of LIQUID crystal cracking of LENOVO G50 Repair method, disassembly procedure
If there is a liquid crystal crack or display failure on the screen of the LENOVO G50, a liquid crystal panel replacement (LCD replacement) is required!
[LENOVO G50 LIQUID Crystal Repair and Decomposition Method STEP 1]
You can confirm that there is a bad display in the left half of the screen by cracking the LCD.
Since the start-up screen of Windows 10 can be confirmed successfully in the visible part on the right, in this case I want to enter the disassembly immediately because I can use the laptop without changing the environment until now just replace the panel in this case.
[LENOVO G50 LIQUID Crystal Repair and Decomposition Method STEP 2]
It's basic, but be sure to remove the battery first when you disassemble your computer.
Because there is a battery when you turn the PC inside out, you can easily remove it if you pull it out while sliding the knob.
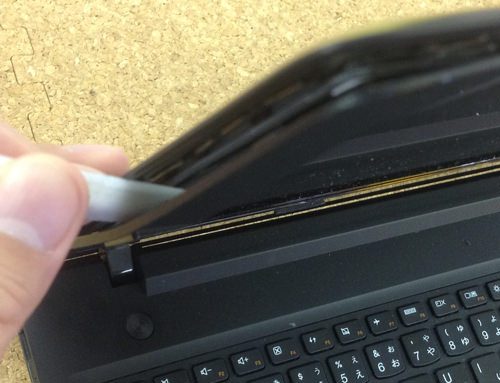
[LENOVO G50 LIQUID Crystal Repair and Decomposition Method STEP 3]
From here on, we will decompose the liquid crystal side.
First, insert a tool (plastic spatula) that looks like you are using in the image into the gap between the rear panel and the frame.
The position to insert the spatula is good from anywhere, but I think that it is easy to disassemble around the upper left or the upper right.
Since the liquid crystal frame is only fixed with plastic claws, I think that you can see that it will come off if you insert the spatula and then try to break it lightly.
You can remove the frame itself by doing one lap of this work.
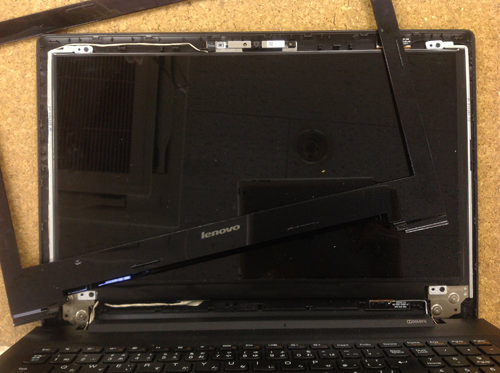
[LENOVO G50 LIQUID Crystal Repair and Decomposition Method STEP 4]
Only the frame could be removed from the laptop.
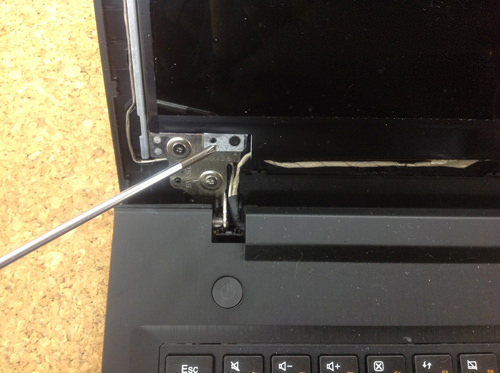
[LENOVO G50 LIQUID Crystal Repair and Decomposition Method STEP 5]
Next, remove the screw that secures the LCD panel.
There are four screws in total, but the image is in the lower left.
I think that the screw can be confirmed in the same position of four corners, so please remove all.
If you can remove the screw, you will be able to move the panel itself, so let's slowly knock it down to the keyboard side!
At that time, the LCD cable is still connected to the back of the panel, so be careful not to break or scratch it.
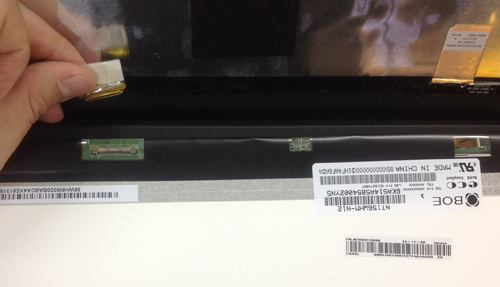
[LENOVO G50 LIQUID Crystal Repair and Decomposition Method STEP 6]
It becomes the cable connection part of the back of the panel, but it can be easily removed by sliding it parallel.
In addition, I think that i was able to remove only the panel from the laptop body if the process up to this point was able to be done accurately.
After that, if you replace it with a newly prepared part, the liquid crystal replacement will be completed.
[LENOVO G50 LIQUID Crystal Repair and Decomposition Method STEP 7]
All of them were reassembled in the original procedure and turned on.
You can see that it is displayed normally.

 If there is a liquid crystal crack or display failure on the screen of the LENOVO G50, a liquid crystal panel replacement (LCD replacement) is required!
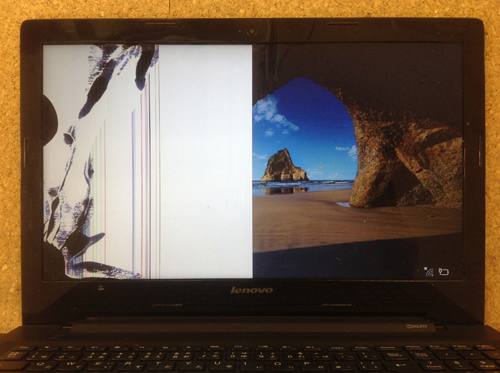


コメントを残す