If the LENOVO ThinkPad E450 screen is cracked and there is a bad display, a liquid crystal panel replacement (LCD replacement) is required!
[LENOVO ThinkPad E450 LCD repair and disassembly method STEP 1]
The display failure has come out because the liquid crystal has broken.
If you replace the LCD panel, you can use your laptop as before, so I would like to start repairing it immediately.
Although the display is bad, I was able to confirm that the data is alive because it is possible to check the start screen of Windows 8 on the right side.
[LENOVO ThinkPad E450 LCD repair and disassembly method STEP 2]
First of all, it enters the removal of the battery, but thinkPad E450 becomes a built-in type, so it is not possible to remove the battery until it disassembles.
Because there is a connector of the battery in the image part, it is a start from the place where the back cover is removed.
First of all, let's remove the screw attached to the back cover with the Phillips screwdriver!
[LENOVO ThinkPad E450 LCD repair and disassembly method STEP 3]
The image part is where the connector of the battery is stuck, but it is possible to remove the connector if you slide it sideways.
Even if you do not remove the battery itself, just do this work and the electricity will not flow to the PC side.
I think that it is easier to work if you return the back cover once while removing the connector.
[LENOVO ThinkPad E450 LCD repair and disassembly method STEP 4]
From here on, we will decompose the liquid crystal side.
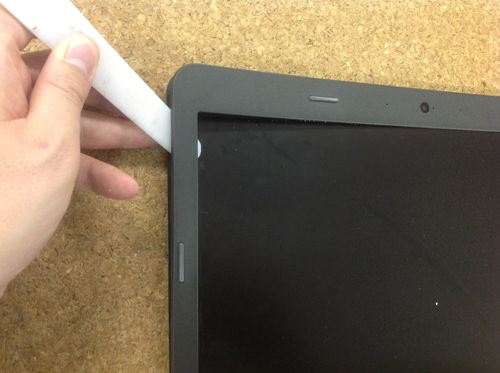
Prepare a tool (spatula) like the image, so that the spatula is placed in the gap between the LCD frame and the rear panel.
The frame itself is only fixed with plastic claws, so if you use a spatula and make it work, it will come off.
You can remove the frame by performing this work one lap of the liquid crystal frame.
[LENOVO ThinkPad E450 LCD repair and disassembly method STEP 5]
When the frame can be removed, the LCD panel appears, but the panel itself is fixed to the rear panel with several screws.
Let's remove all screws that secure the panel with a Phillips screwdriver!
[LENOVO ThinkPad E450 LCD repair and disassembly method STEP 6]
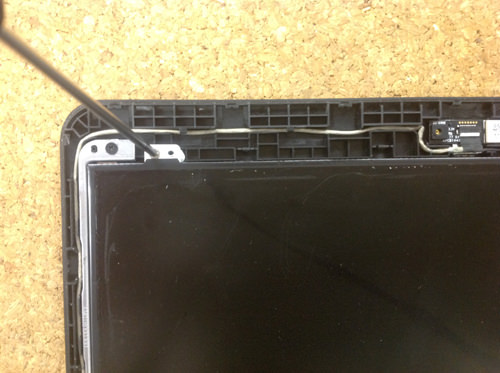
If you can remove all the screws in the previous process, you will be able to move only the panel, so slowly knock it down to the keyboard side.
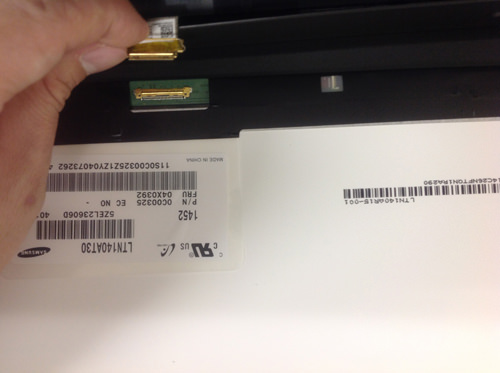
At that time, the LCD cable is connected to the back of the panel, so please be careful not to break it.
The image is in which the panel is knocked down, but the LCD cable can be easily pulled out by raising the pin and then sliding.
I think that only the panel was able to be removed from The ThinkPad E450 by this, so if you replace it with a new part, the LIQUID crystal panel replacement will be completed.
[LENOVO ThinkPad E450 LCD repair and disassembly method STEP 7]
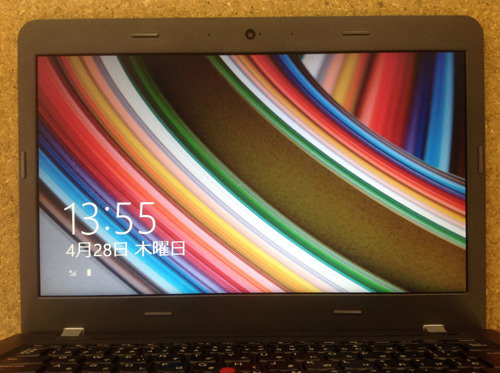
It is a state in which the newly prepared panel is replaced, assembled, and then turned on.
I was able to confirm that it is displayed normally.

 If the LENOVO ThinkPad E450 screen is cracked and there is a bad display, a liquid crystal panel replacement (LCD replacement) is required!
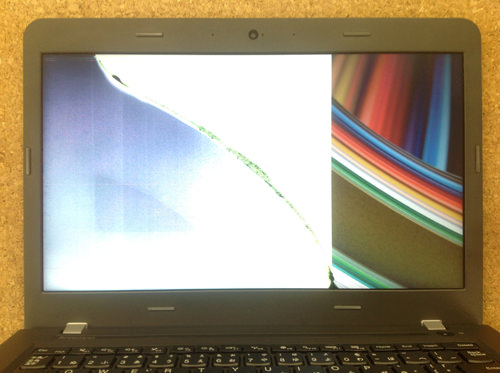
 The display failure has come out because the liquid crystal has broken.
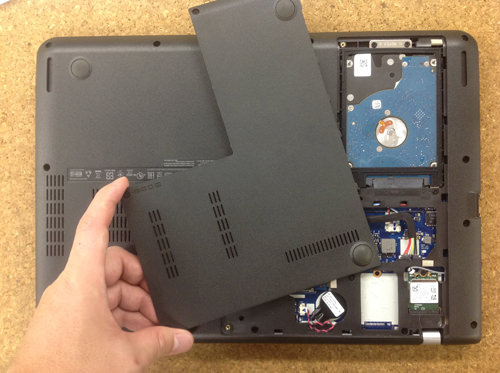


コメントを残す