We will publish the decomposition method of Lenovo TAB3 8, so If you are going to disassemble from now on, I hope you will refer to it.
There are few special tools to disassemble, and even if there is no tool, I think that it can be aligned at several hundred yen, so please prepare it if there is no tool.
If you have a screen crack, you will need to repair it, but if you can repair it yourself, there is no doubt that you can fix it at the lowest price, so if you are confident in your arm, please try to challenge it.
[Lenovo TAB3 8 Repair Method 1]
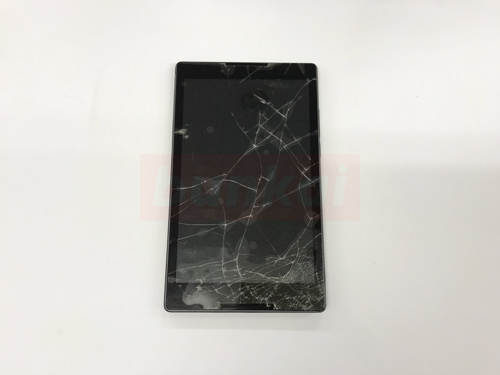
If the screen is cracked or cracked in this way, it is necessary to change the screen, but since it will be a repair that is not related to the data, it is possible to use the tablet with the data as before if it is possible to perform the liquid crystal exchange safely.
[Lenovo TAB3 8 Repair Method 2]
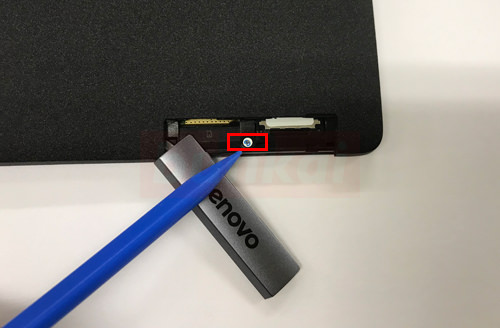
First of all, let's turn the inside out of the main unit and pull out the SD card, SIM card, etc.
In addition, please do not forget to remove it because there is one screw in the red frame part.
[Lenovo TAB3 8 Repair Method 3]
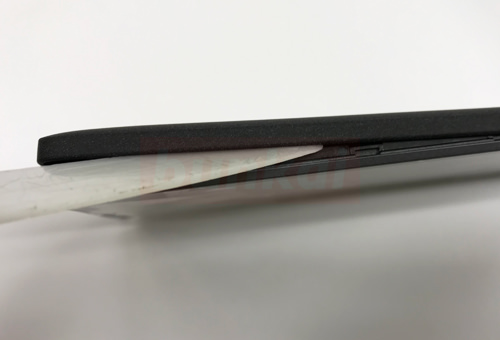
TAB3 8 inches will be in the form of decomposing as it is because there is no screw on the back.
If you insert a tool into the gap between the liquid crystal and the main body side and slide it lightly, you will see the feeling that it is coming off.
This work should be done on one lap of the screen.
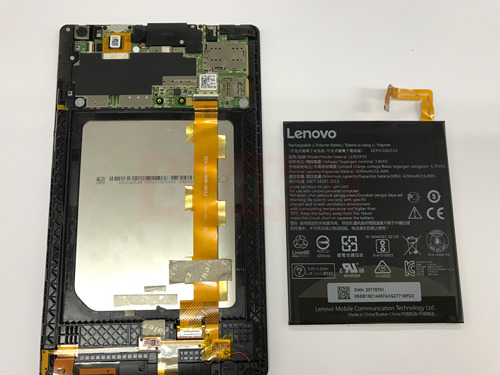
[Lenovo TAB3 8 Repair Method 4]
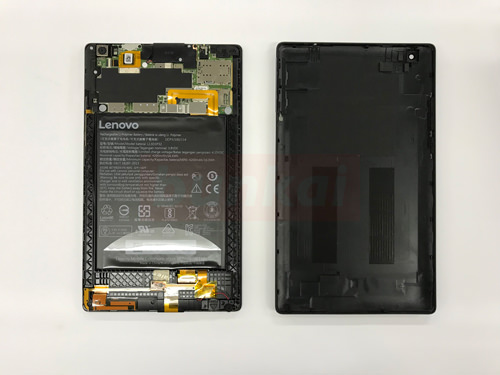
I was able to remove the back cover.
It is good to check to some extent at this point what kind of structure it is.
[Lenovo TAB3 8 Repair Method 5]
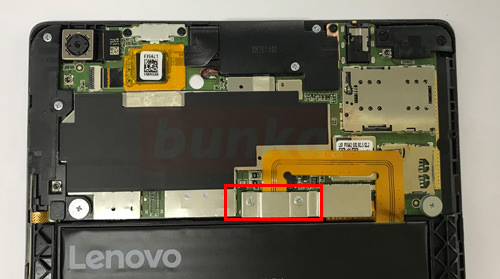
First of all, it becomes the work to be done at the beginning of the first step in proceeding with the disassembly, but the battery is removed.
If you proceed with the decomposition while energizing, there is a possibility that it will be shorted somewhere, so be sure to give priority to this work.
There is a plate in the red frame part, and the plate is fixed with two screws, but let's remove the screw using a thin Phillips screwdriver at the tip.
[Lenovo TAB3 8 Repair Method 6]
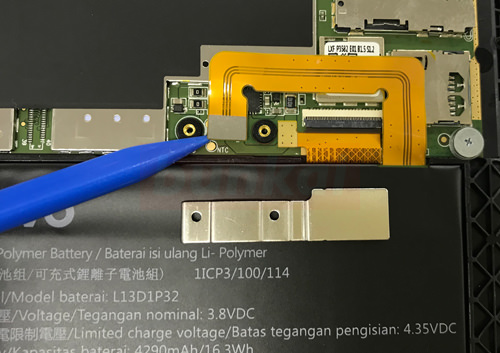
If you can remove the previous plate, there is a place where the battery connector is connected to the motherboard inside, but you can remove the battery connector if you place the tool down as shown in the image and lift it upward.
[Lenovo TAB3 8 Repair Method 7]
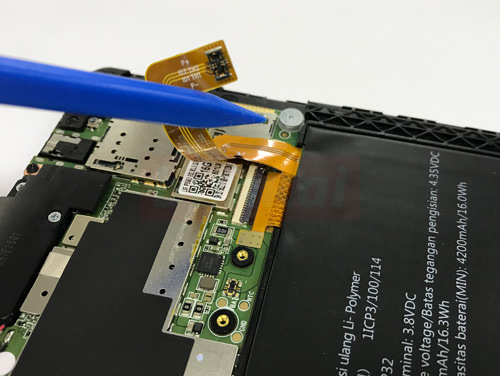
The connector is removed in this way.
[Lenovo TAB3 8 Repair Method 8]
When the previous connector comes off, the electricity is not flowing to the tablet body.
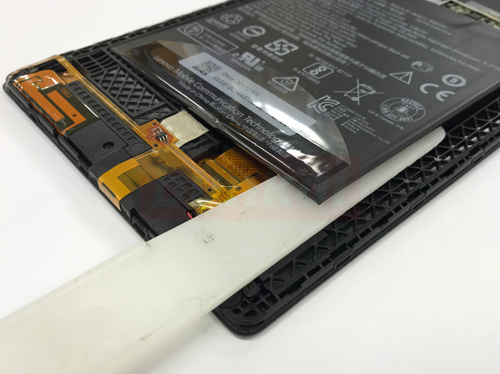
The battery itself will be removed, but the battery is attached to the main body with double-sided tape, so the tool is slipped down and peeled off as shown in the image.
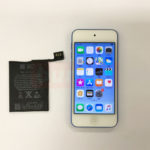
[Lenovo TAB3 8 Repair Method 9]
The battery could be removed from the main unit.
If you want to change the battery, it is OK only by the procedure so far.
[Lenovo TAB3 8 Repair Method 10]
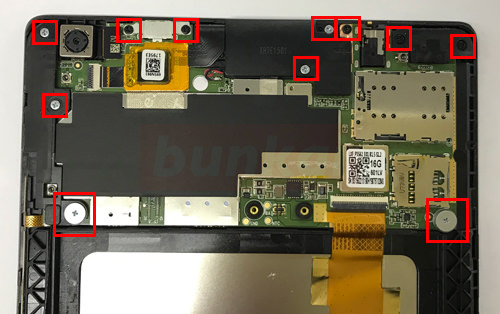
It will be the work to remove each part on the motherboard, but first let's remove all the screws of the red frame part.
Because the shape etc. are different, please keep the screw so that the place is not understood.
[Lenovo TAB3 8 Repair Method 11]
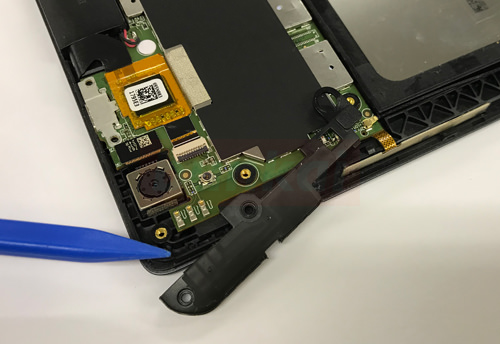
When the screw is removed, the black part of the plastic is easily removed.
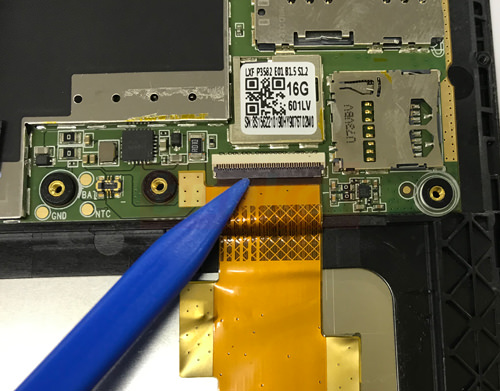
[Lenovo TAB3 8 Repair Method 12]
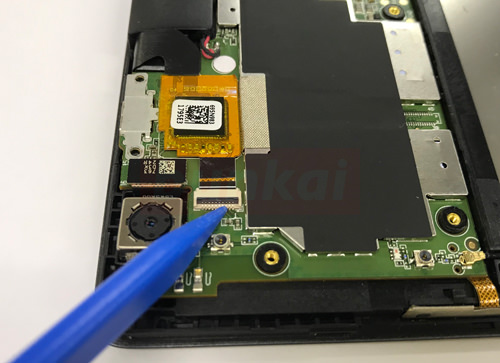
This part is connected to the connector on the motherboard side, but instead of pulling it out as it is, let's first raise the claws of the connector up to 90 degrees.
[Lenovo TAB3 8 Repair Method 13]
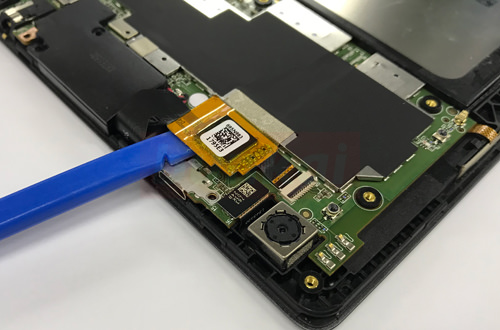
The tool is inserted under the cable, but the cable is attached to light double-sided tape, so if you lift it from the bottom to the top, the tape will be easily peeled off.
Then you can pull out the cable.
[Lenovo TAB3 8 Repair Method 14]
It is possible to remove the cable in such a feeling.
[Lenovo TAB3 8 Repair Method 15]
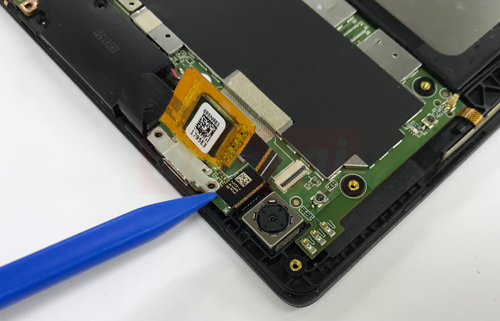
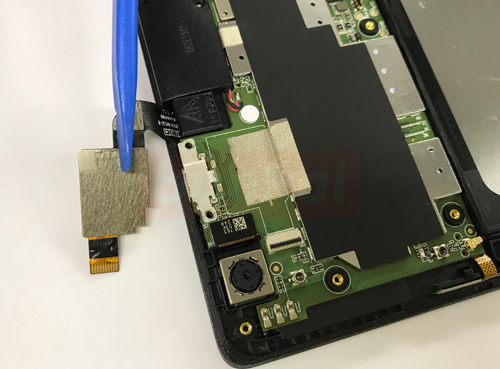
The connector of the camera part can be removed by placing the tool down and lifting it up.
[Lenovo TAB3 8 Repair Method 16]
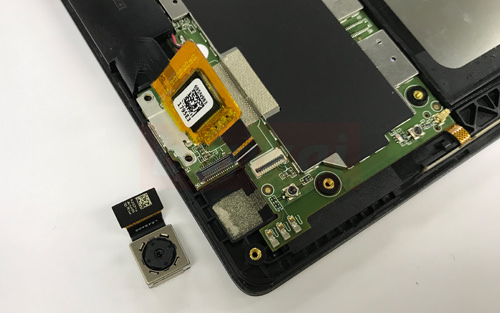
After that, you can remove the camera just by putting the tool in the gap of the camera and breaking it lightly.
[Lenovo TAB3 8 Repair Method 17]
This black plastic can also be easily removed if the screw is off.
[Lenovo TAB3 8 Repair Method 18]
The plastic on the top right also easily removes.
The part where the tool is placed is the same as step 12 and the previous method, and the nail is raised to 90 degrees, and the cable is pulled out.
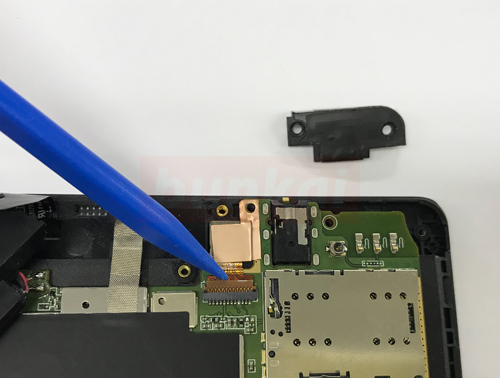
[Lenovo TAB3 8 Repair Method 19]
This connector also pulls out the cable after raising the nail.
[Lenovo TAB3 8 Repair Method 20]
You can remove it like this.
[Lenovo TAB3 8 Repair Method 21]
Remove the Wifi cable by lifting it from the bottom to the top.
I think that the motherboard is in a state where it can be moved to some extent if it is possible to disassemble without problems so far.
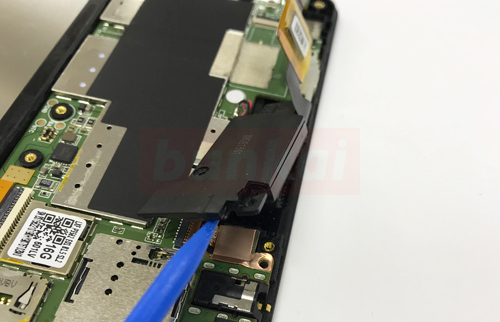
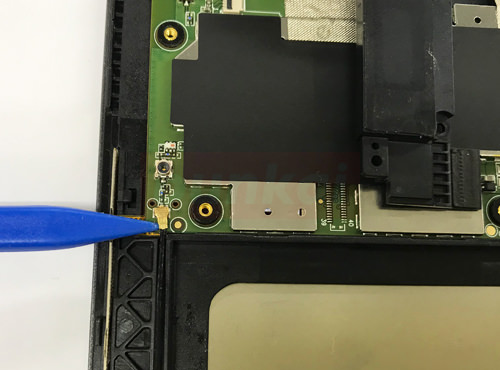
[Lenovo TAB3 8 Repair Method 22]
The place of the volume button is soldered to the motherboard like the image, so remove it from the main body side.
The main unit side is only fixed with double-sided tape, so be careful not to break the cable.
[Lenovo TAB3 8 Repair Method 23]
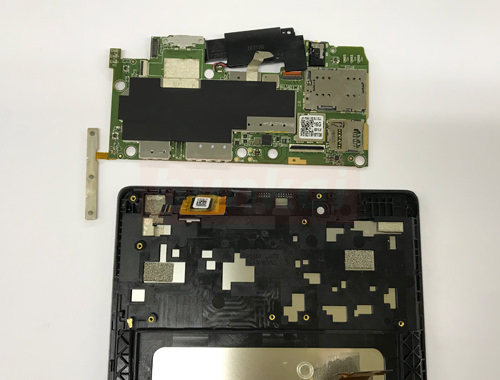
The motherboard could be removed from the main unit.
[Lenovo TAB3 8 Repair Method 24]
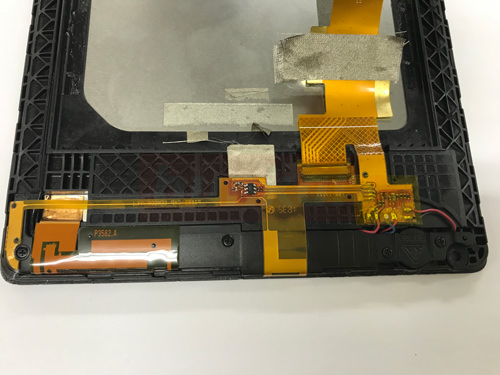
This Wifi will be a speaker.
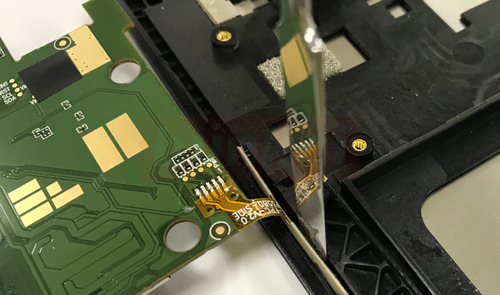
[Lenovo TAB3 8 Repair Method 25]
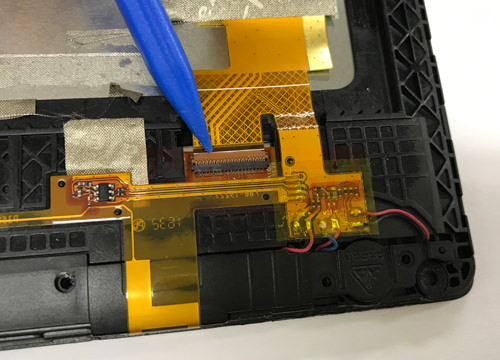
The cable extends from the motherboard, but remove the connector in the same way as before.
[Lenovo TAB3 8 Repair Method 26]
The cable was able to be removed from the connector.
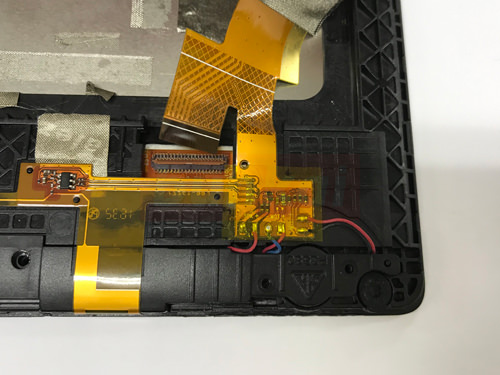
[Lenovo TAB3 8 Repair Method 27]
Because it sticks to the main body side with a light double-sided tape, let's peel off little by little.
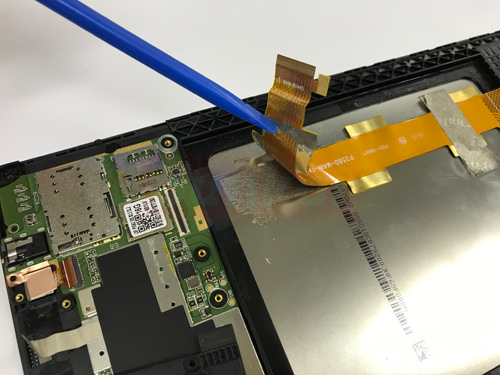
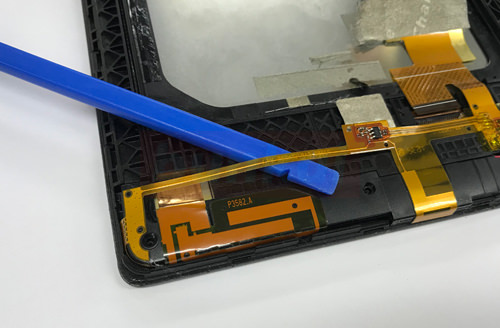
[Lenovo TAB3 8 Repair Method 28]
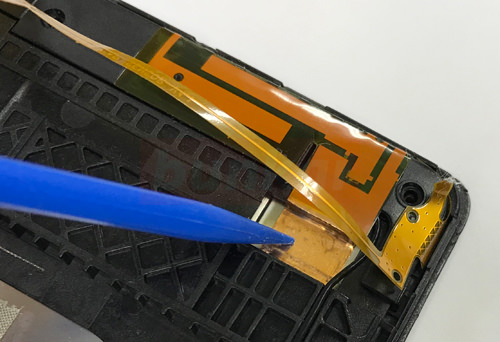
The part where the blue tool hits becomes copper tape, but because it is attached to the liquid crystal panel with tape, let's peel off the tape by turning it.
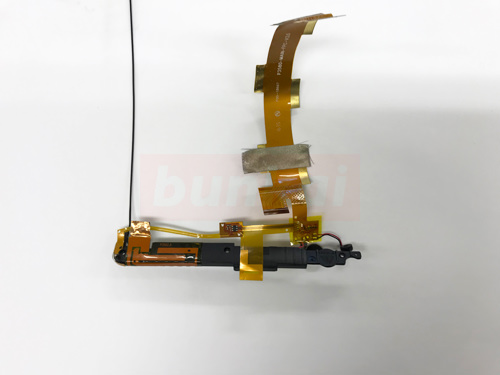
[Lenovo TAB3 8 Repair Method 29]
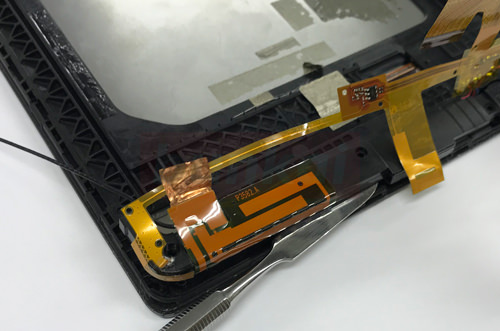
If the ribbon cable (orange cable) can be peeled off to some extent, slide the tool under the speaker as shown in the image.
[Lenovo TAB3 8 Repair Method 30]
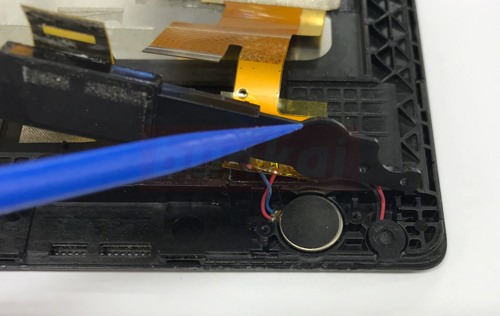
I found a hidden speaker!
[Lenovo TAB3 8 Repair Method 31]
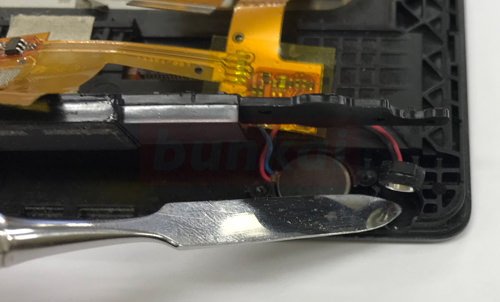
The speaker can be removed by inserting the tool down.
[Lenovo TAB3 8 Repair Method 32]
I was able to remove the parts, but if all the processes up to this point are going well, I will transplant each part to the newly prepared liquid crystal.
[Lenovo TAB3 8 Repair Method 33]
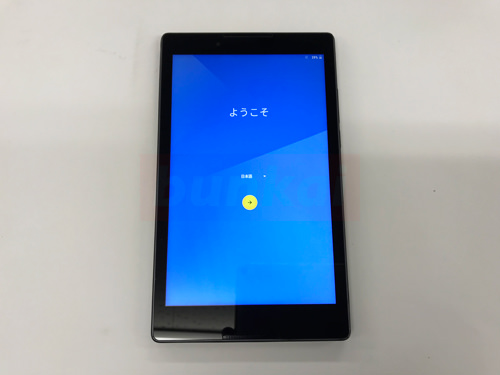
I turned on the power in a state of assembling everything, but I was able to confirm that it looks normal.
If you are used to disassembly within one hour, if you are the first person to disassemble, I think that screen exchange is possible in about 2 hours.