Computer repair, such as Lenovo E450 does not start or restart repeatedly
Although the symptoms such as not moving forward from the Lenovo logo, freezing, and repeated rebooting are often in the hard disk failure, it is an effective decomposition method even if you want to add a hard disk rather than a failure.
It becomes a fairly simple model as decomposition difficulty, so if you have confidence in your arm, please try to challenge.
[Lenovo E450 Hard Disk Replacement, Repair Method Step 1]
The first step in removing the battery is to disassemble the laptop, but in the case of the Lenovo E450, it is the built-in type, so it cannot be easily removed.
However, it is possible to cut off the electricity by removing the connector without removing the battery itself.
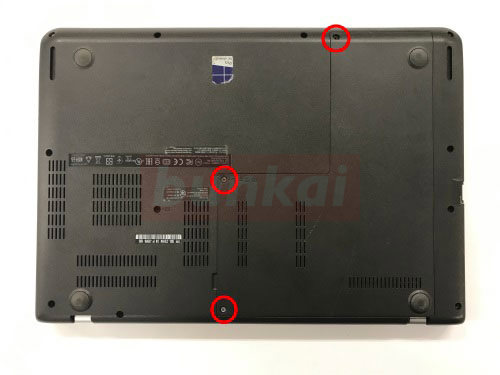
First of all, the screw of the red circle part of the back of the main body is removed though the work of pulling out the connector of the battery is done.
The screw is not a completely removable type, but it is caught in the plastic part, but please refer to the following image.
[Lenovo E450 Hard Disk Replacement, Repair Method Step 2]
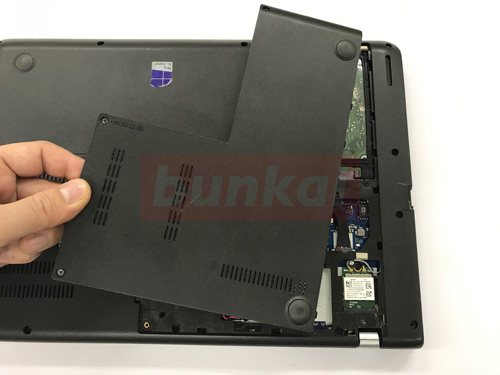
After removing the screws of the three places, it is possible to remove the cover if you lift it by hand.
In the image, let's lift it from the left side because the right side is caught by the nail.
[Lenovo E450 Hard Disk Replacement, Repair Method Step 3]
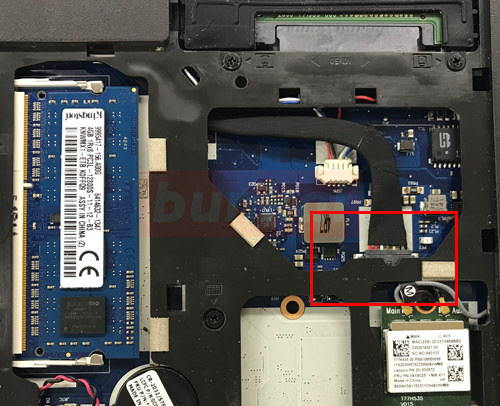
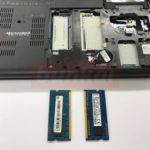
As soon as the lid is removed, there is memory and hard disk, but the battery connector is removed first.
The battery connector of the E450 is not a type that can be covered from the top, but is inserted from the side to the motherboard side.
In terms of the image, it is possible to remove the connector if you pull upward.
[Lenovo E450 Hard Disk Replacement, Repair Method Step 4]
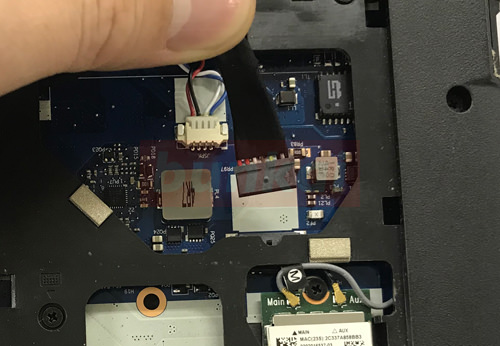
This way, you can remove the battery connector.
[Lenovo E450 Hard Disk Replacement, Repair Method Step 5]
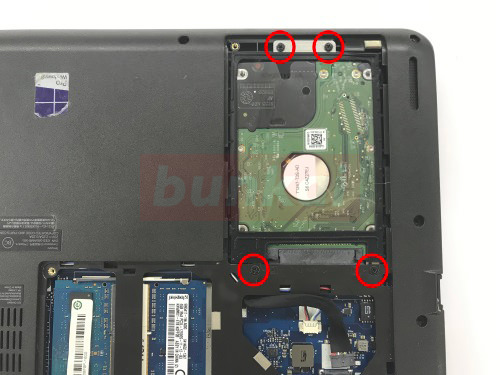
Next, the hard disk is finally removed, but the hard disk itself is screwed to the main body side with an iron plate.
Let's remove the screw of the red circle part with a Phillips screwdriver.
[Lenovo E450 Hard Disk Replacement, Repair Method Step 6]
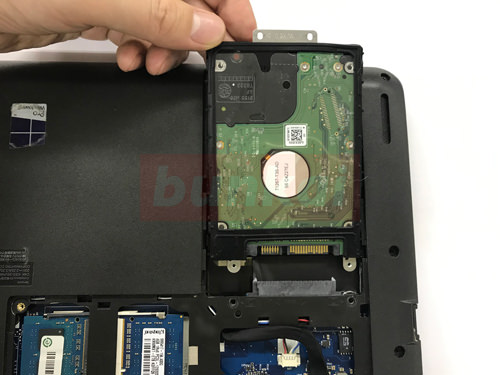
After removing the screw, you can remove the hard disk from the main body by sliding it sideways as shown in the image.
[Lenovo E450 Hard Disk Replacement, Repair Method Step 7]
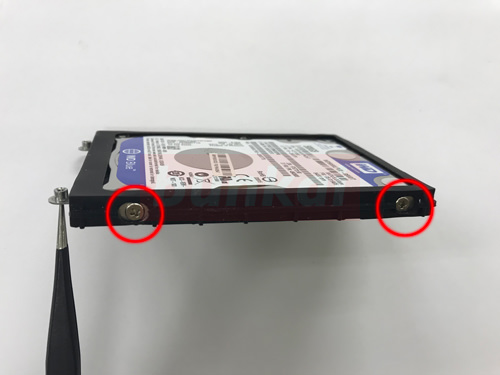
The hard disk is removed here, but there are two screws on both sides, so all of them will be removed.
[Lenovo E450 Hard Disk Replacement, Repair Method Step 8]
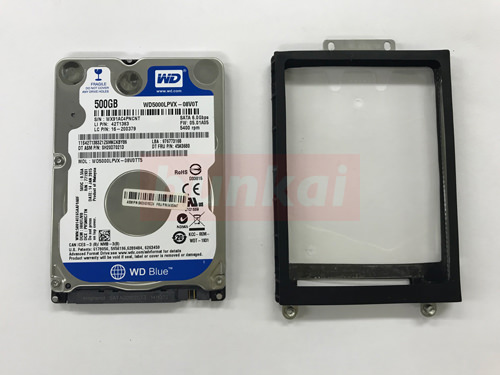
After that, replace it with a newly prepared 2.5-inch hard disk, and if you incorporate it in the reverse procedure that has been disassembled, the hard disk replacement of the E450 will be finished.