If the LENOVO S21e screen has a crackin LCD and there is a bad display on the LCD, a liquid crystal panel replacement (LCD replacement) is required!
[LENOVO S21e LIQUID Crystal Repair and Decomposition Method STEP 1]
Due to the fall of the laptop, the display is defective.
The screen is blurred, but it is possible to check the start-up screen of Wndows8, so you can check that there is no problem with the OS itself.
In the case of this state, I want to enter the liquid crystal repair immediately because I can use the laptop as before only by changing the liquid crystal.
[LENOVO S21e LIQUID Crystal Repair and Decomposition Method STEP 2]
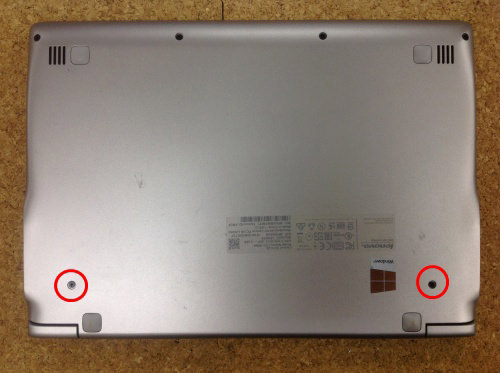
First of all, it enters from the work of removing the battery, but S21e can not be removed immediately in the back of the main body because the battery is a built-in type.
In this case, there is a possibility of shorting if you continue to disassemble as it is, so it will be a little troublesome, but we will do the work of removing the connector of the battery first.
Let's remove the two screws of the red circle part!
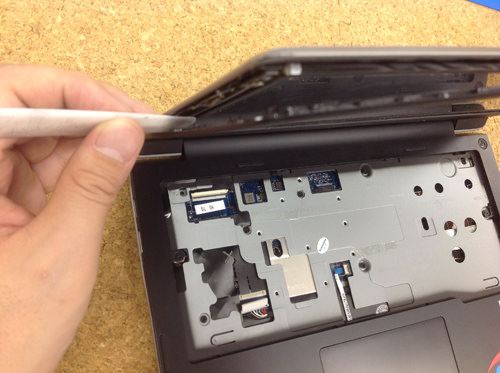
[LENOVO S21e LIQUID Crystal Repair and Decomposition Method STEP 3]
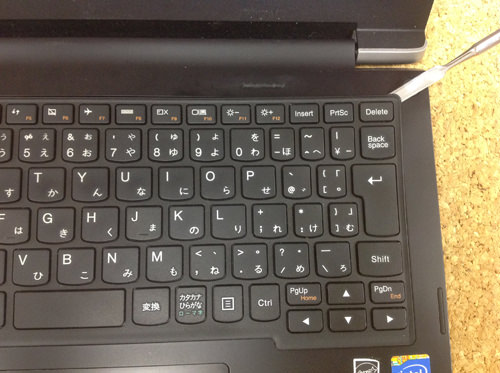
Removing the keyboard?As you might think, the battery connector is under the keyboard and will fall apart from here.
You can lift the keyboard itself by inserting a tool such as a spatula into the gap between the keyboard and the top cover as shown in the image and making it strain lightly.
Because the keyboard itself is fixed with a light nail, I think that you can understand the feeling that comes off when rubbing from the bottom to the top.
[LENOVO S21e LIQUID Crystal Repair and Decomposition Method STEP 4]
If you try to break the upper horizontal row, you will be able to lift the keyboard as in the image.
You can see that the keyboard connector is connected to the motherboard just below, but please proceed to the next step without just checking and pulling it out.
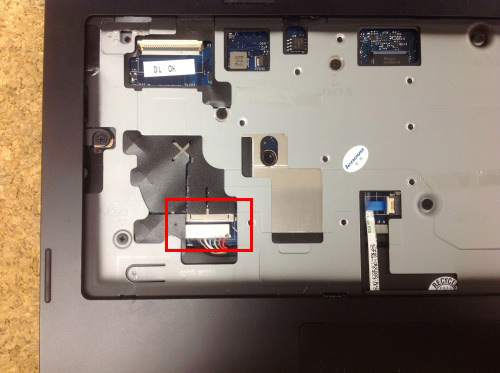
[LENOVO S21e LIQUID Crystal Repair and Decomposition Method STEP 5]
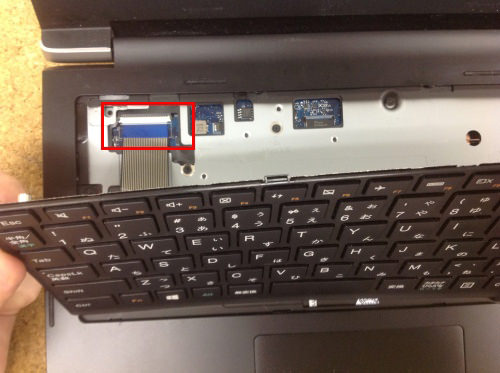
In the image, the keyboard is removed, but it is removed so that disassembly is easy to understand.
Remove the red-frame battery connector before removing the connector on the previous keyboard.
The battery connector can be pulled out by simply sliding it.
Let's do this and then remove the connector on the previous keyboard!
[LENOVO S21e LIQUID Crystal Repair and Decomposition Method STEP 6]
Removing the battery connector cut off the laptop.
From here on, we will break down the liquid crystal side, but we will insert a spatula into the gap of the frame part.
It is possible to remove only the frame if the whole around the liquid crystal is made to be strained.
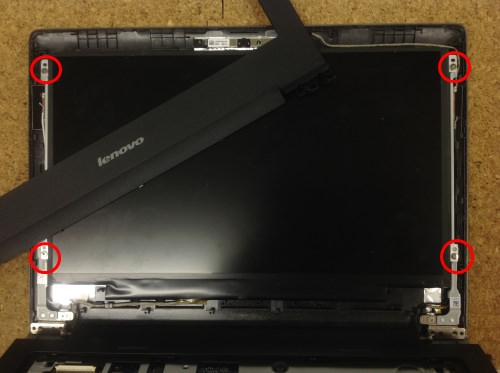
[LENOVO S21e LIQUID Crystal Repair and Decomposition Method STEP 7]
When the frame itself can be removed, the LCD panel will be visible, but since it is fixed with four screws (red frame part), remove all.
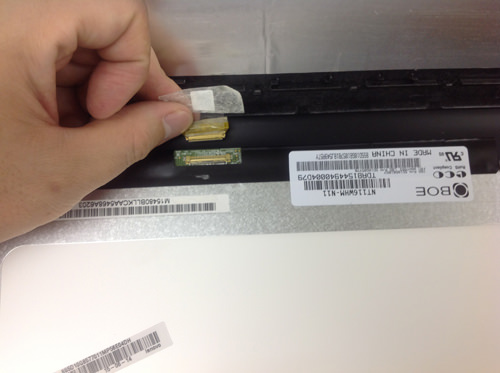
[LENOVO S21e LIQUID Crystal Repair and Decomposition Method STEP 8]
If you can remove the screw, only the LCD panel can be knocked down in the forward direction (keyboard surface), so let's put it to sleep!
Then, I think that it can be confirmed that the LCD cable is connected to the back of the panel.
You can remove the cable from the panel by turning the tape and sliding the connector.
If the work so far can be done accurately, I think that only the panel could be removed from the laptop, but if you incorporate it in the reverse procedure, the LCD replacement of the S21e will be completed.

 If the LENOVO S21e screen has a crackin LCD and there is a bad display on the LCD, a liquid crystal panel replacement (LCD replacement) is required!
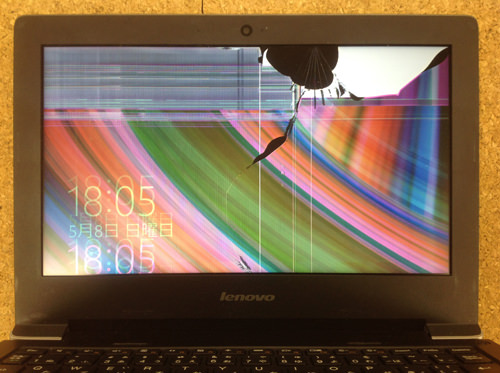


コメントを残す