The inside is not visible at all because of the display failure of the LCD screen.
The liquid crystal crack of the laptop becomes a failure caused by the shock from the outside, but I want to repair it immediately because the personal computer can be used in the same environment as before if the liquid crystal panel is changed.
Next, it enters the decomposition of the liquid crystal, but because four screws are attached to the liquid crystal frame, the screw concealed will be peeled off with tweezers etc.
If the screw can be removed, the liquid crystal frame can be removed, but the liquid crystal frame is fixed with plastic claws in addition to the screw.
It is possible to remove the liquid crystal frame easily by disassembling using a spatula like the image.
The LCD frame of the CF-SX3 is thinner than the standard notebook.
Let's disassemble carefully in order to get cracks and cracks in the liquid crystal frame if you forcibly disassemble.
Although the LCD frame is removed, the LCD panel of Let's note CF-SX3 is not particularly fixed to hinges.
After removing the LCD frame, slowly turn the LCD panel forward (keyboard side).
You can see that the LCD cable and LCD panel are connected to the back of the LCD panel.
The tape is attached to the connection part, so remove the tape before removing it.
Because there is a silver hook, you can easily unplug the LCD cable by causing the hook and then sliding the LCD cable.
The LCD cable is removed from the LCD panel.
I think that the liquid crystal panel could have been removed if the decomposition up to this point was able to be done well.
If you replace the newly prepared liquid crystal panel, the liquid crystal replacement of cf-SX3 will be completed.
There is a tape around the original LCD panel that fills the gap with double-sided tape, but it is good to attach it to a newly prepared liquid crystal if possible.
I was able to confirm the normal display by the liquid crystal exchange.
Since the login screen of windows8 is visible, you can use it as usual without OS failure.

 Panasonic Let's note CF-SX3 screen cracking, LCD panel replacement (LCD replacement) is required if there is a display failure!
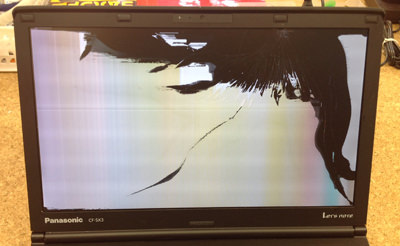

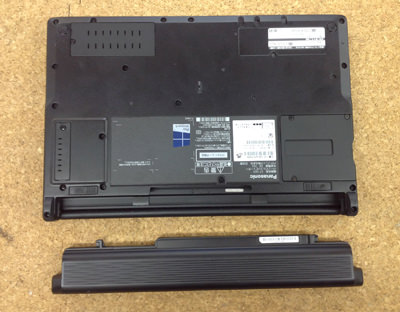
 First of all, remove the battery from the laptop body.
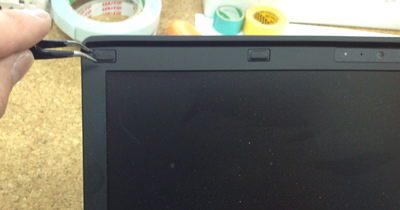
 Next, it enters the decomposition of the liquid crystal, but because four screws are attached to the liquid crystal frame, the screw concealed will be peeled off with tweezers etc.
 When the screw is peeled off, it is possible to confirm that there is a screw in the inside, so use a Phillips screwdriver to remove the four screws.
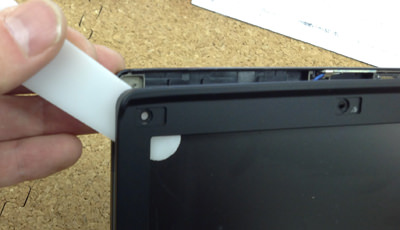
 If the screw can be removed, the liquid crystal frame can be removed, but the liquid crystal frame is fixed with plastic claws in addition to the screw.
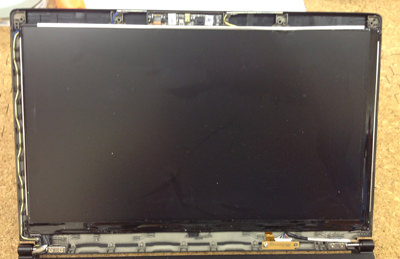
 Although the LCD frame is removed, the LCD panel of Let's note CF-SX3 is not particularly fixed to hinges.
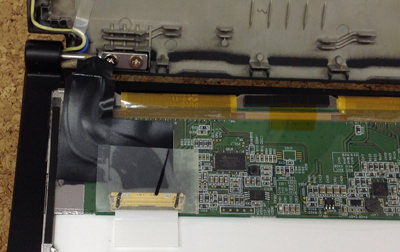
 You can see that the LCD cable and LCD panel are connected to the back of the LCD panel.
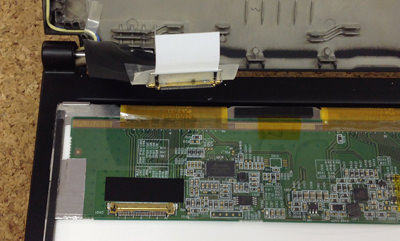
 The LCD cable is removed from the LCD panel.
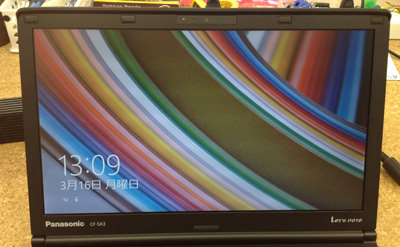
 I was able to confirm the normal display by the liquid crystal exchange.

コメントを残す