SCREEN REPLACEMENT of THE ASUS K52F LCD Cracking Repair Method, Decomposition Procedure
If the screen of ASUS K52F has a cracked LCD and there is a bad display on the LCD, a liquid crystal panel replacement (LCD replacement) is required!
[ASUS K52F LCD repair and disassembly method STEP 1]
Because the display is completely broken, the inside is not visible at all.
By replacing the LCD panel, i would like to repair it immediately because it can be used without changing the environment until now.
If you are concerned about whether data remains before disassembling, you can easily check it by connecting it to an external monitor.
[ASUS K52F LCD repair and disassembly method STEP 2]
First of all, it is a task to be sure to disassemble the laptop, but turn the main unit inside out and remove the battery.
You can easily remove it by pressing the knob next to the battery.
If you proceed with the decomposition without doing this work, there is a risk of shorting in the middle, so be sure to do so.
[ASUS K52F LCD repair and disassembly method STEP 3]
From here on, we will decompose the liquid crystal side.
Since the LCD is inside the rear panel and frame, it starts from the place where the frame is removed.
It is fixed with a screw as shown in the image, and rubber is attached so that the screw cannot be seen on it, but it can be easily peeled off by using tweezers.
[ASUS K52F LCD repair and disassembly method STEP 4]
If you remove the rubber, the screw will come into view, so let's remove it!
There are two places in the image, but please remove all the places attached to the frame.
[ASUS K52F Decomposition STEP 5]
If you can remove the screw of the previous, remove the frame itself next.
Using spatulas like images makes decomposition very easy.
The spatula used in this disassembly is sold at the caulking corner of the home center.(It's a few hundred yen.))
This work can be disassembled by inserting a spatula into the gap between the frame and the rear panel, so this work is performed one lap around the liquid crystal.
[ASUS K52F LCD repair and disassembly method STEP 6]
When the frame can be removed, the LCD panel becomes exposed, but it is fixed to an iron frame called a hinge.
Remove all screws that secure the liquid crystal.
[ASUS K52F LCD repair and disassembly method STEP 7]
This is the screw attached to the side of the camera, so don't forget to remove it.
[ASUS K52F LCD repair and disassembly method STEP 8]
It is the side side of the liquid crystal.This part has the screw evenly on the left and right, so remove all.
If you are sure that all screws have been removed, gently turn the display down to the keyboard side.
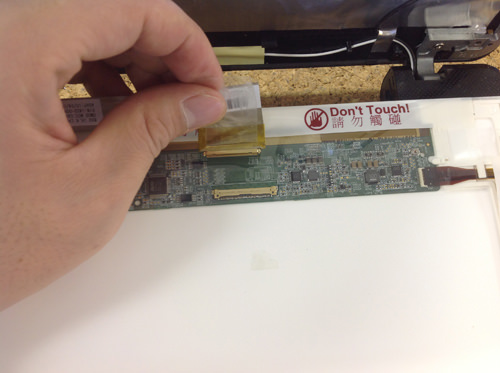
[ASUS K52F LCD repair and disassembly method STEP 9]
It is the back side of the display that can not be seen uless it disassembles, but it was confirmed that the LCD cable is connected to the panel.
You can easily pull out the cable by sliding it parallel to the panel as shown in the image.
I think that i was able to remove the liquid crystal panel with this, but if you replace the newly prepared parts and incorporate them according to the original procedure, the liquid crystal repair of the K52F will be completed.
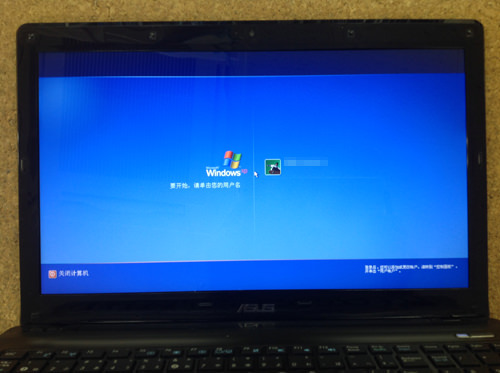
[ASUS K52F LCD repair and disassembly method STEP 10]
All built-ins are complete and the computer is turned on.
You have verified that it is displayed correctly.

 If the screen of ASUS K52F has a cracked LCD and there is a bad display on the LCD, a liquid crystal panel replacement (LCD replacement) is required!
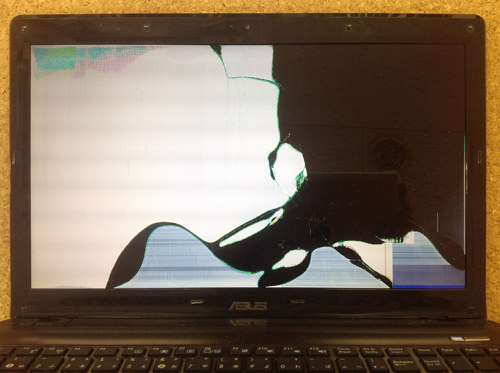
 Because the display is completely broken, the inside is not visible at all.
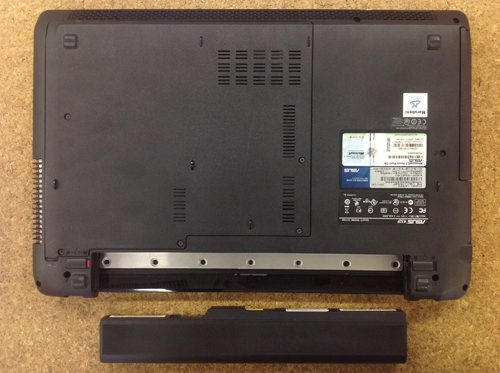
 First of all, it is a task to be sure to disassemble the laptop, but turn the main unit inside out and remove the battery.
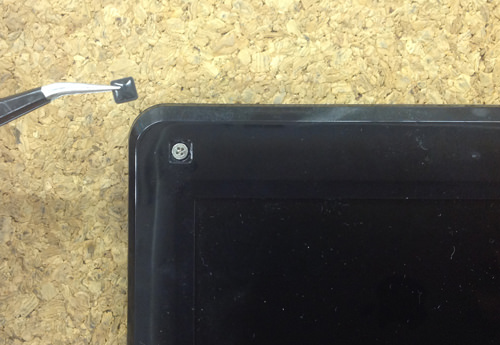
 From here on, we will decompose the liquid crystal side.
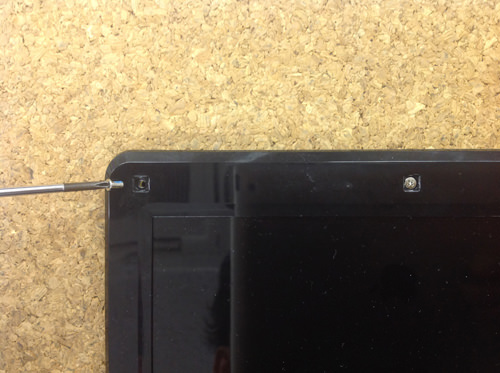
 If you remove the rubber, the screw will come into view, so let's remove it!
 If you can remove the screw of the previous, remove the frame itself next.
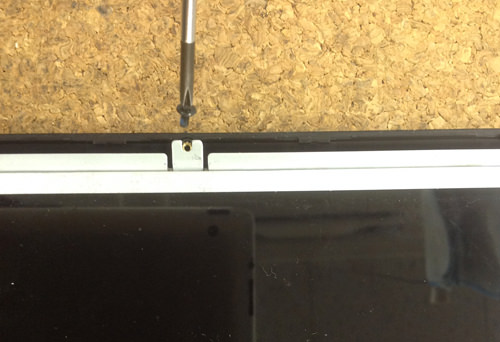
 When the frame can be removed, the LCD panel becomes exposed, but it is fixed to an iron frame called a hinge.
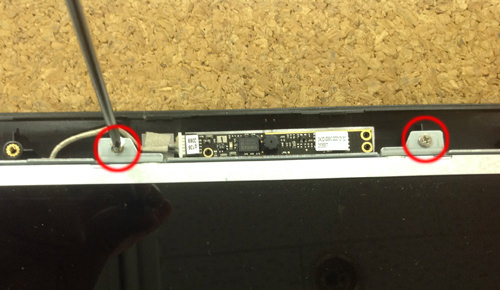
 This is the screw attached to the side of the camera, so don't forget to remove it.
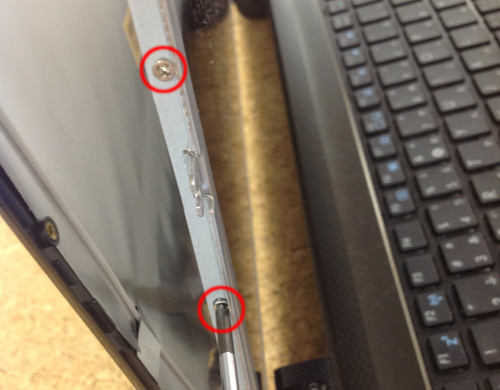


コメントを残す