Screen replacement of lcd cracks in Fujitsu FMVA53MW Repair method, disassembly procedure
If there is a liquid crystal crack or display failure of Fujitsu FMVA53MW, a liquid crystal panel replacement (LCD replacement) is required!
[Fujitsu FMVA53MW LCD repair and disassembly method STEP 1]
If the screen of Fujitsu FMV LIFEBOOK AH53/M is leaked or displayed incorrectly, or the screen is broken, this decomposition method can be used.
In the image, ink leakage occurs in the upper left, but this condition is generally referred to as "liquid crystal cracking of the personal computer".
Since it does not improve unless the LIQUID panel is changed, it is necessary to change the liquid crystal.
Please refer to this decomposition method because it will cost a very high repair fee when it comes to the manufacturer!
[Fujitsu FMVA53MW LCD repair and disassembly method STEP 2]
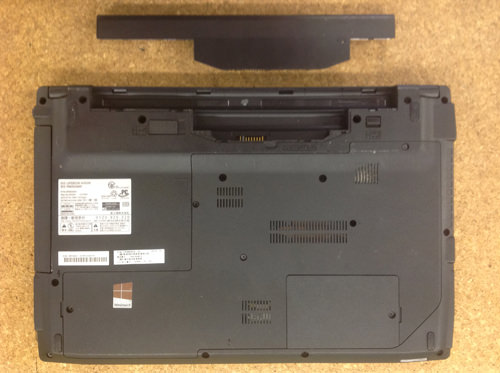
Not only Fujitsu FMV LIFEBOOK AH53/M, but also when disassembling a laptop, be sure to remove the battery before doing so!
Please note that if you disassemble the battery without removing it, it will be short-circuited, and there are cases where the power is no longer turned on.
The battery turns the main unit inside out and is supposed to be released by sliding the knob next to the battery.
[Fujitsu FMVA53MW LCD repair and disassembly method STEP 3]
From here, the liquid crystal is disassembled.
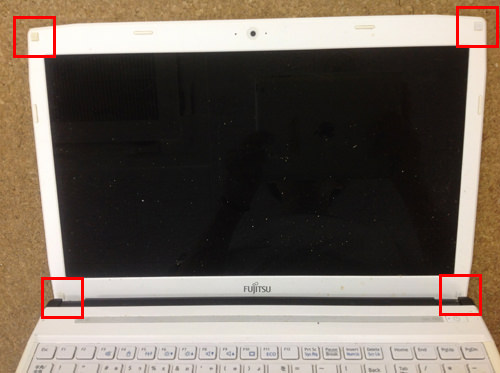
From here, we will remove the panel, but the panel is fixed between the back cover and the frame.
If you can remove the frame, you can remove the panel, so let's do a dashing decomposition!
Because there is rubber in the red frame part, it peels off with tweezers etc.
[Fujitsu FMVA53MW LCD repair and disassembly method STEP 4]
When the rubber is peeled off, the screw will be visible inside, so you will use the Phillips screwdriver.
These small parts will be reused later, so please keep them so that they do not disappear.
[Fujitsu FMVA53MW LCD repair and disassembly method STEP 5]
From here on, we'll remove the frame itself.
It has become possible to remove if you can remove the screw of the previous, but let's proceed after understanding the structure rather than proceeding with the decomposition suddenly!
The frame is fixed with screws from the outside, but the inside is fixed with plastic claws.
I think that the tool necessary for disassembly is easy to do by using a spatula like the image.
Plastic spatula is located in the caulking corner at the home center and can be purchased for about 300 yen.
If it is a home center, it was sold in most stores!
It is a position to insert the spatula, but I think that it is good from the upper left corner of the liquid crystal frame or the upper right, but I think that you can see the feeling that the nail comes off when you insert it into the gap and make it lightly twisted.
You can remove the frame by performing one lap of this work.
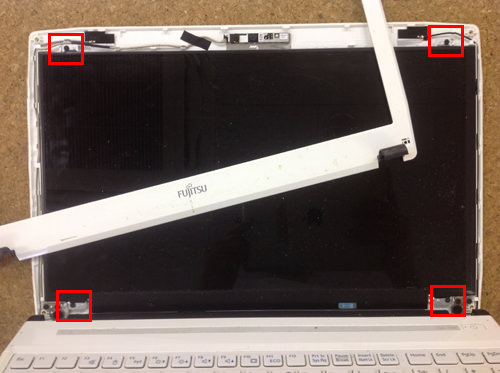
[Fujitsu FMVA53MW LCD repair and disassembly method STEP 6]
When the frame is removed, the entire LCD panel is visible.
Since the panel itself is fixed to the back cover, let's remove all the screws of the red frame part!
If you can remove the screw, you will be able to move the panel freely, so you will lie in the forward direction as it is.
At that time, please be careful not to disconnect because the cable is connected to the back of the panel.
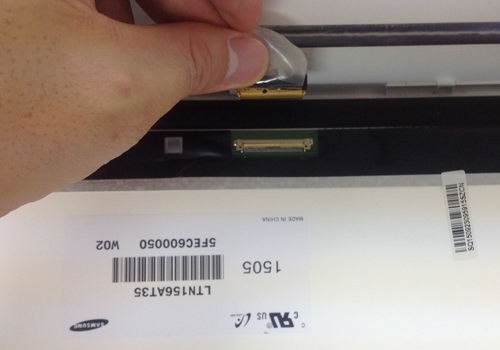
[Fujitsu FMVA53MW LCD repair and disassembly method STEP 7]
Pull the cable out of the panel, but you can easily remove it by sliding it.
I think that only the panel was able to be removed from the personal computer if the decomposition method up to this point was able to be done accurately.
The model number of the panel is described, but LTN156AT35 was used for this model.
[Fujitsu FMVA53MW LCD repair and disassembly method STEP 8]
All the work has been completed and assembled to the original state.
It is in the state that the PC was turned on, but the liquid crystal replacement is completed because you can confirm that it came to be displayed normally!

 If there is a liquid crystal crack or display failure of Fujitsu FMVA53MW, a liquid crystal panel replacement (LCD replacement) is required!
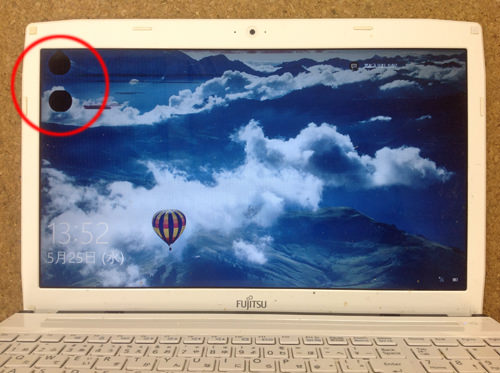

 From here, the liquid crystal is disassembled.
 When the rubber is peeled off, the screw will be visible inside, so you will use the Phillips screwdriver.
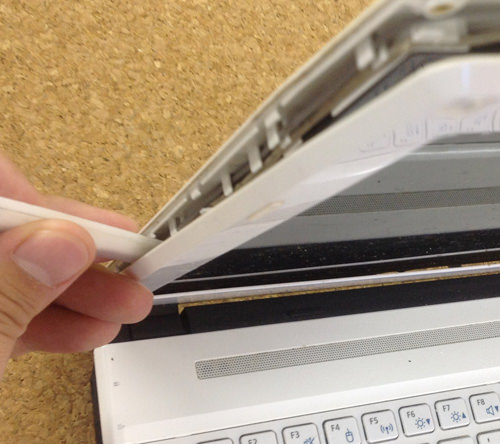


コメントを残す