Screen replacement of LCD cracking of ACER E1-531-H82C/F Repair method, disassembly procedure
If there is a crack in the LCD screen of ACER E1-531-H82C/F, please refer to it if there is a display failure.
[ACER E1-531-H82C/F LCD repair and disassembly method STEP 1]
Due to the liquid crystal cracking, we have caused a display failure.
I would like to change the LCD panel because the liquid crystal crack of the laptop does not improve unless parts are changed.
We used an external display in advance to check whether there was any data left, but it was successfully displayed on the external display.
From this, it can be predicted that it can be repaired almost only by the liquid crystal panel replacement.
I would like to perform disassembly repair immediately.
[ACER E1-531-H82C/F LCD repair and disassembly method STEP 2]
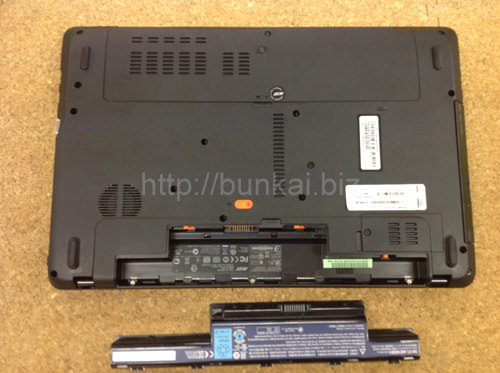
First of all, the battery is removed from the laptop body, but in the case of E1-531-H82C/F, the battery comes off when you slide the orange part near the battery.
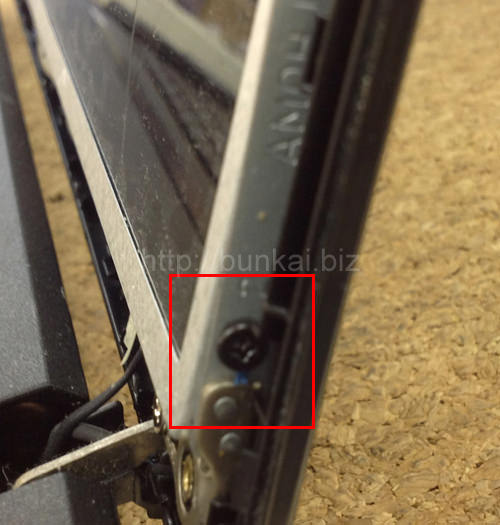
[ACER E1-531-H82C/F LCD repair and disassembly method STEP 3]
Next, it enters the decomposition of the liquid crystal, but it is necessary to remove the liquid crystal frame to remove the liquid crystal panel.
Since the liquid crystal frame is secured with screws, first remove the liquid crystal frame in front of the LCD panel.
The screw is hidden in the red frame part of the image, but because it has a seal called screw concealation, it will be peeled off using tweezers.
If you peel off the screw hidden, the screw is hidden inside, so you will use the Phillips screwdriver.
[ACER E1-531-H82C/F LCD repair and disassembly method STEP 4]
After removing the screw, go into removing the LCD frame.
The rear panel of the liquid crystal and the gap between the LCD frame are inserted into the gap of the image-like spatula and disassembled.
The liquid crystal frame can be removed by disassembling the liquid crystal frame one lap.
[ACER E1-531-H82C/F LCD repair and disassembly method STEP 5]
After removing the LCD frame, the LCD panel is visible, but the LCD panel is fixed to the hinge.
Since the screw is stopped from the side, all the screws on the left and right are removed.
If all the screws on both sides can be removed, the LCD panel can be moved, but it is possible to knock it down to the keyboard side.
Since the LCD cable is connected to the back side of the LCD panel, let's knock it down while carefulnot to break!
[ACER E1-531-H82C/F LCD repair and disassembly method STEP 6]
The image is the connection between the LCD cable and the LCD panel.
If you turn over the seal and then slide the LCD cable, you can remove it.
I think that I was able to remove the liquid crystal panel if I can disassemble it so far, but if I prepare a new liquid crystal panel and incorporate it in the original procedure, the liquid crystal change is completed.
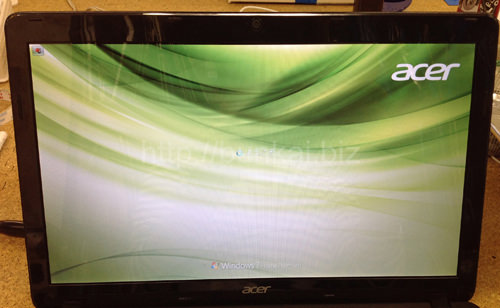
[ACER E1-531-H82C/F LCD repair and disassembly method STEP 7]
The LCD now appears normally.
It's a screen of windows7!

 If there is a crack in the LCD screen of ACER E1-531-H82C/F, please refer to it if there is a display failure.
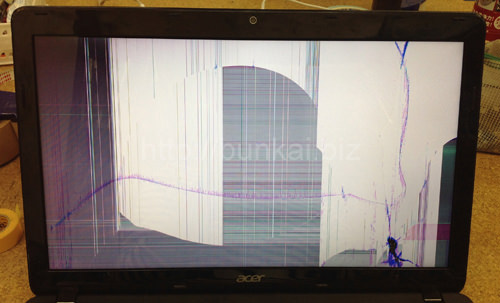

 First of all, the battery is removed from the laptop body, but in the case of E1-531-H82C/F, the battery comes off when you slide the orange part near the battery.
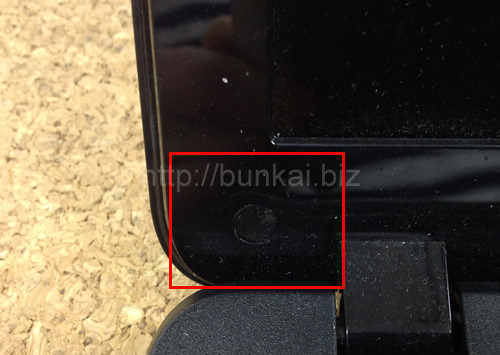
 Next, it enters the decomposition of the liquid crystal, but it is necessary to remove the liquid crystal frame to remove the liquid crystal panel.
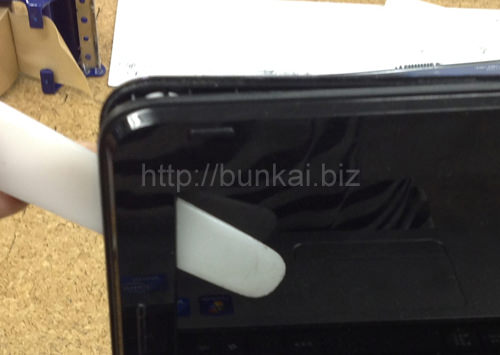
 After removing the LCD frame, the LCD panel is visible, but the LCD panel is fixed to the hinge.
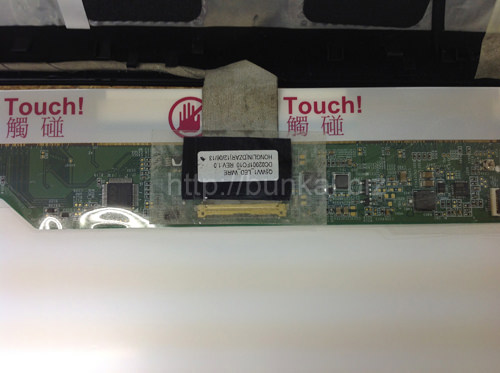
 The LCD now appears normally.

コメントを残す