Toshiba PT55467KBXW LCD screen cracking, IF THERE is a display failure in the liquid crystal, liquid crystal panel replacement (liquid crystal replacement) is required!
[Toshiba PT55467KBXW LCD repair and disassembly method STEP 1]
There is a display failure because the laptop has a crack in the LCD.
You can see that it is displayed normally on the right side of the liquid crystal, but I think that it will be able to use normally if the liquid crystal panel is replaced, so I would like to disassemble it immediately.
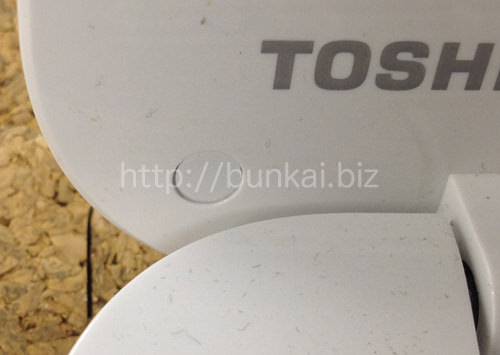
[Toshiba PT55467KBXW LCD repair and disassembly method STEP 2]
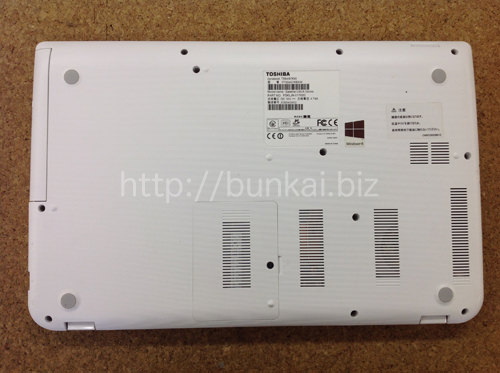
The battery of PT55467KBXW is from the process of removing it, but the battery cannot be easily removed because of the built-in type.
There is a battery and motherboard connection inside the bottom case and must be removed.
First of all, the screw of all the bottom case is removed.
[Toshiba PT55467KBXW LCD repair and disassembly method STEP 3]
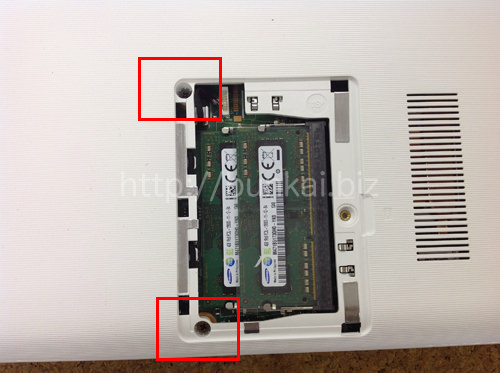
There is a case where there is a memory in the middle just around, but it is necessary to remove the screw enclosed in the red frame.
In addition, please remove it so as not to forget it because the connector is stuck just next to the red frame part.
If all screws can be removed, the bottom case can be removed.
[Toshiba PT55467KBXW LCD repair and disassembly method STEP 4]
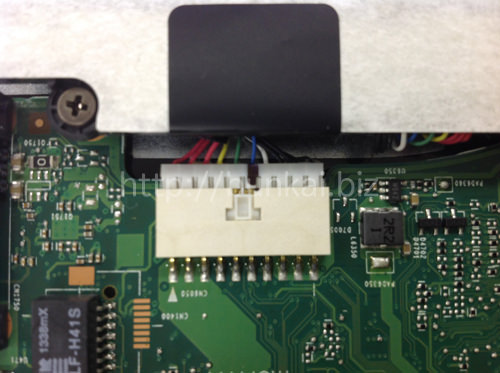
The connection part of the battery.
It is a little hard to remove, but you can remove it if you slide it.
It is easier to work in the future by returning the bottom case once after removing the battery connector.
[Toshiba PT55467KBXW LCD repair and disassembly method STEP 5]
From here, we will enter the decomposition of the liquid crystal.
First of all, it is necessary to remove the liquid crystal frame, so remove the screw that secures the liquid crystal cable.
The screws are hidden by a seal called screw concealation, so use tweezers to peel them off.
Remove all screws on the LCD frame.
[Toshiba PT55467KBXW LCD repair and disassembly method STEP 6]
After removing the screw, the liquid crystal frame is disassembled, but it can be disassembled smoothly by using a spatula such as the image.
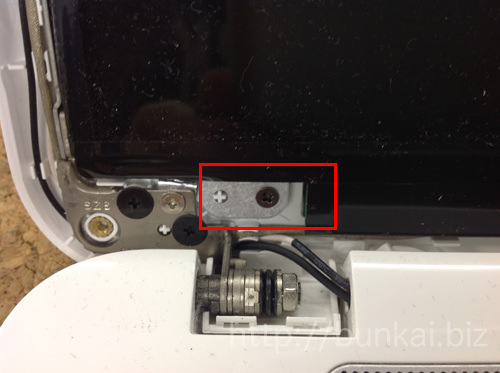
[Toshiba PT55467KBXW LCD repair and disassembly method STEP 7]
If the liquid crystal frame can be removed, the LCD panel will be visible, but the LCD panel is also secured with screws.
Remove the screw on the red frame, but remove the right side of the screw in the same manner.
[Toshiba PT55467KBXW LCD repair and disassembly method STEP 8]
The screw of the previous was the upper side, but there is a screw on the lower side as well, so remove it.
If you can remove all the screws that secure the LCD panel, slowly knock the LCD panel down to the keyboard side.
In that case, the LCD cable is connected to the back of the LCD panel, so please knock it down carefully so as not to damage it.
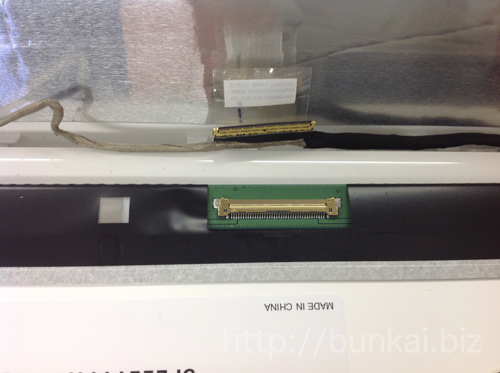
[Toshiba PT55467KBXW LCD repair and disassembly method STEP 9]
The LCD cable was removed from the LCD panel.
The LCD cable can be removed by sliding parallel to the LCD panel.
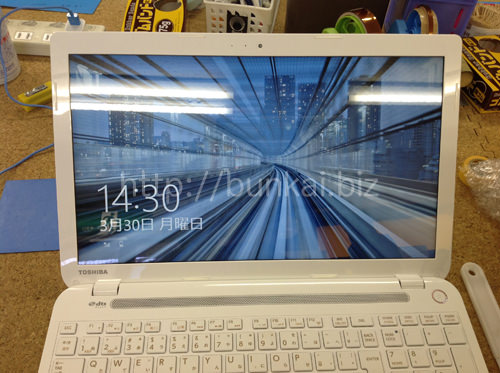
I think that I was able to remove the liquid crystal panel if I can disassemble it so far, but liquid crystal repair is completed if I replace it with a newly prepared liquid crystal panel.
[Toshiba PT55467KBXW LCD repair and disassembly method STEP 10]
The part that was not visible until a while ago by the liquid crystal panel exchange came to be displayed normally!

 Toshiba PT55467KBXW LCD screen cracking, IF THERE is a display failure in the liquid crystal, liquid crystal panel replacement (liquid crystal replacement) is required!
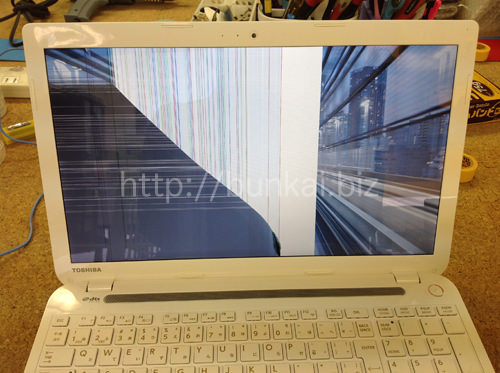

 From here, we will enter the decomposition of the liquid crystal.
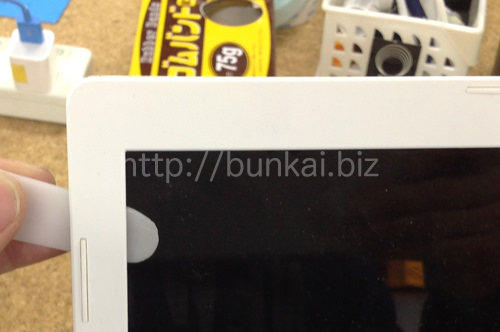
 After removing the screw, the liquid crystal frame is disassembled, but it can be disassembled smoothly by using a spatula such as the image.
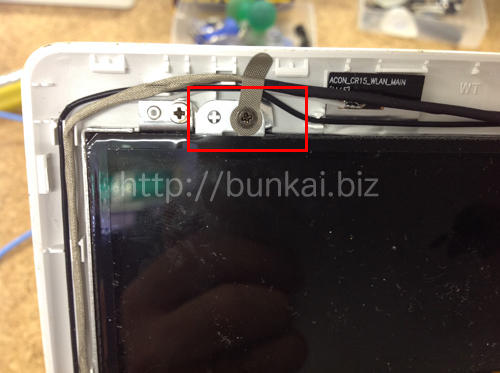


コメントを残す