If there is a screen crack or a display defect in the LCD of Fujitsu LIFEBOOK A574/KW, a liquid crystal panel replacement is required!
[Fujitsu LIFEBOOK A574/KW LCD Repair and Decomposition Method STEP 1]
Because the LCD panel is broken, the inside is not visible at all, but you can see that the start screen of windows is visible slightly in the upper left.
I was able to confirm that the operating system was running using an external monitor, but it was a re-setup screen, so I can see that the customer tried recovery.
I will be able to use the laptop by replacing the LCD panel and re-setup, so I would like to replace the LCD panel immediately.
[Fujitsu LIFEBOOK A574/KW LCD Repair and Decomposition Method STEP 2]
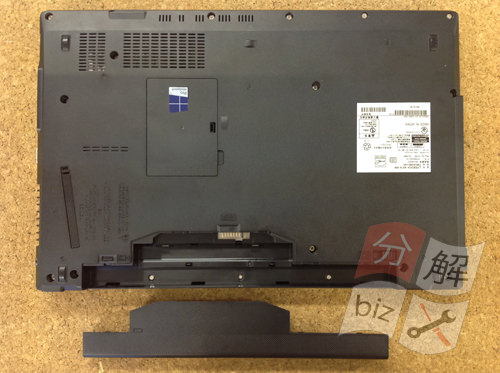
Start by removing the battery from the laptop itself.
If you disassemble it as it is, it may short down internally, so be sure to remove the battery when disassembling your computer.
[Fujitsu LIFEBOOK A574/KW LCD Repair and Decomposition Method STEP 3]
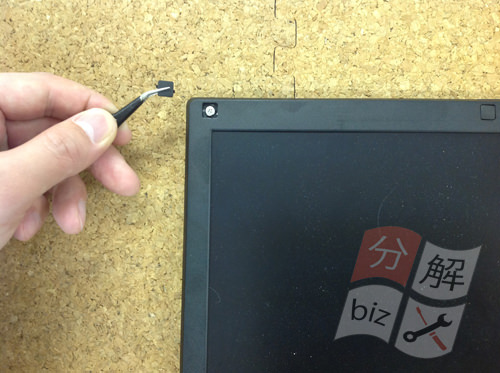
After removing the battery, the lcd side is disassembled.
The liquid crystal frame is removed first, but the liquid crystal frame is secured with screws and the screws are hidden by screw concealed.
Because there is a screw hidden in the image part, use a pointed tool such as tweezers to remove the screw concealation.
[Fujitsu LIFEBOOK A574/KW LCD Repair and Decomposition Method STEP 4]
If you can remove the screw stab, the screw will come into view, so all screws that secure the liquid crystal frame will be removed.
[Fujitsu LIFEBOOK A574/KW LCD Repair and Decomposition Method STEP 5]
When removing the liquid crystal frame, it is possible to decompose smoothly by disassembling using a spatula such as an image.
I removed the screw earlier, but the liquid crystal frame uses a spatula because it is fixed with a plastic claw in addition to the screw.
If you insert a spatula into the entire liquid crystal area, you can remove only the liquid crystal frame.
When the LCD frame can be removed, the LCD panel is exposed.
If you can remove all the screws that secure the LCD panel, you can knock the LCD panel forward, so let's knock it down to the keyboard side!
[Fujitsu LIFEBOOK A574/KW LCD Repair and Decomposition Method STEP 6]
The LCD cable is connected to the back of the LCD panel, but you can easily remove the LCD cable by sliding it.
If the decomposition up to this point had been successful, I think that the liquid crystal panel could be removed, but the liquid crystal repair will be completed if you replace it with a newly prepared liquid crystal panel.
[Fujitsu LIFEBOOK A574/KW LCD Repair and Decomposition Method STEP 7]
Since the LCD panel is displayed normally, the re-setup screen of wondows7 is visible.

 If there is a screen crack or a display defect in the LCD of Fujitsu LIFEBOOK A574/KW, a liquid crystal panel replacement is required!
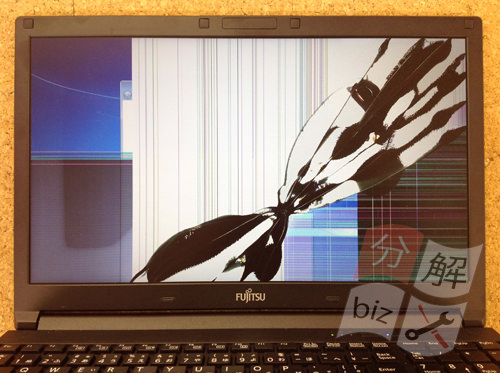

 After removing the battery, the lcd side is disassembled.
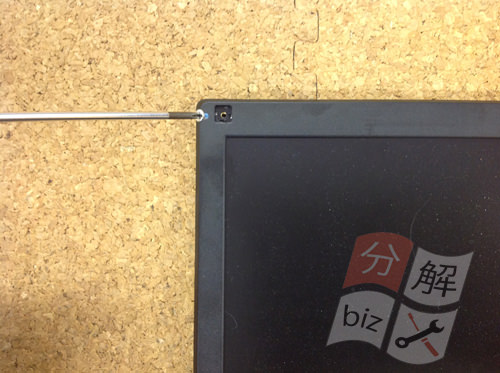
 If you can remove the screw stab, the screw will come into view, so all screws that secure the liquid crystal frame will be removed.
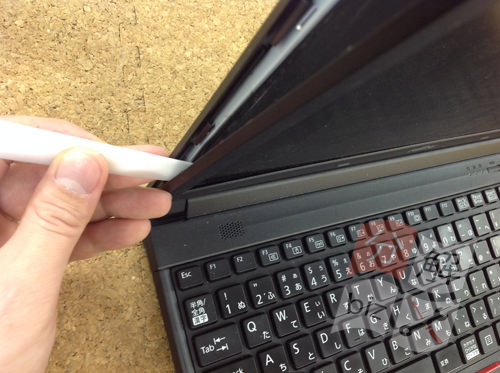
 When removing the liquid crystal frame, it is possible to decompose smoothly by disassembling using a spatula such as an image.
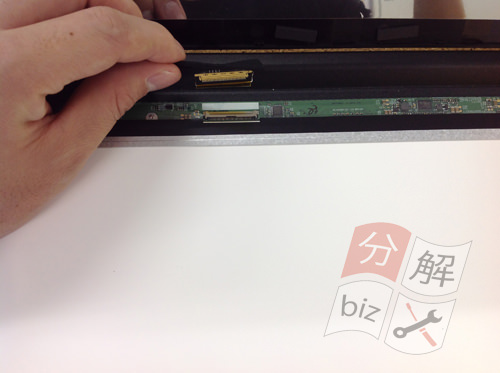
 The LCD cable is connected to the back of the LCD panel, but you can easily remove the LCD cable by sliding it.
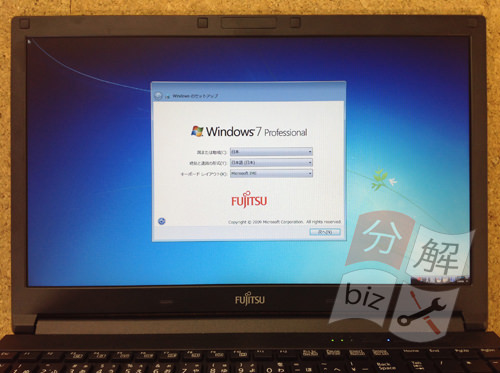
 Since the LCD panel is displayed normally, the re-setup screen of wondows7 is visible.

コメントを残す