How to repair and disassemble if the iMac A1311 DVD does not load or rotate
Steps to disassemble a drive replacement when the drive on the iMac A1311 does not load or cannot be played back
[iMac A1311 Drive Replacement and Decomposition Method STEP 1]
The CD or DVD is getting difficult to load, the disc is not loaded, or the CD or DVD is clogged and cannot be removed.We recommend that you replace the optical drive for symptoms such as:
It is not a little that it is refused if the model which does not already repair correspondence if it is a manufacturer, and parts do not enter.
In such a case, it is one means to disassemble it by oneself and to try the replacement repair.
This article will show you how to disassemble the iMac A1311 EMC 2389 optical drive.
We have omitted some of the process of removing the LCD panel on the way, so please check it by replacing the liquid crystal panel.
[iMac A1311 Drive Replacement and Decomposition Method STEP 2]
When the liquid crystal panel is removed, the optical drive on the right side is secured with four Torx screws, so remove all four screws.
[iMac A1311 Drive Replacement and Decomposition Method STEP 3]
The connector cable is connected to the drive body, so pull it out.
When the sponge tape of the red mark is peeled off, the sensor is attached to the drive, so it peels off so as not to damage the sensor and cable.
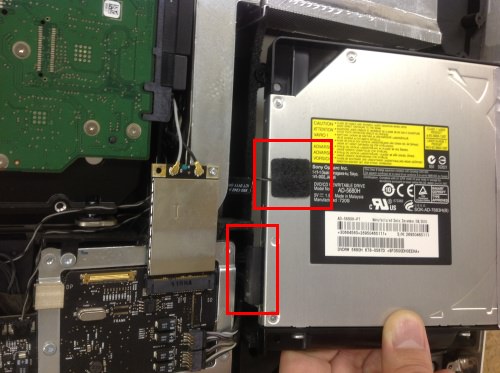
[iMac A1311 Drive Replacement and Decomposition Method STEP 4]
Remove the black plastic parts for fixing the optical drive to the main unit, but remove the two torx screws marked with red.
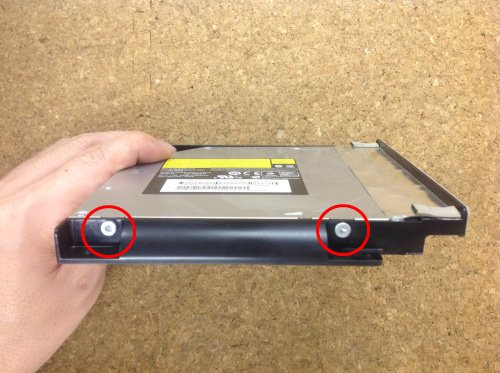
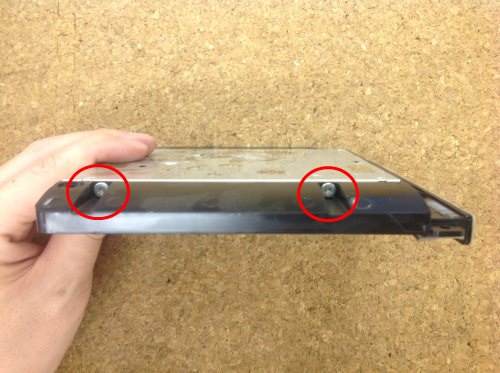
[iMac A1311 Drive Replacement and Decomposition Method STEP 5]
The other side is also removed two Torx screws and the drive is removed, so in the case of replacement, carefully check the procedure and put it back.

 Steps to disassemble a drive replacement when the drive on the iMac A1311 does not load or cannot be played back
 The CD or DVD is getting difficult to load, the disc is not loaded, or the CD or DVD is clogged and cannot be removed.We recommend that you replace the optical drive for symptoms such as:
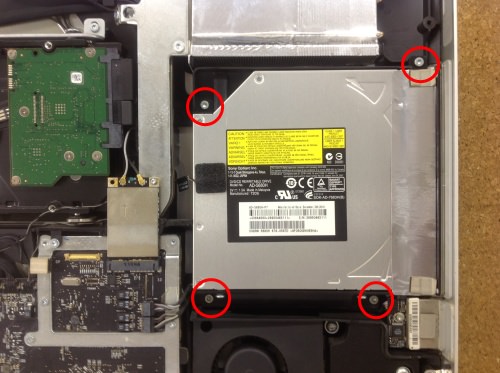


コメントを残す