iPad Mini Retina LCD panel replacement and decomposition procedure1 steps
[iPad Mini Retina LCD Panel Replacement STEP 1]
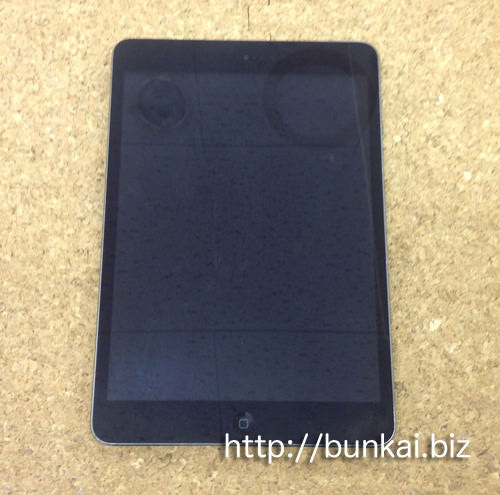
The lcd panel replacement method of the iPad Mini Retina model will be released.
Please refer to this is an effective repair method if there is a line in the LCD panel, the screen does not reflect, or the color is strange.
The above image does not crack the liquid crystal, but as a decomposition method, it will be the same whether the liquid crystal is cracked or not.
The tools used are heat guns, dryers, Phillips screwdrivers, suction cups, spatulas, etc.
Now, I'd like to break down the iPad Mini Retina model.
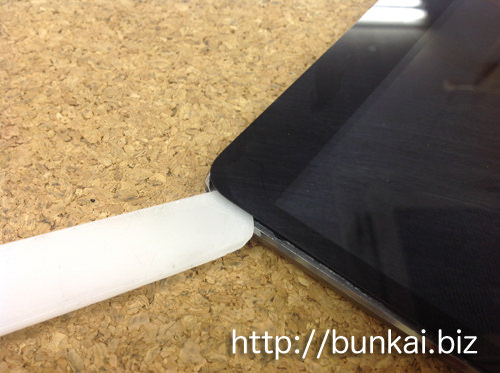
First of all, heat is applied to the black glaze part of the liquid crystal glass with a heat gun, a dryer, etc.
Liquid crystal glass is only fixed with strong double-sided tape, but it is impossible to peel off without adding heat, so it is more reliable to prepare a heat gun.
It is possible to substitute a dryer, but it may take quite a while.
[iPad Mini Retina LCD Panel Replacement STEP 2]
It can float like an image if you give heat and then twist it with a spatula.
In the image, the LCD screen is not broken, so it is peeled off cleanly, but if the liquid crystal glass is broken, it cannot be peeled off cleanly.
The liquid crystal will crack into the burr, but there is no problem as a procedure, so please proceed as it is.
It is common to all of the disassembly of the iPad, but the process of removing the liquid crystal glass takes the most time.
Eighty percent of the work peels off the glass, and 20% is other working hours.
[iPad Mini Retina LCD Panel Replacement STEP 3]
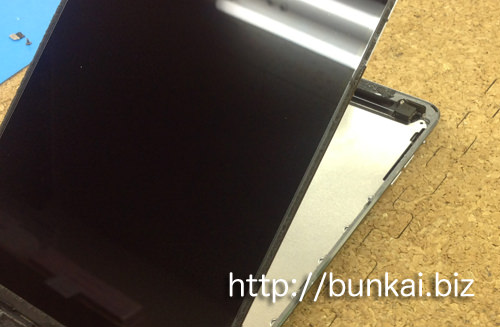
If you peel off the liquid crystal glass, it will be in the state of the image, but be sure to wake it up from the upper side (front camera side) to the home button side.
Because the home button side is still in a state where the wiring is connected internally, it is necessary to be careful because it leads to the cause of the failure if it peels off forcibly.
[iPad Mini Retina LCD Panel Replacement STEP 4]
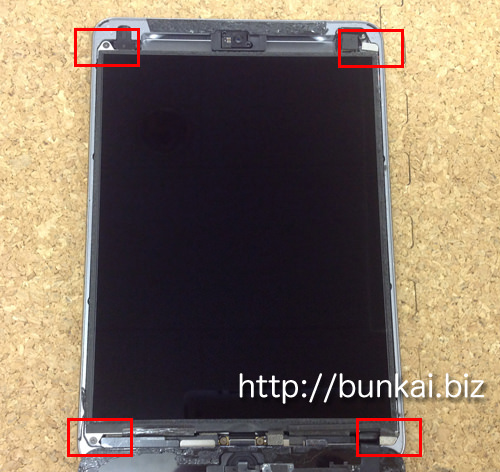
The LCD panels are secured with a total of four screws, each with four screws.
[iPad Mini Retina LCD Panel Replacement STEP 5]
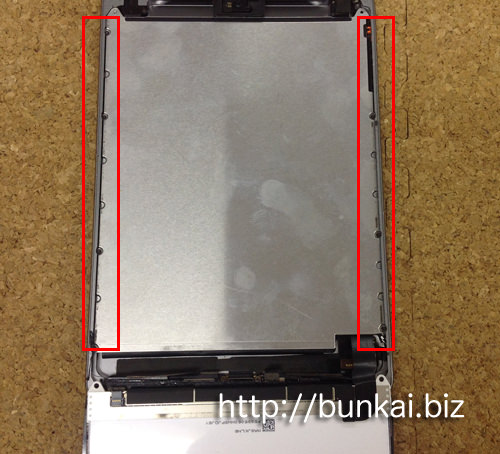
The red frame part becomes all screws that secure the liquid crystal panel, so it will be removed.
A magnet is attached to the screw in the upper right and lower right, but please keep this magnet so as not to lose it.
[iPad Mini Retina LCD Panel Replacement STEP 6]
If the previous screw can be removed, the LIQUID crystal panel can be caused.
There is a place with tape when causing the liquid crystal panel, but please work carefully because there is a risk that the liquid crystal will crack if you try to cause it forcibly without peeling off the tape.
[iPad Mini Retina LCD Panel Replacement STEP 7]
An iron plate (heat shield) is laid under the liquid crystal panel, but the plate can be removed by removing the screw of the red frame part.
It is difficult to remove without a thin Phillips screwdriver on the tip because it is a fairly small screw.
[iPad Mini Retina LCD Panel Replacement STEP 8]
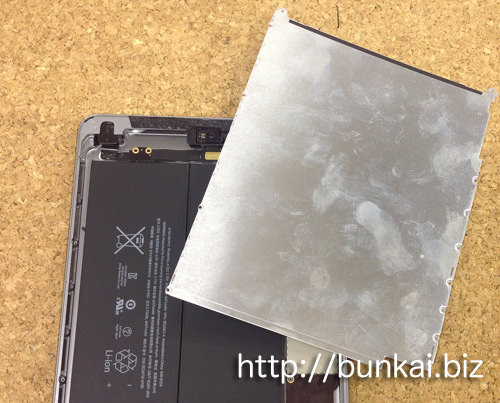
The heat shield is removed.
[iPad Mini Retina LCD Panel Replacement STEP 9]
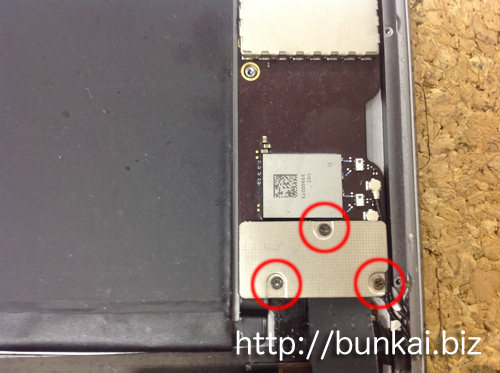
The plate can be removed and there is a part of the image above in the lower right corner of the iPad body.
Remove all the screws in the red circle and remove the plate.
[iPad Mini Retina LCD Panel Replacement STEP 10]
When the plate can be removed, it becomes the image above, but the place that is enclosed in the red frame part becomes the connection point of the battery.
When disassembling the iPad, remove the battery first, but if you do not remove the battery and disassemble it, there is a risk of shortcircuit, so be sure to do so.
[iPad Mini Retina LCD Panel Replacement STEP 11]
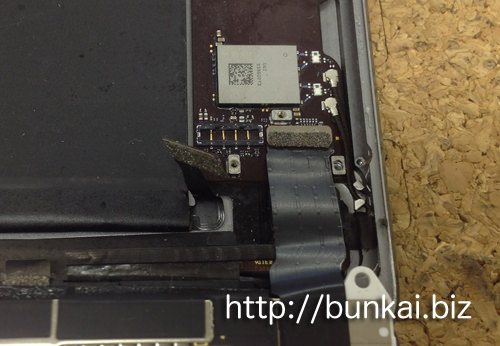
The battery connection is removed, but the connector can be removed if it is raised from the bottom to the top.
The same connector next to the battery connector is the part that connects the LCD panel and the logic board, so let's remove it in the manner that the connector of the previous battery was removed.
I think that the LCD panel was able to be removed from the main unit, but if a new LCD is installed and incorporated in the original procedure, the LCD panel replacement of the iPad Mini Retina will be completed.


コメントを残す