iPad Mini Retina LCD glass replacement and decomposition procedure 13 steps
[iPad Mini Retina LCD glass replacement STEP 1]
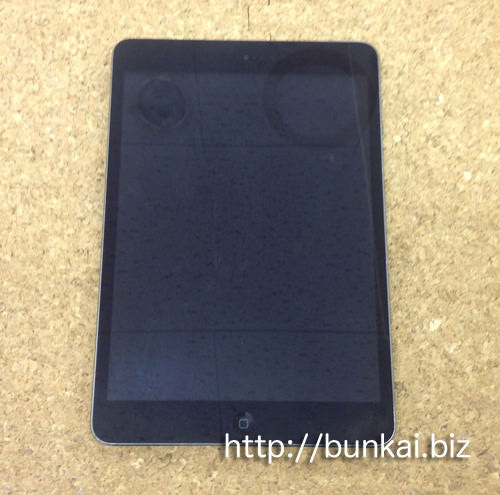
The liquid crystal glass replacement method of the iPad Mini Retina model will be released.
If the liquid crystal glass (touch panel) has cracks or cracks, it will be an effective repair method, so please refer to it.
The above image does not crack the liquid crystal, but as a decomposition method, it will be the same whether the liquid crystal is cracked or not.
The tools used are heat guns, dryers, Phillips screwdrivers, suction cups, spatulas, etc.
Now, Let's start disassembling the iPad Mini Retina model.
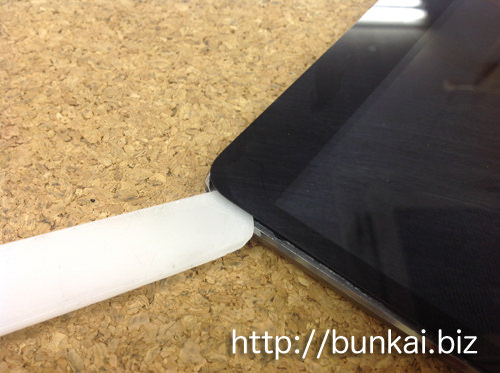
First of all, heat is applied to the black glaze part of the liquid crystal glass with a heat gun, a dryer, etc.
Liquid crystal glass is only fixed with strong double-sided tape, but it is easy to remove by applying heat.
[iPad Mini Retina LCD Glass Replacement STEP 2]
It can float like an image if you give heat and then twist it with a spatula.
In the image, the LCD screen is peeled off cleanly because it is not cracked, but it is not able to peel off neatly if the liquid crystal cracks.
The liquid crystal will crack into the burr, but there is no problem as a procedure, so please proceed as it is.
It is common to all of the disassembly of the iPad, but please use the most time for the process of removing the liquid crystal glass.
[iPad Mini Retina LCD Glass Replacement STEP 3]
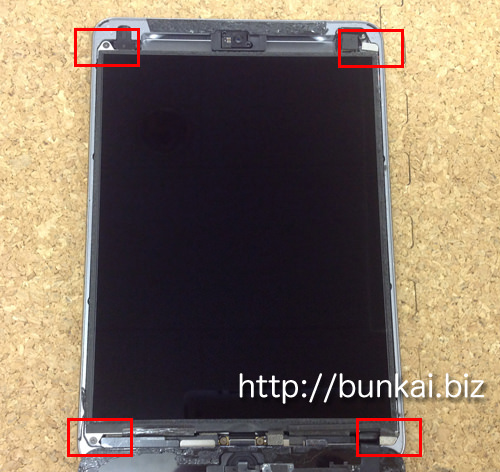
When the liquid crystal glass is removed, it becomes the state of the image.
[iPad Mini Retina LCD Glass Replacement STEP 4]
All connection connectors are disassembled because they cannot be removed without disassembling the liquid crystal glass or lcd panel.
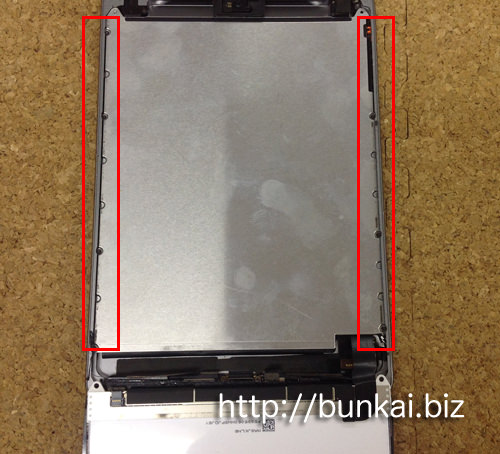
First of all, it decomposes from the liquid crystal panel, but the red frame part is the screw which secures the liquid crystal panel.
[iPad Mini Retina LCD Glass Replacement STEP 5]
The red frame part becomes all screws that secure the liquid crystal panel, so it will be removed.
A magnet is attached to the screw in the upper right and lower right, but please keep this magnet so as not to lose it.
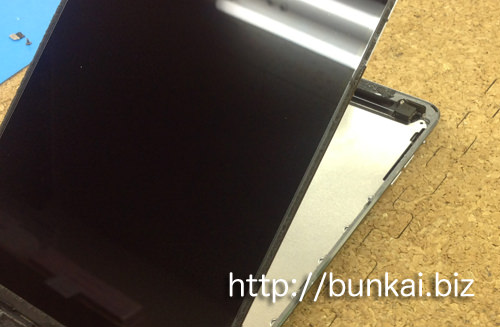
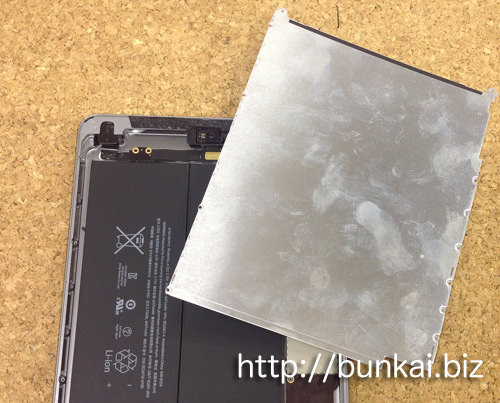
[iPad Mini Retina LCD Glass Replacement STEP 6]
If the previous screw can be removed, the LIQUID crystal panel can be caused.
There is a place with tape when causing the liquid crystal panel, but please work carefully because there is a risk that the liquid crystal will crack if you try to cause it forcibly without peeling off the tape.
[iPad Mini Retina LCD Glass Replacement STEP 7]
There is an iron plate under the LCD panel, but you can remove the plate by removing the screw son of the red frame.
[iPad Mini Retina LCD Glass Replacement STEP 8]
The plate has been removed.
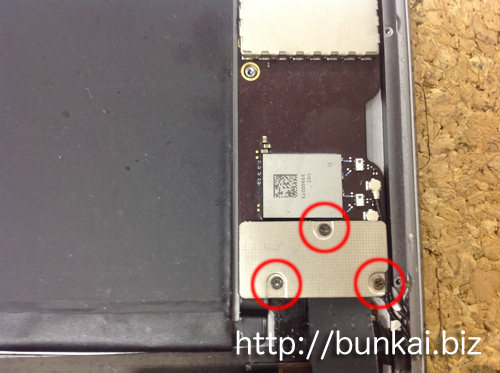
[iPad Mini Retina LCD Glass Replacement STEP 9]
The plate can be removed and there is a part of the image above in the lower right corner of the iPad body.
Remove all the red-circle screws and remove the plate.
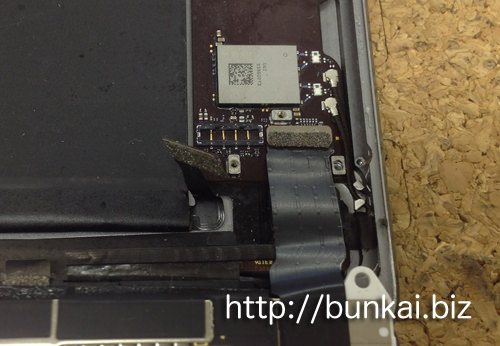
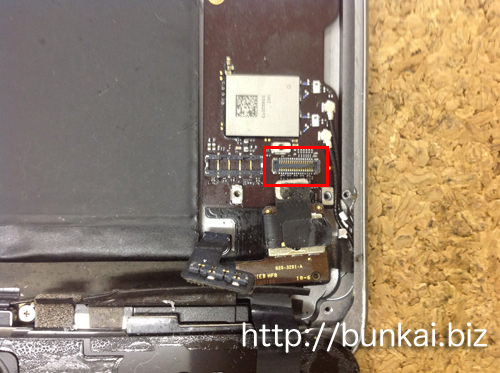
[iPad Mini Retina LCD Glass Replacement STEP 10]
When the plate can be removed, it becomes the image above, but the place that is enclosed in the red frame part becomes the connection point of the battery.
Remove the battery first when disassembling the iPad.
If you do not remove the battery and disassemble it, there is a risk of shorting, and it may lead to failure of other places, so be sure to do so.
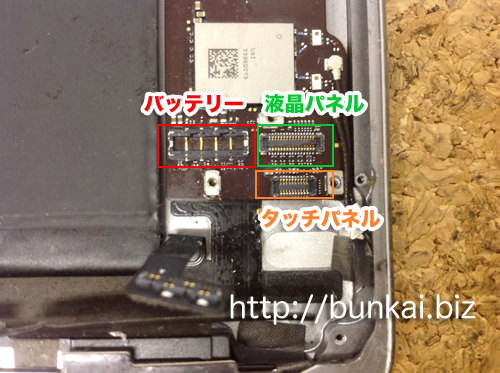
[iPad Mini Retina LCD Glass Replacement STEP 11]
The battery connection is disconnected.
The connector can be removed if it is raised from the bottom to the top.
[iPad Mini Retina LCD Glass Replacement STEP 12]
The red frame is with the connector on the LCD panel removed.
[iPad Mini Retina LCD Glass Replacement STEP 13]
The connector of the liquid crystal glass (touch panel) which is the decomposition purpose of this time is orange.
It can be removed by raising it from the bottom to the top just as by removing the connector of the battery and the LCD panel.
If the decomposition up to this point was done correctly, I think that the liquid crystal glass could be removed, so if you replace it with a newly prepared liquid crystal glass, the repair will be completed.


 how to repair and disassemble the iPad
コメントを残す