How to repair the iPad3 if it can't be charged or the battery is low fast
The iPad 3's battery is quick and needs to be replaced if it expands.
In addition, even if the power of the iPad 3 does not turn on, there is a good chance that it will be fixed only by replacing the battery, so I think that you can refer to it.
Heat guns are the most important tools required for disassembly.
Heat gun will be a powerful thing of the dryer if you say in an easy-to-understand, it is possible to substitute even dryers in the home once.
However, if you want to work efficiently, please align the heat gun and suction cup.

 battery replacement and disassembly procedure for iPad3
- [iPad 3 Battery Replacement STEP 1]

- I would like to start disassembling the battery replacement of the iPad3.
Since the iPad 3 does not have a screw on the outside, all decomposition starts with the process of peeling off the liquid crystal.
So when the battery is replaced, it is necessary to work to peel off the liquid crystal, if you break the liquid crystal in the process in the middle by any chance, it is necessary to liquid crystal replacement and battery replacement, Please be careful about disassembly because it may become a rather expensive repair price.
First of all, a strong double-sided tape is attached to the part filled with red, so i warm it with a heat gun or a dryer and float the double-sided tape.
The liquid crystal (touch panel) is not secured with screws and is installed only with strong double-sided tape.
- [iPad 3 Battery Replacement STEP 2]
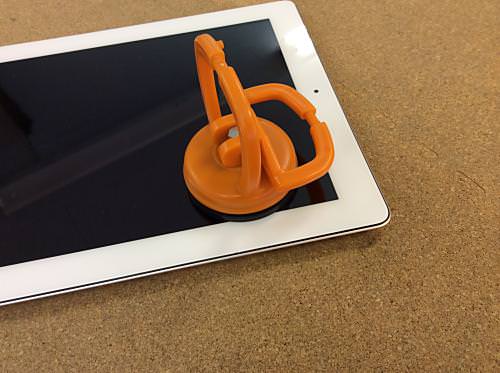
- Next, we will start removing the LCD panel using suction cups.
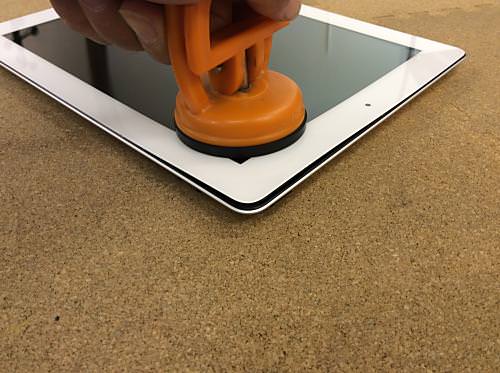
Suction cups are sold at home centers and are mainly used by glass shops.
There are small objects from large ones, but in order to disassemble the iPad, a small thing is enough, but please note that the glass on the surface is very thin and easy to break.
- [iPad 3 Battery Replacement STEP 3]
- Decomposition of this touch panel is the most important (glass easily broken) in disassembling the iPad 3, so we will work carefully.
Do you see that the touch panel on the surface is farther than the main body?
It is the momentum that I want to remove at once as it is, but I will peel it off carefully little by little using a dryer, heat gun, etc.
Make a gap little by little, insert a pick, etc. into the gap, so that the glass does not re-adhesive again.
It seems like the touch panel is floating easily, but if you're disassembling your iPad for the first time, take a lot of time.
Because it always breaks when it tries to peel off withimpatience without peeling off easily.
- [iPad 3 Battery Replacement STEP 4]
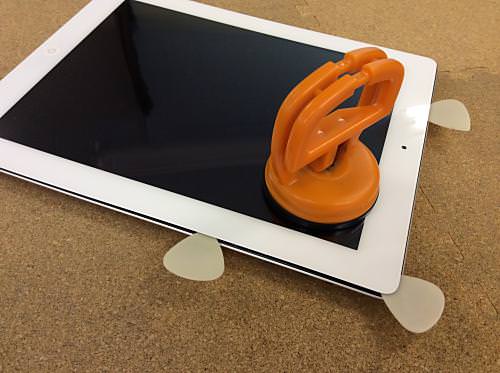
- It is a state that floats little by little.
Let's insert a pick etc. in the part that can be peeled off.
- [iPad 3 Battery Replacement STEP 5]
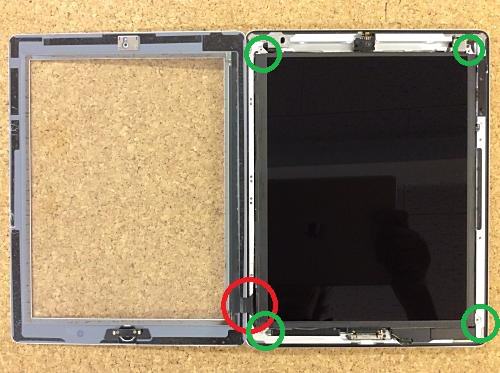
- In the image, the touch panel is opened, but you can see that there is a cable in the red circle.
This cable is connected to the logic board from the touch panel, but if you break it or scratch it, the touch panel will not respond, so be careful.
Since the battery is under the touch panel and the LIQUID panel, we will decompose further, but let's remove the Plus screwdriver because the screw that secures the liquid crystal panel becomes four green.
- [iPad 3 Battery Replacement STEP 6]

- Remove the screw on the green side and insert it under the base like the pick on the right.
Now the electricity can be cut off from the iPad 3.
Next, remove the wiring (LCD panel) on the left side of the red circle, but it is possible to remove the cable by causing the black nail to 90 degrees and then sliding the cable.
- [iPad 3 Battery Replacement STEP 7]
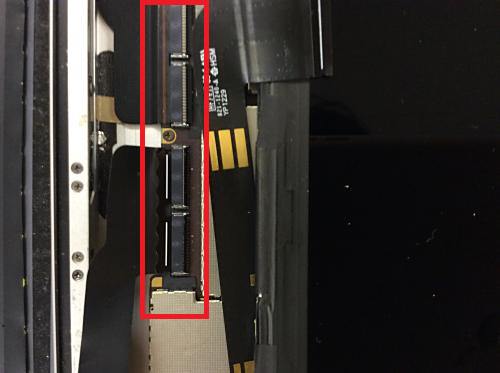
- This is an image of the cable on the LCD display.
Underneath the cable, the cable from the board of various switch parts such as the cable of the touch panel and the camera is connected.
- [iPad 3 Battery Replacement STEP 8]
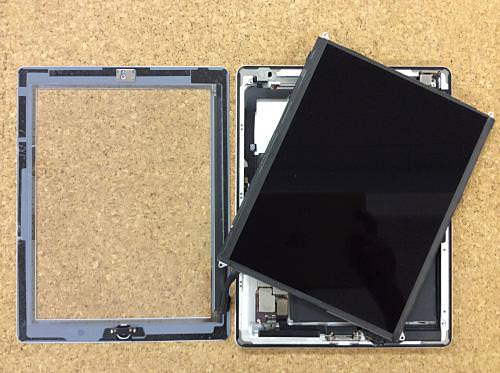
- The lcd display of the iPad can be removed from the main unit.
- [iPad 3 Battery Replacement STEP 9]
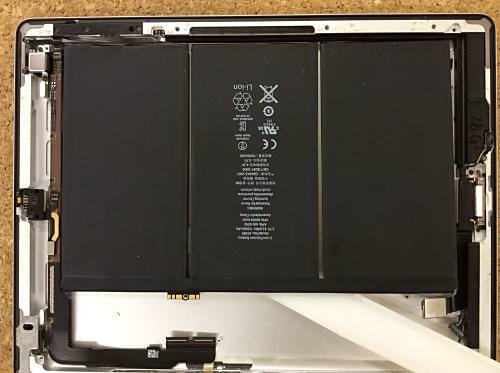
- It is possible to remove the battery once if you can remove even the liquid crystal panel.
However, it requires a little force when removing the battery, and I want to remove the parts that are close to prevent failure of other parts by mistake.
Let's remove each wiring in the manner that the connector of the liquid crystal panel is removed.
- [iPad 3 Battery Replacement STEP 10]
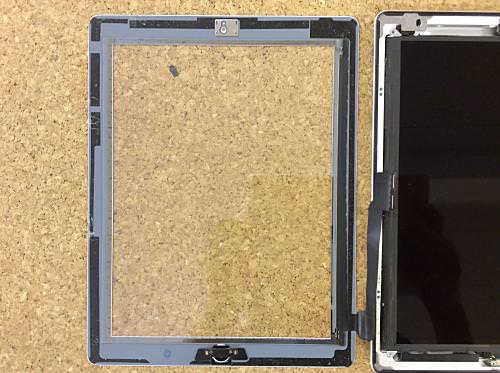
- I was able to remove the touch panel.
- [iPad 3 Battery Replacement STEP 11]
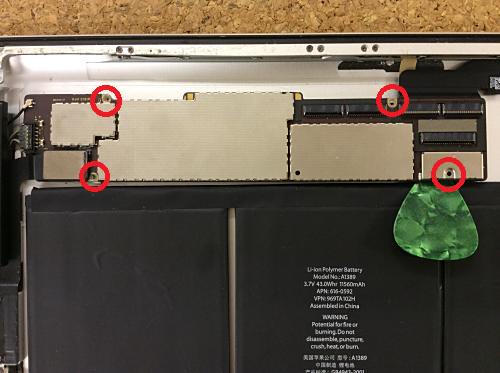
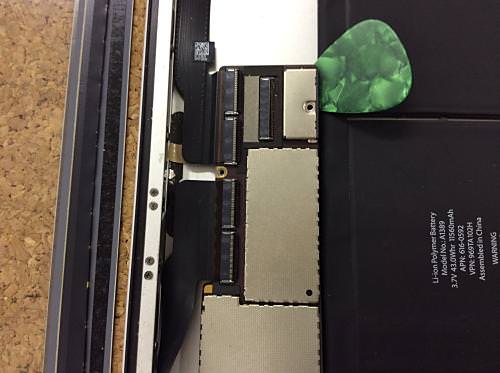
- The image is the main logic board, but if you fail this part, it will become severe if the power does not turn on, so you want to evacuate before removing the battery.
Let's remove each screw and connector.
- [iPad 3 Battery Replacement STEP 12]
- Be sure to remove all connector relationships.
- [iPad 3 Battery Replacement STEP 13]
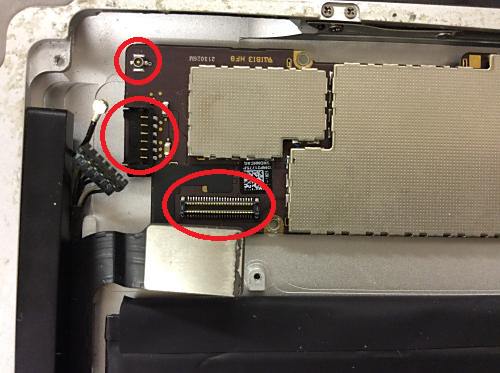
- When the logic board can be removed, a gap can be made in the part, but the spatula is inserted from there and the battery is peeled off.
The battery is fixed with strong double-sided tape, but if it is hard, it will be easier to peel off the battery by warming the apple mark side of the rear panel.
If you can remove the battery, you can just replace it with the battery you have prepared and return it with the original procedure.
Let's use the one of PSE mark authentication for the battery to be replaced!


コメントを残す