How to repair and disassemble when the iPad2 has a crackin, display defect, or line
IPad2 LCD panel replacement and disassembly procedure
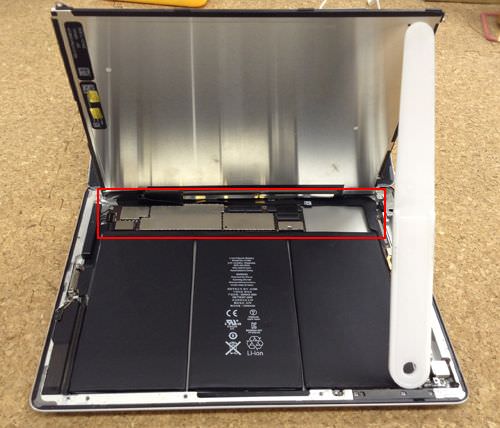
[STEP 1]
This decomposition method is an effective procedure if there is a crack or crack in the LCD panel of the ipad2, or if there is a malfunction in the display of the LCD panel.
The lcd glass change and the process of the ipad2 will be almost the same, but you can check it in the image, so please disassemble according to the procedure.
First of all, a strong double-sided tape is attached to the part filled with red, so I warm it with a dryer and float the double-sided tape.
If you have a heat gun, work efficiency will increase.
[STEP 2]
Next, we start to work on disassembling liquid crystal glass using suction cups and other methods.
Suction cups are sold at home centers and are mainly used by glass shops.
There are from large to small, but small things are enough for disassembling the iPad.
[STEP 3]
Decomposition of this liquid crystal glass is the most important for disassembling the iPad, so we will work carefully.
Do you see that the glass is farther than the main body?
It is the momentum that I want to remove at once as it is, but I will decompose carefully using a dryer, heat gun, etc.
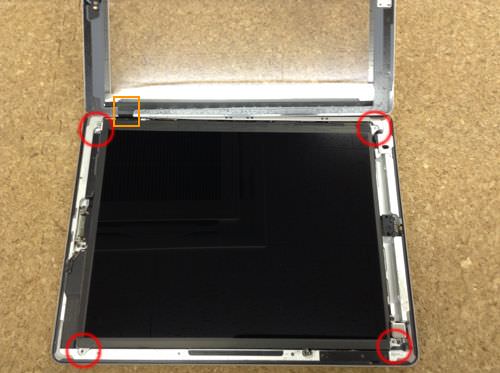
[STEP 4]
The liquid crystal glass has come off the main body, but the cable (orange part) connecting the liquid crystal glass to the ipad body is still attached.
If you remove the liquid crystal glass forcibly in the process of removing it, the cable part will be cut off, so when removing the cable surface, it will work carefully.
In addition, wifi part and the cable of the volume switch may be involved in the work of removing the double-sided tape, so when you break down the liquid crystal glass, I think that it is a good way to check by looking into the inside and off a little.
The lcd glass on the surface is connected to the cable under the liquid crystal panel, and the cable cannot be removed unless the liquid crystal panel is lifted.
The red circle part becomes the mounting screw of the liquid crystal panel, so remove all.
[STEP 5]
It is removed in the same direction as the liquid crystal glass.
The red part becomes the motherboard called the iPad, and the cable of the liquid crystal panel is connected here as well as the liquid crystal glass.
The cable of the liquid crystal panel is connected to the side of the liquid crystal glass.
[STEP 6]
The orange part becomes the connection part of the LIQUID PANEL, but remove the battery first before removing it.
There is a screw in the red circle part, but it is a mechanism that is connected to the battery by closing the screw.
You can remove the cable from the LCD panel by removing the screw and pulling out the lcd cable (orange) while away from the battery below.
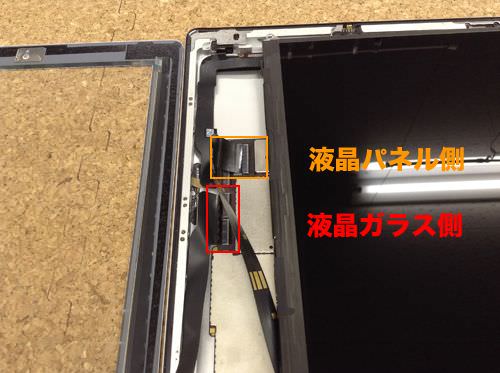
[STEP 7]
It is an image from a different angle.
The silver plate becomes the motherboard of the iPad2, from which the signal is sent to each part.
Remove the orange part this time.
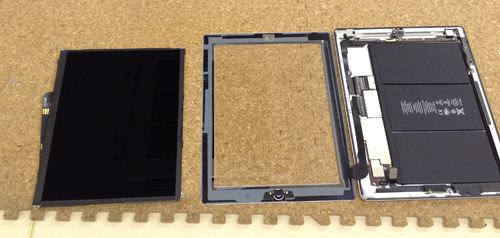
[STEP 8]
This concludes the decomposition procedure for the LCD panel.
The original steps will be reassembled and completed.

 IPad2 LCD panel replacement and disassembly procedure
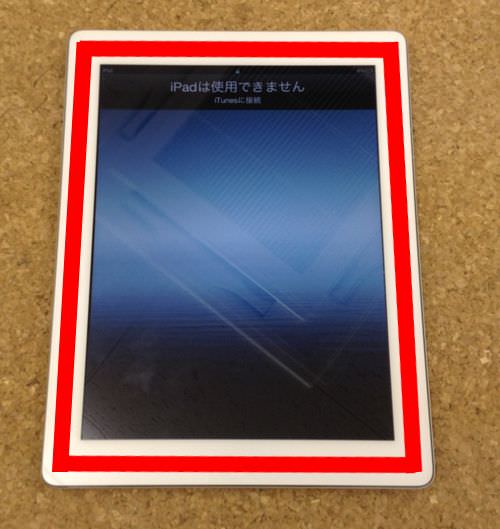
 This decomposition method is an effective procedure if there is a crack or crack in the LCD panel of the ipad2, or if there is a malfunction in the display of the LCD panel.
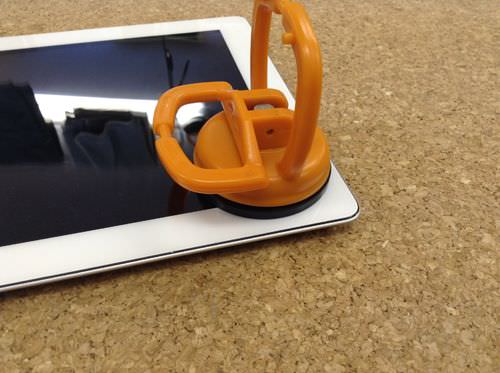
 Next, we start to work on disassembling liquid crystal glass using suction cups and other methods.
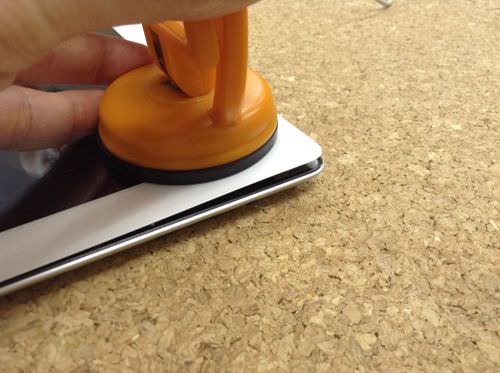
 It is removed in the same direction as the liquid crystal glass.
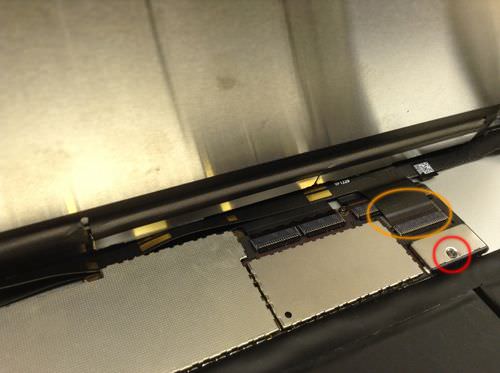
 This concludes the decomposition procedure for the LCD panel.

コメントを残す