How to repair and disassemble iPad 2 LCD cracking and touch panel replacement
The iPad 2 has become a long time ago now, but there are a lot of people who are still used now when looking at the whole country.
I think that cost-effectiveness is bad judging from the year when i make a repair request to a manufacturer or a consumer electronics retailer, but it is a fact that it has become a model that can be fixed at a fairly cheap price if I can repair it by myself.
In order to purchase a touch panel called a digitizer for around 2000 yen, it is better to think that the majority of the cost of more than 10,000 yen at the repair shop is labor.
When you change the glass of the iPad 2 for the first time (touch panel replacement), it takes at least two hours, and even if you are quite quick to repair it, you can't change the glass in 10 minutes or so unlike the iPhone repair.
The cost of replacing the iPad 2 LCD with Apple was 21800 yen!
Of course, when it comes to manufacturer repair, data erasure seems to be basic, so you have to back up your data yourself when you request an iPad repair.
There are advantages and disadvantages to repair by yourself, so please start disassembly repair after thinking carefully!
lcd glass replacement and decomposition procedure for iPad2
- [iPad 2 LCD glass replacement, repair method STEP 1]
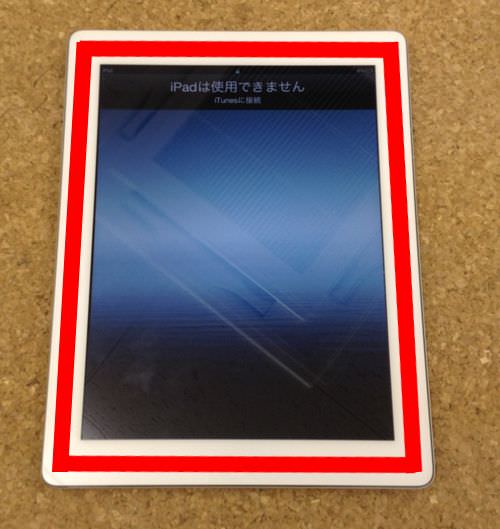
- This decomposition method is an effective procedure if the liquid crystal glass (touch panel) of the ipad2 has cracks or cracks.
In the image, the liquid crystal crack is not done for the reference photograph, but the flow of the repair is the same even if the screen is not cracked.
Please note that you will not be able to return after disassembling in a cracked state.
The touch panel is not stopped by a screw, but is all fixed with only double-sided tape.
It will be difficult to remove without tools, so let's start disassembling after aligning the special tool!
First of all, a strong double-sided tape is attached to the part filled with red, so I warm it with a dryer and float the double-sided tape.
If you have a heat gun, the work efficiency will increase considerably.
- [iPad 2 LCD glass replacement, repair method STEP 2]
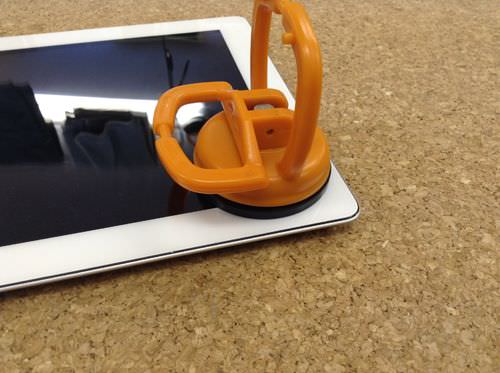
- Next, we start to work on disassembling liquid crystal glass using suction cups and other methods.
Suction cups are sold at home centers, but they are mainly used by glass shops.
There are small things from large ones, but only small ones are enough for disassembling the iPad.
If there is no suction cup, the thin tool at the tip will be inserted into the gap between the glass and the main body to peel off the touch panel.
Since the suction cup cannot be used when the liquid crystal is cracked, it is necessary to work to peel off steadily with a heat gun and a tool.
- [iPad 2 LCD glass replacement, repair method STEP 3]
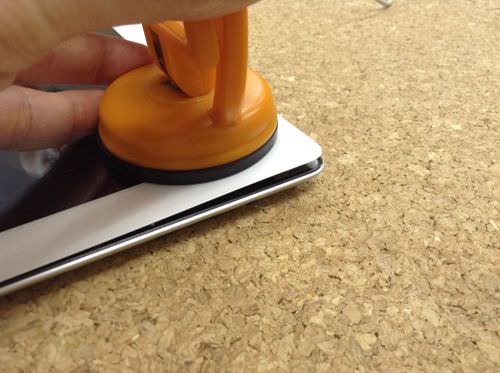
- Decomposition of this liquid crystal glass is the most important for disassembling the iPad, so we will work carefully.
Do you see that the glass is farther than the main body?
It is the momentum that I want to remove at once as it is, but I will decompose carefully using a dryer, heat gun, etc.
If the glass has already been broken in the bakibaki, the only way to peel off the glass over time is to proceed with the work patiently.
- [iPad 2 LCD glass replacement, repair method STEP 4]
- The liquid crystal glass has come off the main body, but the cable (orange part) connecting the liquid crystal glass to the iPad body is still attached.
In the image, the home button is on the left.
If you remove the liquid crystal glass forcibly in the process of removing it, the cable part will be cut off, so when removing the cable surface, it will work carefully.
In addition, wifi part and the cable of the volume switch may be involved in the work of removing the double-sided tape, so when you break down the liquid crystal glass, I think that it is a good way to check by looking into the inside and off a little.
It seems to be easy to peel off the touch panel so far, but please think that you will spend 80% of the total time in this work.
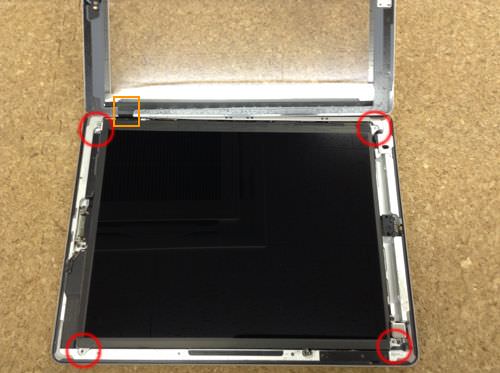
The lcd glass on the surface is connected to the cable under the liquid crystal panel, and the cable cannot be removed unless the liquid crystal panel is lifted.
Let's remove all because the red circle part becomes the mounting screw of the liquid crystal panel.
- [iPad 2 LCD glass replacement, repair method STEP 5]
- It is possible to lift the liquid crystal panel if it is possible to remove the four screws of the previous.
In the image, it is a state that woke up from the front to the back.(It is removed in the same direction as the liquid crystal glass.))
The red part becomes the logic board called the iPad, and the cable of the liquid crystal glass is connected here.
Logic board has become the most important part in the iPad, but if you damage it by any chance, the power will not turn on, becareful to handle it because it will become severe, such as the screen does not appear.
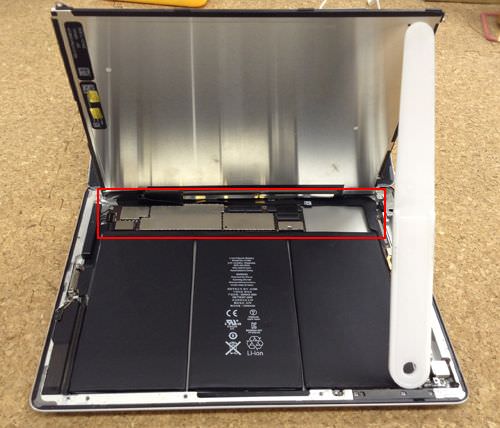
- [iPad 2 LCD glass replacement, repair method STEP 6]

- The orange part becomes the connection part of the liquid crystal glass, but remove the battery first before removing it.
There is a screw in the red circle part, but the battery and the logic board are connected by closing the screw, so first remove the screw.
It is efficient to put a thin pick between the battery and the logic board.
The cable (orange part) of the touch panel is connected to two connectors.
If you try to pull the tool up to the bottom of the black nail of the connector, the black nail part will rise to 90 degrees.
If you cause two claws and then slide the cable on the touch panel, you will be able to pull out the cable.
- [iPad 2 LCD glass replacement, repair method STEP 7]
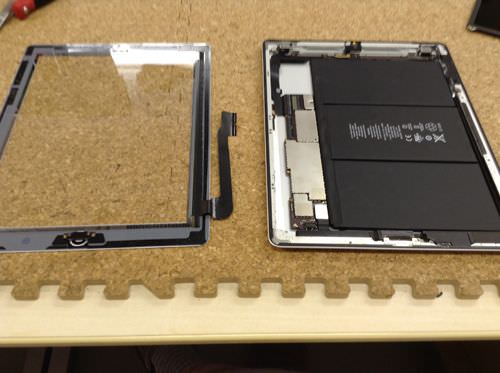
- I was able to take out only the glass of the liquid crystal from the iPad body.
After that, I will replace the newly prepared touch panel and reassemble it with the original procedure, but I think that I will probably have a hard time putting the touch panel.
Because the glass floats later only with double-sided tape, it is recommended because it becomes considerably powerful if the bond is applied on the tape.
I've tried various bonds so far, but Scotch glue was the best match.
The system that hardens immediately, such as Aron Alpha, is not recommended because it will float later when the iPad is heated.
Until the adhesive is completely cured, the adhesive effect increases considerably if you use laundry scissors and clamps, but as a guide, it is to leave it for one day after bonding.


コメントを残す