iPadAir LCD glass replacement and decomposition procedure
[iPadAir Glass Replacement STEP 1]
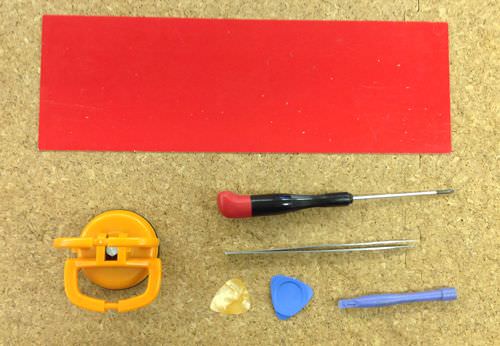
This is the basic tool used for the glass cracking of the iPadAir.
Even if there is no specialized thing such as a pick, it is possible to substitute it with a spatula.
Because the red sheet is a magnet type, it is useful for preventing the loss of screws, but please prepare each one because it is only the thing which can be obtained at 100 yen shop.
The tools in the image are small, but other than these tools, heat guns are very efficient.
[iPadAir Glass Replacement STEP 2]
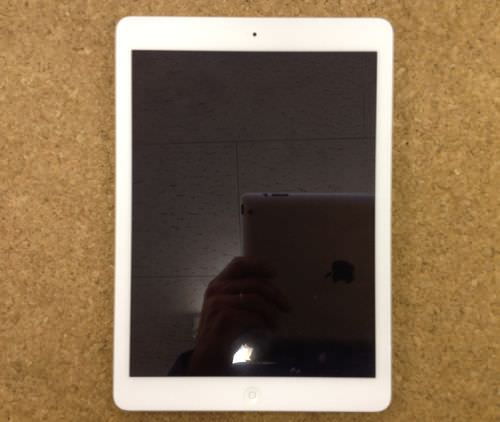
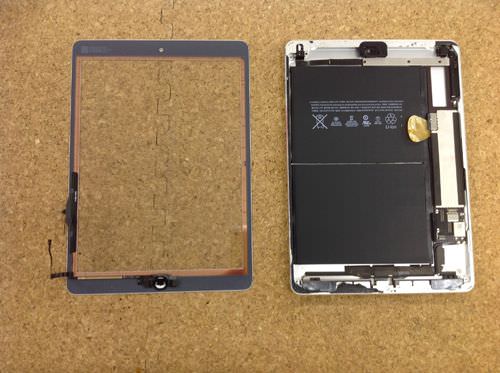
The iPadAir decomposition started with the LCD glass removed, which is true for all iPads on sale at the moment.
When it comes to iPadAir2, the front panel and the internal monitor are all over the area, so the process changes slightly, but the process itself is the same as removing the screen.
In addition, the glass is fixed only with strong double-sided tape, and no screws are used.
Peeling off strong double-sided tape is key, but this work accounts for 70% of the decomposition.
First of all, heat is applied to one lap of the white part of the glass surface and the internal double-sided tape is softened, but if you have a heat gun, add heat little by little.
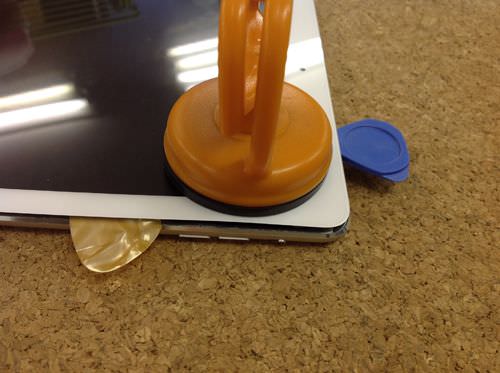
[iPadAir Glass Replacement STEP 3]
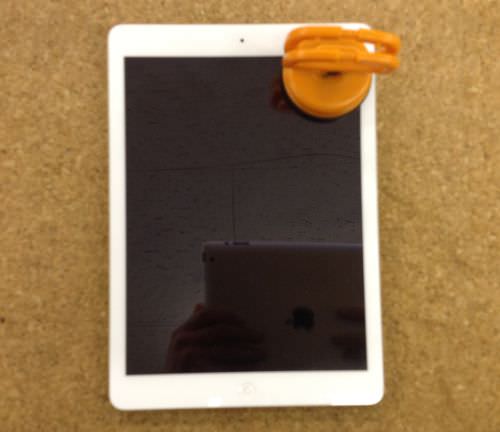
The glass side of this iPadAir is not broken, but in this case, it will be very efficient to use a (suction cup) tool such as the image.
This tool cannot be used if the glass has cracks or cracks even a little.
If the glass is broken, it is necessary to peel it off over time, so we will use iron spatula, spatula, tweezers, etc.
In addition, let's peel off from the camera side to the bottom instead of the home button side though it is the direction to peel off the liquid crystal.
[iPadAir Glass Replacement STEP 4]
If you put a pick etc. in the part where the glass floated even a little, the work efficiency will be improved.
It is most important to take the time to peel off slowly, but if you try to peel it off forcibly, you may break the liquid crystal on the way, so be careful.
In addition, it is easier to remove the glass by softening the double-sided tape around the liquid crystal, but if you do not put some tools in place, you may end up starting over from scratch.
So, when it floats a little, the work of inserting the tool is done around the screen.
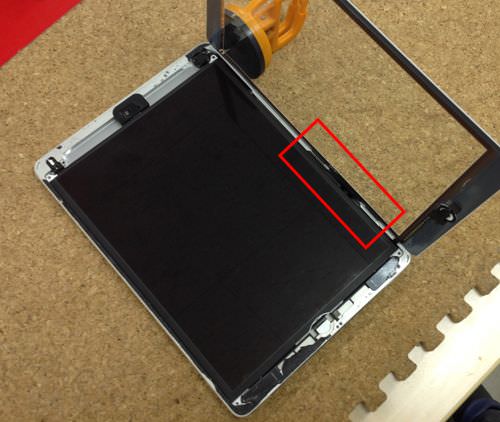
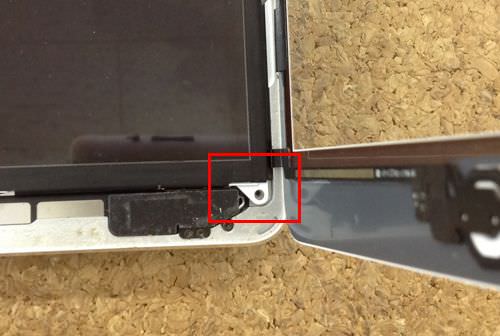
[iPadAir Glass Replacement STEP 5]
It may feel like it's peeling off easily, but if you're new to it, it will take more than an hour to get to this state.
The cable of the liquid crystal glass is connected to the logic board side in the red frame part on the right side, so be careful not to break it.
If you can peel off the glass overall, slowly lower it to the right side as it is.
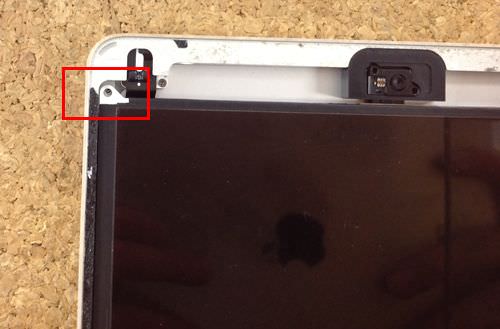
[iPadAir Glass Replacement STEP 6]
The cable of the liquid crystal glass is connected to the logic board, but the cable part cannot be removed unless the liquid crystal panel is removed, so the liquid crystal panel is removed first.
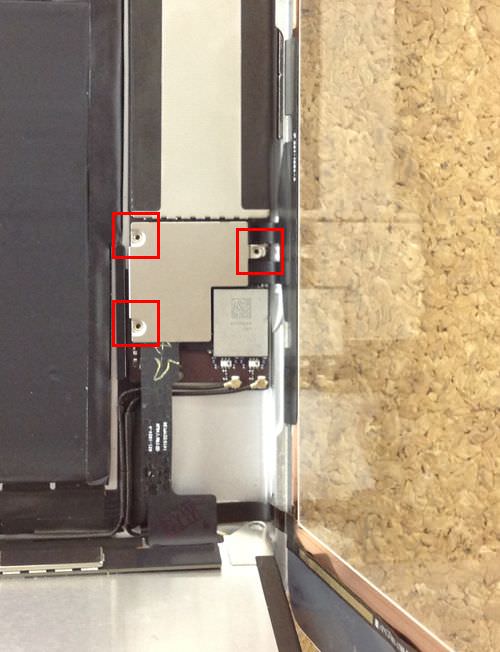
There are screws in the red frame part, so there are similar screws on the top, bottom, left and right, so let's remove all.
The image is in the upper left toward, but you can remove everything with a Phillips screwdriver.
This is the first time to remove the screw, but please keep it so as not to lose it because a large amount of screws will be removed after this work.
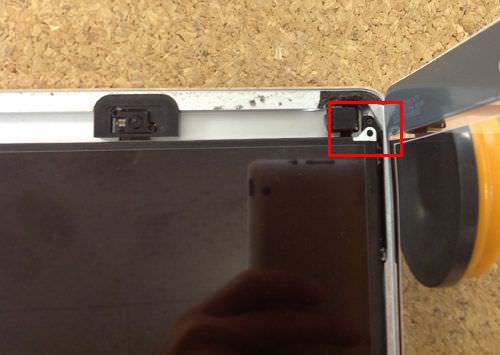
[iPadAir Glass Replacement STEP 7]
This part becomes the screw of the upper right, but you can confirm that there is a camera nearby.
This part will be replaced if the camera breaks down because the camera exchange is introduced in other processes.
[iPadAir Glass Replacement STEP 8]
This part will be in the lower right, but there is a home button cable and Wifi cable nearby.
Be careful not to break it.
[iPadAir Glass Replacement STEP 9]
Finally, I think that I was able to remove all four screws that secure the liquid crystal panel if I could remove the screw on the lower left.
Since it is possible to move the LIQUID PANEL with this, i will try to wake up from the camera direction to the home button side.
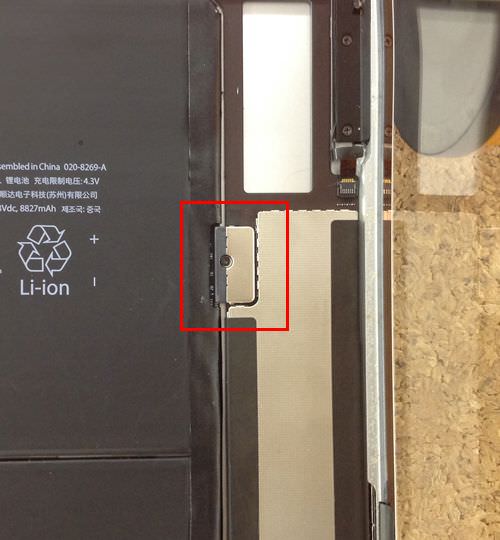
[iPadAir Glass Replacement STEP 10]
If all four screws of the liquid crystal panel can be removed, the panel itself can be moved.
Since the cable itself of the LCD panel is still connected to the logic board, the screw connecting the battery and the logic board is removed from the main body first.
The red frame part is the target position, but you can easily remove it with a Phillips screwdriver.
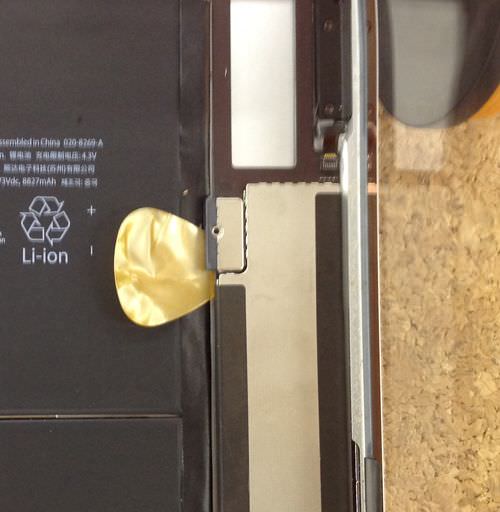
[iPadAir Glass Replacement STEP 11]
Because a gap can be done a little when the screw of the previous is removed, it will be sandwiched in a pick and a spatula like the image.
There is no electricity flowing through the iPadAir console.
Note that if you remove the cable of the liquid crystal glass or the cable of the liquid crystal panel without removing the battery first, it may be short-circuited.
[iPadAir Glass Replacement STEP 12]
From here, disconnect the cable from the lcd glass and the LCD panel.
Because there are three screws in the red frame part, all will be removed.
If it is possible to remove it, it will be able to remove each plate of iron if it lifts upward from the lower side.
[iPadAir Glass Replacement STEP 13]
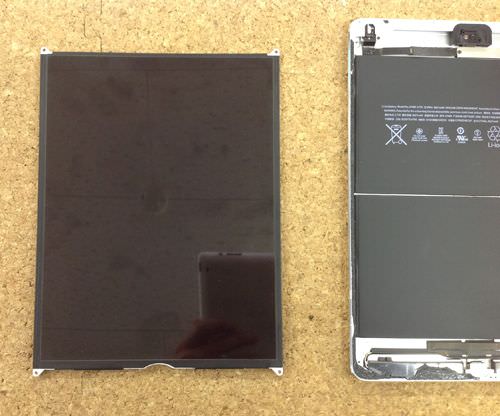
I was able to remove the LCD panel.
If there is a line on the screen, the screen is not reflected, or there is a display defect, it will usually be improved by replacing this part.
[iPadAir Glass Replacement STEP 14]
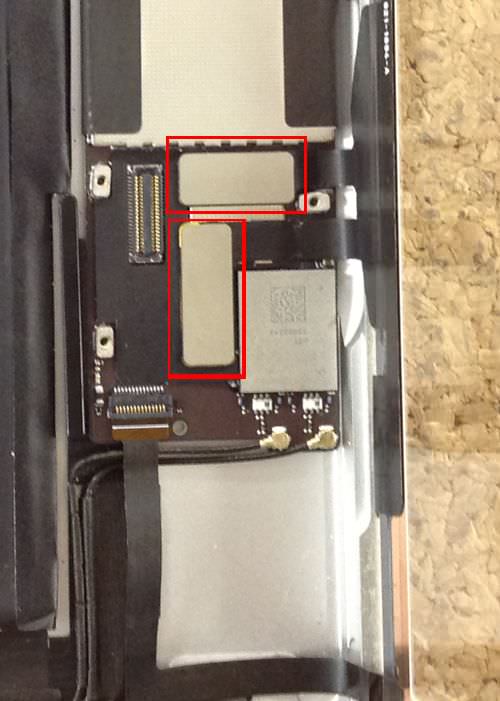
Next, disconnect the cable from the liquid crystal glass.
I disconnected the cable of the liquid crystal panel in STEP12 above, but the cable on the liquid crystal glass side is hidden under it.
It is possible to remove it if it is made to lift from the bottom to the top in the same way, but remove two red frame parts.
Please remove it slowly because there is a possibility that it will damage the base side if you remove it forcibly.
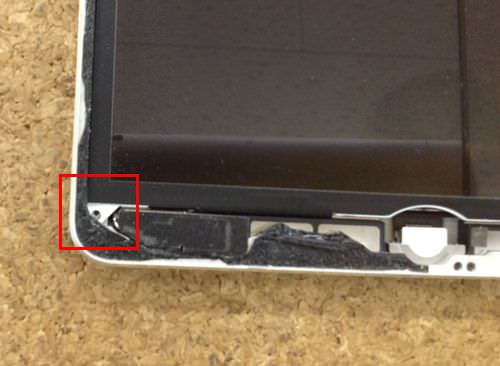
[iPadAir Glass Replacement STEP 15]
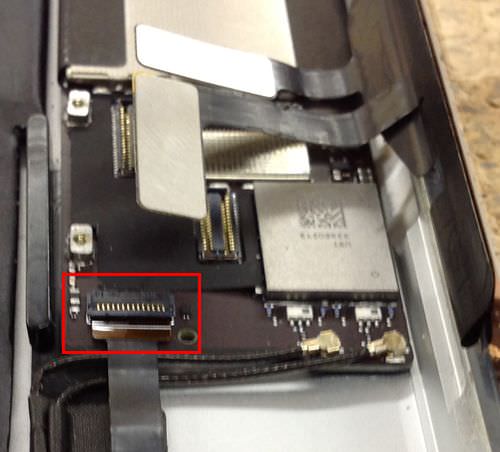
Because the home button is also set in the liquid crystal glass, the red frame part becomes the cable of the home button.
In the image, it is possible to pull out the cable by raising the black plastic on the upper side up.
In the image, the upper nail comes to lift, but since it rises only from 90 degrees to about 100 degrees, let's not cause any more.
If this nail part is broken, unnecessary process will increase if it is pressed by force with Kapton tape later.
[iPadAir Glass Replacement STEP 16]
It was able to separate only glass completely from the iPadAir body.
After that, if you replace it with the glass of the newly prepared iPadAir, the repair will be completed, so just incorporate it according to the original procedure.
General-purpose products have also been released in various general-purpose products in the glass prepared for replacement, but if you prepare parts without the home button, it is necessary to port to the panel to be newly installed than the original glass.
The home button needs to be ported not only to the button but also to the cable, so please do not disconnect it.


コメントを残す