iPadAir camera does not start, how to repair, disassemble failure, sandstorm
iPadAir rear camera, front camera replacement and disassembly procedure
[iPadAir Camera Replacement STEP 1]
We will publish the procedure for replacing the iPadAir camera.
If the camera freezes or falls when you start it, you may need to replace the camera.
If restarting the iPadAir doesn't improve, it's better to suspect a hardware failure, not the software side.
When replacing the rear camera, it is necessary to remove the liquid crystal, but until the middle process, it will be the same as replacing the liquid crystal glass and the liquid crystal panel, so please refer to that.
The rear camera and the front camera will be different parts, but the decomposition will be almost the same place, so we will publish the decomposition method at the same time!
[iPadAir Camera Replacement STEP 2]
Decomposition will start from the state where the liquid crystal glass and the liquid crystal panel are removed, but the decomposition from here is okay if there is only a Phillips screwdriver and tweezers.
[iPadAir Camera Replacement STEP 3]
The camera on the upper left of the iron plate is the rear camera, and the small black one in the upper right is the front camera.
I would like to remove both cameras because it is almost the same as the decomposition process.
First of all, the iron plate just below the camera is removed, but because there is a screw in the red frame part, all three places are removed.
When the screw can be removed, the iron plate is made to be able to be removed easily.
[iPadAir Camera Replacement STEP 4]
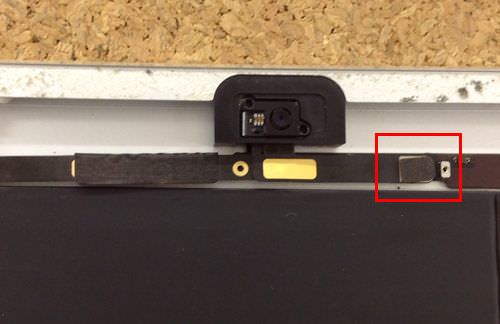
Under the plate, there is a hidden part connecting the motherboard and camera connectors.
You can easily remove the red-framed connector by lifting it from the bottom to the top.
[iPadAir Camera Replacement STEP 5]
There are more connectors under the connector i just had, so let's remove it together!
By the way, this connector becomes the connector of the headphone jack, but if you do not remove it, the rear camera itself will be removed because it cannot be removed.
[iPadAir Camera Replacement STEP 6]
Then, the red frame part comes into view, but this has become the connector of the rear chemera.
You can easily remove the removal method by lifting it from the bottom to the top.
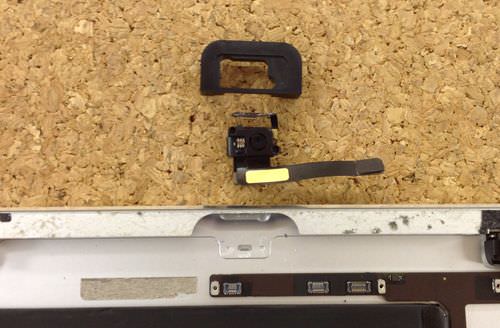
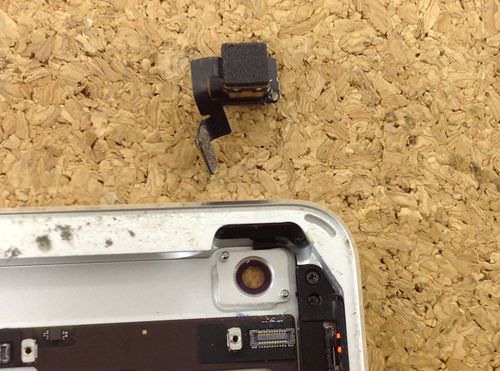
[iPadAir Camera Replacement STEP 7]
The rear camera could be removed.
If the rear camera physically fails, this part replacement may improve.
[iPadAir Camera Replacement STEP 8]
Back to the first image, the rear camera and the front camera can be removed first.
If anything, the front camera is easier to replace, but remove the iron plate as before.
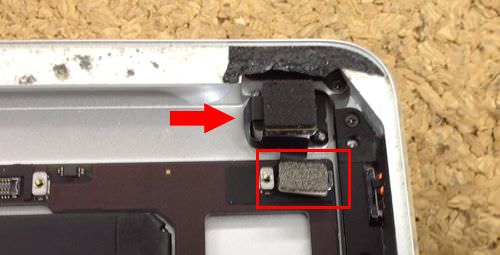
[iPadAir Camera Replacement STEP 9]
Since only the connector is connected to the red frame part, you can easily remove the connector by lifting the connector from the bottom to the top.
Since the front camera itself is fixed to the main body with a pedestal, it can be removed if it is made to twist from the bottom to the top like the connector of the previous.
[iPadAir Camera Replacement STEP 10]
The front camera could be removed.
There are a lot of fine parts on the iPadAir, but there is an impression that does not break so much unless you let it fall.
However, even if you start it, the camera freezes, the camera falls immediately, and if the condition becomes a sandstorm, the part itself may be out of order, so there is a high possibility that it will need to disassemble like this time.

 iPadAir rear camera, front camera replacement and disassembly procedure
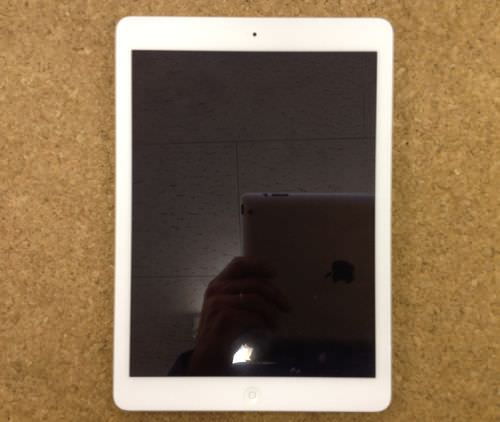
 We will publish the procedure for replacing the iPadAir camera.
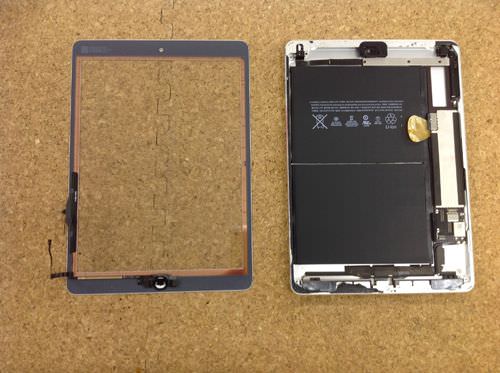
 Decomposition will start from the state where the liquid crystal glass and the liquid crystal panel are removed, but the decomposition from here is okay if there is only a Phillips screwdriver and tweezers.
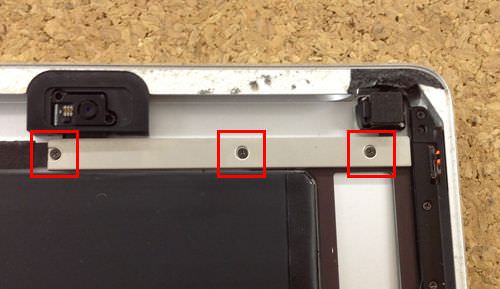
 Under the plate, there is a hidden part connecting the motherboard and camera connectors.
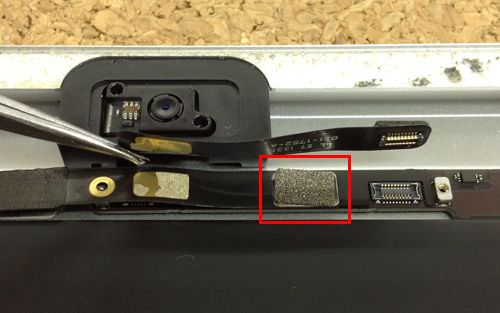
 There are more connectors under the connector i just had, so let's remove it together!
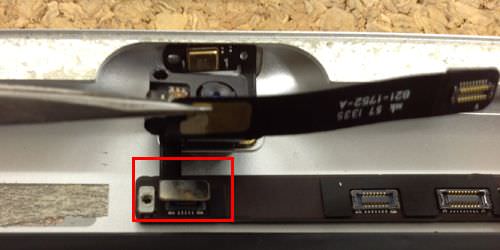


コメントを残す