IPad Mini 2 Retina cannot be charged, battery degradation, expansion repair method, disassembly method
Will the data disappear if I change the battery?
The data will not disappear just by replacing the battery.
Since the data of the iPad is recorded in the part called NAND on the logic board, the data is not lost just by replacing the battery.
However, the data is not lost only if you repair it yourself or repair it at a non-regular store.
If you want to replace the battery with data, you should avoid manufacturer repairs because it will almost 100% of the data initialization when you ask Apple or an authorized service provider.
In addition, if you can take a backup in iTunes, etc., there is no problem with the manufacturer repair, but you can not take the backup, if you feel troublesome please consult a non-regular store.
The advantage of non-regular stores is that most of the repairs that are not related to the data will proceed with the data as it is.
If you can replace the battery by yourself with reference to the decomposition method below, you can use the iPad as it is with the data up to now.
However, it is safe to back up and remember how to back up in case of a failure that you do not know when it will happen.
If apple replaces the battery of the iPad Mini 2 Retina, it will cost 10800 yen.
battery replacement and disassembly procedures for iPad Mini Retina
- [iPad Mini 2 Retina Battery Replacement STEP 1]
- The battery replacement method of the iPad Mini Retina model will be released.
If the battery is bad, it will be an effective repair method, so please refer to it.
The tools used are heat guns, dryers, Phillips screwdrivers, suction cups, spatulas, etc.
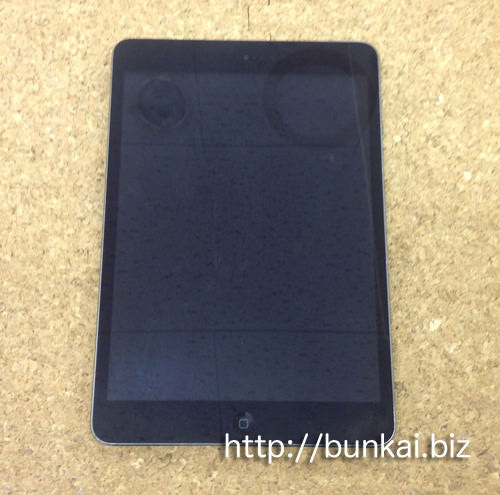
Now, I would like to break down the iPad Mini Retina model, but first I will heat the black glaze of the liquid crystal glass with a heat gun, a hair dryer, etc.
Liquid crystal glass is only fixed with strong double-sided tape, but applying heat softens the tape and makes it easier to peel off. - As can be said for all iPads on sale at the moment, the screen is fixed with a powerful double-sided tape on the main body side, so it will continue to do the same work even if it is not iPad Mini Retina.
-
- [iPad Mini 2 Retina Battery Replacement STEP 2]
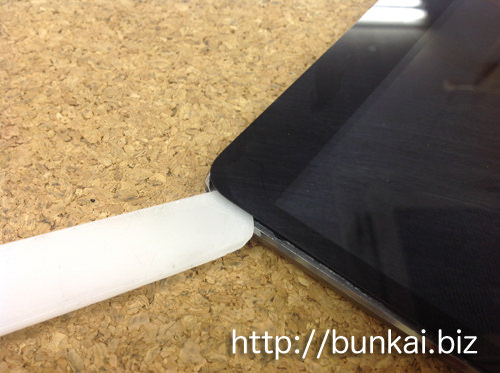
- It is possible to float like an image if you give heat and then twist it with a spatula, but you can work more easily by using a suction cup.
How to use suction cups
Using a suction cup, the most efficient method of disassembling is to insert a spatula into the open part. -
- [iPad Mini 2 Retina Battery Replacement STEP 3]

- When the liquid crystal glass is removed, it becomes the state of the image.
- [iPad Mini 2 Retina Battery Replacement STEP 4]

- The LCD panels are secured with a total of four screws, each with four screws.
- [iPad Mini 2 Retina Battery Replacement STEP 5]
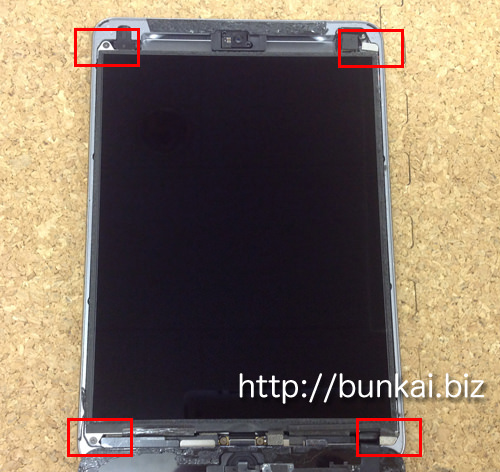
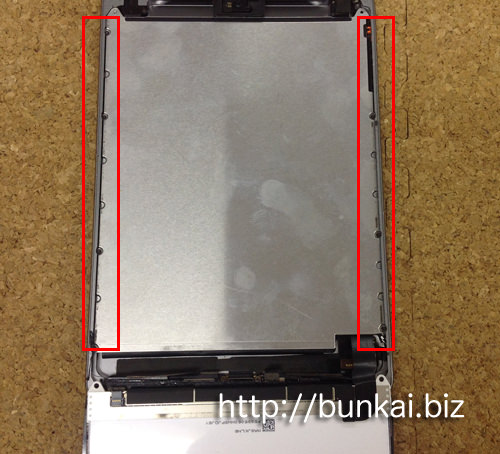
- The red frame part becomes all screws that secure the liquid crystal panel, so it will be removed.
A magnet is attached to the screw in the upper right and lower right, but please keep this magnet so as not to lose it.
- [iPad Mini 2 Retina Battery Replacement STEP 6]
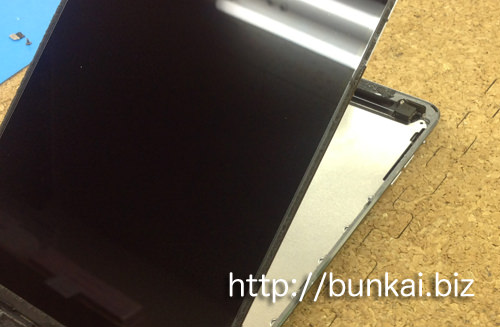
- If the previous screw can be removed, the LIQUID crystal panel can be caused.
There is a place with tape when causing the liquid crystal panel, but please work carefully because there is a risk that the liquid crystal will crack if you try to cause it forcibly without peeling off the tape.
- [iPad Mini 2 Retina Battery Replacement STEP 7]
- There is an iron plate under the LCD panel, but you can remove the plate by removing the screw son of the red frame.
- [iPad Mini 2 Retina Battery Replacement STEP 8]
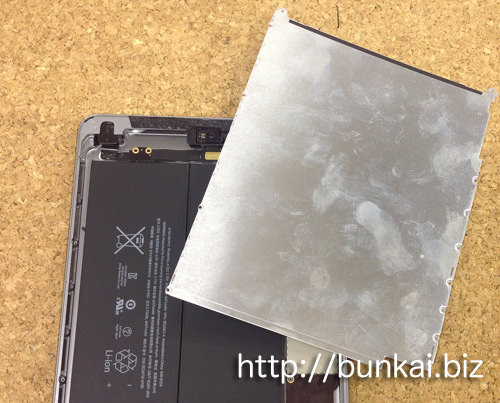
- The plate has been removed.
- [iPad Mini 2 Retina Battery Replacement STEP 9]
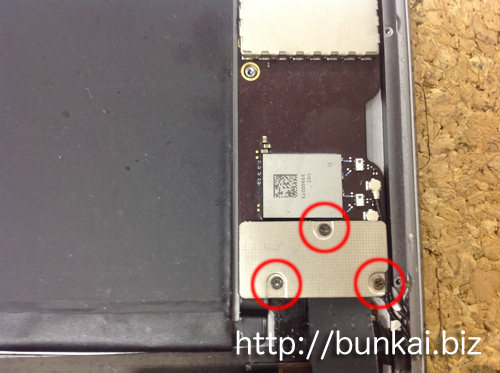
- The plate can be removed and there is a part of the image above in the lower right corner of the ipad body.
Remove all the red-circle screws and remove the plate.
- [iPad Mini 2 Retina Battery Replacement STEP 10]

- When the plate can be removed, it becomes the image above, but the place that is enclosed in the red frame part becomes the connection point of the battery.
On disassembling the iPad, remove the battery first.
If you do not remove the battery and disassemble it, there is a risk of shorting, and it may lead to failure of other places, so be sure to do so.
- [iPad Mini 2 Retina Battery Replacement STEP 11]
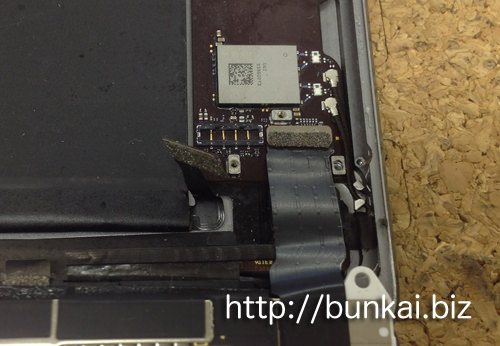
- The battery connection is disconnected.
The connector can be removed if it is raised from the bottom to the top.
- [iPad Mini 2 Retina Battery Replacement STEP 12]
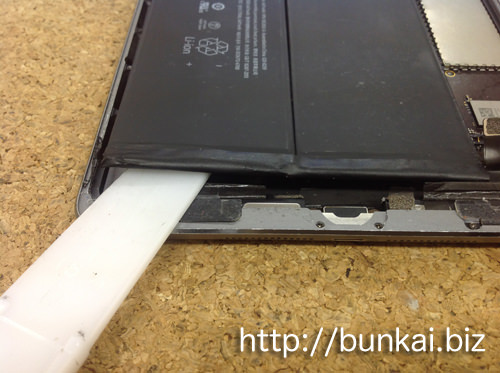
- The battery is a powerful double-sided tape (bond?) in addition to the connector the previous one.It is easy to disassemble by using a spatula such as an image because it is about the main body.
If you try to remove it forcibly, the battery may fail, so it is important to float it little by little.
If you can peel off the third place of the fourth place, you will be able to peel off by hand.
- [iPad Mini 2 Retina Battery Replacement STEP 13]
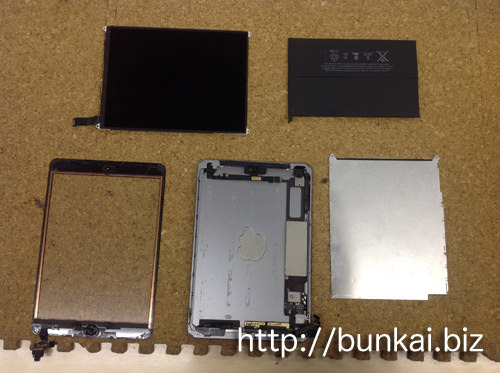
- It is an image that disassembled the iPad Mini 2 Retina to some extent.
Liquid crystal glass, LCD panel, battery will be removed, but it is necessary to remove various parts before removing the battery, so it is necessary to proceed with caution so as not to break those parts.
Unlike the battery replacement of the iPhone in the repair shop, it does not end in 10 minutes and 20 minutes, so it is safe to watch it for about 2 hours when disassembling the iPad for the first time.


コメントを残す