iPad Retina Battery Replacement, Motherboard Replacement, and Decomposition Procedures
[STEP 1]
It becomes a replacement repair method when replacing the battery of the iPad4. The sample iPad4 does not crack the liquid crystal, but depending on the cracking condition of the touch panel glass on the surface, the time and effort to disassemble varies greatly.
Please note that you will not be able to return after disassembling in a cracked state.
First of all, a strong double-sided tape is attached to the part filled with red, so I warm it with a dryer and float the double-sided tape.
If you have a heat gun, work efficiency will increase.
Please note that if it is too hot, burns and parts will deform or break due to heat.
Before you start working, leave the iPad shut down.
[STEP 2]
Next, we start to disassemble the liquid crystal panel using suction cups and other methods.
Suction cups are sold at home centers and are mainly used by glass shops.
There are from large to small, but small things are enough for disassembling the iPad.
When the touch panel glass on the surface is broken, it does not stick firmly, so the work becomes difficult and patience is necessary.
Also, be careful not to get hurt by broken glass.
[STEP 3]
Decomposition of this LCD panel is the most important for disassembling the iPad, so we will work carefully.
Do you see that the touch panel on the surface is farther than the main body?
It is the momentum that I want to remove at once as it is, but I will peel it off carefully little by little using a dryer, heat gun, etc.
We make a gap little by little, insert a pick, etc. into the gap, so that the glass does not stick again.
Please be careful not to insert the pick etc. deeply into the main body.Cables and parts may be damaged.
Because there is rubber between the touch panel and the main body of the surface, please be careful not to deform or cut the line.
[STEP 4]
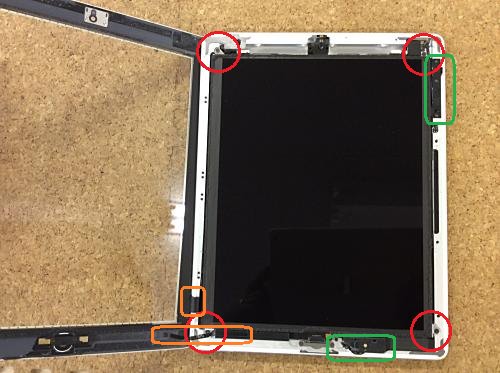
This is an image that has been peeled off the touch panel of the surface.The touch panel is still attached to the main body, and the cables are connected to the main body,
Please note that if you peel it off forcibly, it will cut off.
Because the cable of the film type is connected to the main body in the orange part (on the left side when the home button is down), it is necessary to be careful not to cut it.
Be careful not to break important parts on the edge of the case on the green area when you peel off the touch panel glass.
The part of the red circle is four screws that stop the liquid crystal panel, but it is good to put it in a part case that can be divided so as not to lose it because it is very small.
[STEP 5]
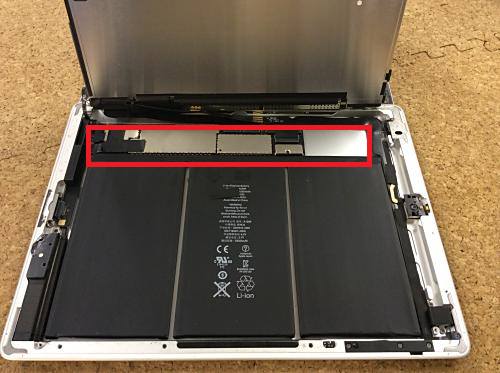
This is an image with the LCD panel removed.
The LCD panel also has a cable extension from the left side to the main unit, which is connected to the main base (motherboard) of the iPad4, which is surrounded in red.
The black one below is the battery.
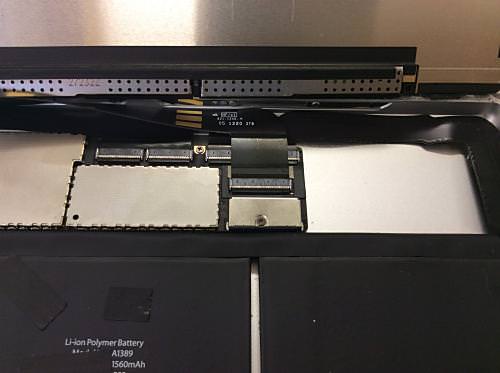
[STEP 6]
It is the part connected to the main base (motherboard) and each cable and battery.
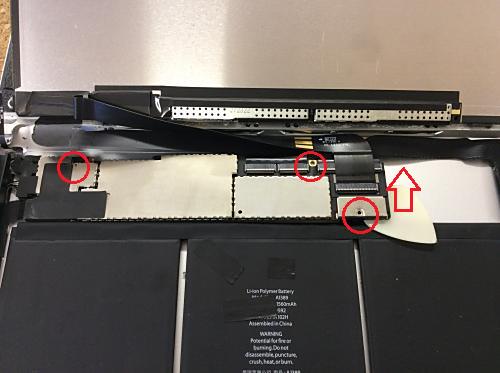
[STEP 7]
Remove the three red screws, float the main base (motherboard) slightly, release the battery and the base, and prevent picks and other areas from energizing.
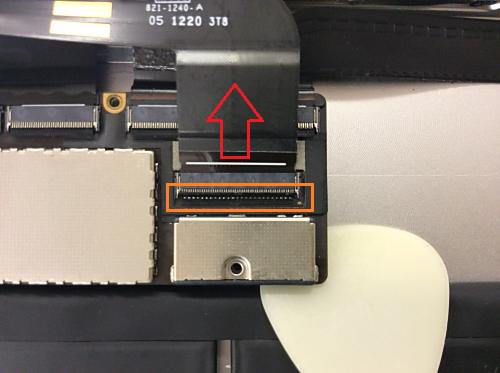
[STEP 8]
The connector part of the LCD panel cable is locked with a nail to prevent it from falling out easily.
Lift the black nails on top of the orange part to unlock and unplug the cable.
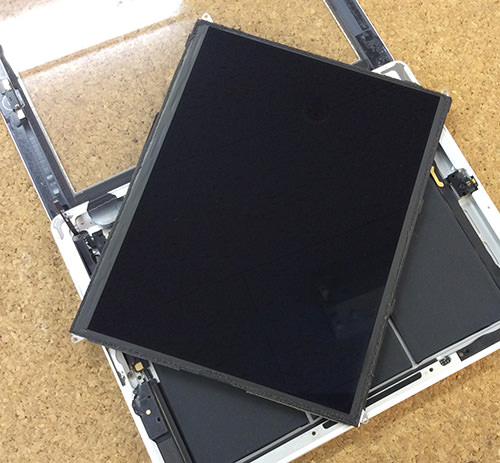
[STEP 9]
The cable may enter the gap between the case and the main base (motherboard), so if you remove it carefully, the LCD panel will come off.
The LCD panel is now removed.
[STEP 10]
The touch panel is connected to the main base (motherboard) with two wires.
Raise the two claws on the main base surrounded by orange and pull out the cable.
It is connected by two, and it works carefully because it is a hard wiring.
Be careful not to scratch or force it to fold.
[STEP 11]
There is wiring in the lower part, too.This is also small, but pull out the cable by raising the claws of the connector.
[STEP 12]
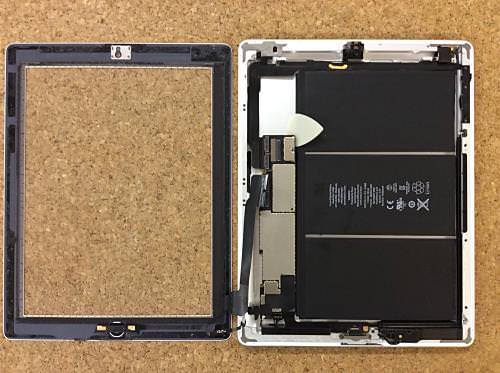
You can now remove the touch panel.
The LCD panel has been removed so that wiring is easy to see in the image.
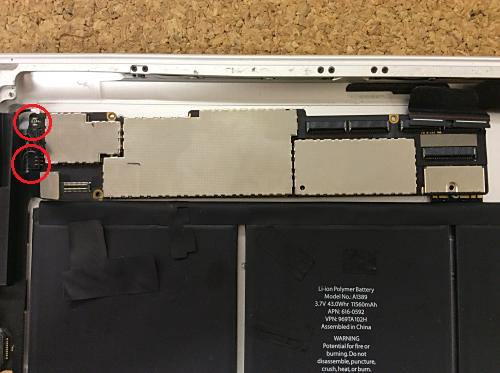
[STEP 13]
In addition to the wiring of the touch panel in the lower part of the main base (motherboard), two wires are connected.
Both wires are plugged into the motherboard from above, so carefully remove them up.
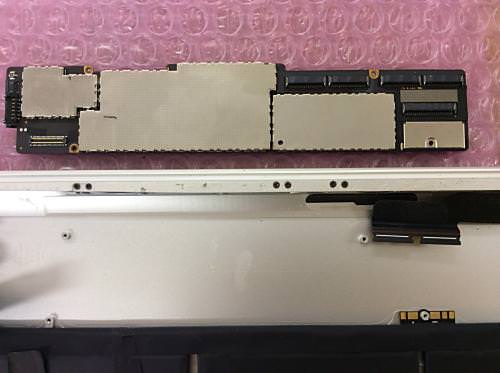
[STEP 14]
You can now remove the main base (motherboard).
[STEP 15]
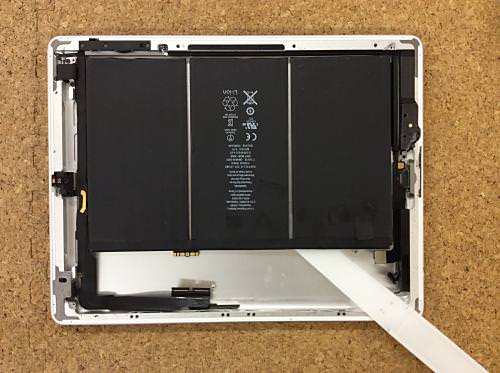
Then remove the battery.
Since the battery is glued to the case with double-sided tape, it will be peeled off by inserting a spatula.
It seems to be divided into three pieces, but it is all connected by wiring.
At this time, be careful not to force it into damaging the battery or lift it up to deform the battery.
[STEP 16]
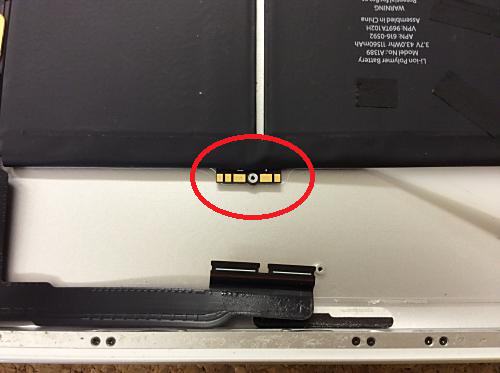
The part of the red circle becomes the battery terminal.
When removing the battery, short it or stop it so that it does not break, and remove the battery.
[STEP 16]
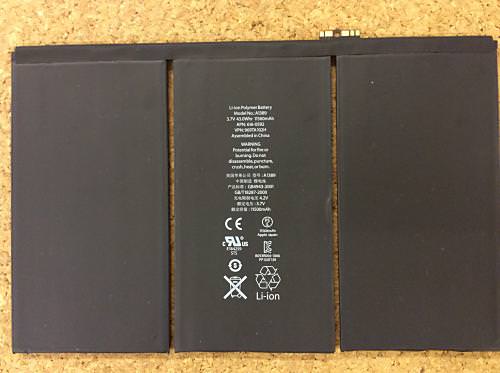
The battery has now been removed.
The battery is under all parts, so it is difficult because all parts must be removed, but please work carefully.


 iPad Retina Battery Replacement, Motherboard Replacement, and Decomposition Procedures
 It becomes a replacement repair method when replacing the battery of the iPad4. The sample iPad4 does not crack the liquid crystal, but depending on the cracking condition of the touch panel glass on the surface, the time and effort to disassemble varies greatly.
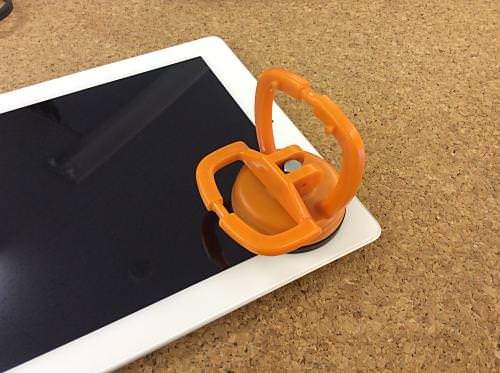
 Next, we start to disassemble the liquid crystal panel using suction cups and other methods.
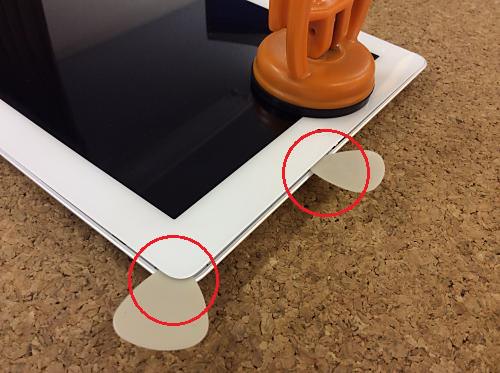
 The cable may enter the gap between the case and the main base (motherboard), so if you remove it carefully, the LCD panel will come off.
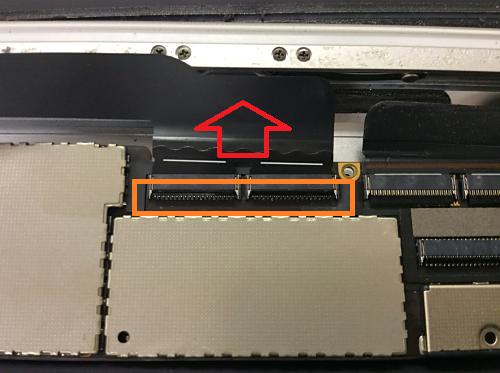


コメントを残す