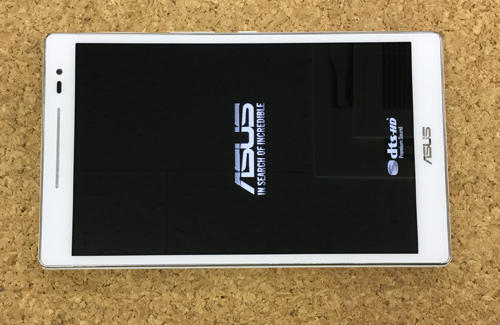
We have repaired the display failure of the Asus tablet Zenpad Z380KL!
Liquid crystal cracking due to fall, I think that you can use it as before by performing this decomposition if there is a display failure, so please refer to it.
The only tools we used were Phillips screwdrivers, iron spatulas and plastic spatulas.
You can buy any of them for about a few hundred yen, so please prepare them.
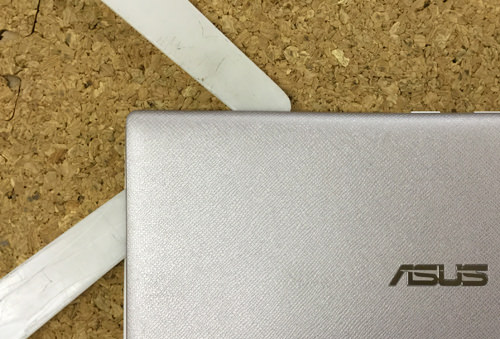
[ASUS ZenPad Z380KL LCD repair and disassembly method Step 1]
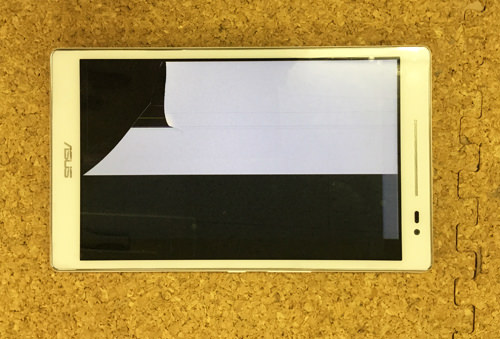
The following image is a state in which the liquid crystal cracked by dropping The Zenpad Z380KL, but this time I want to fix the liquid crystal crack.
There are various ways to exchange liquid crystal, but the following decomposition method is LCD assembly replacement (a set of touch panels and LCD panels).
[ASUS ZenPad Z380KL LCD repair and disassembly method Step 2]
We will continue to disassemble from this, but first we will remove the battery connector inside the main unit by turning off the power supply.
Z380KL does not find a screw in appearance, but the screw is hidden in the main body cover, and the main body is fixed with the screw.
Therefore, the main body cover is removed, but the plastic spatula is inserted into the M gap of the liquid crystal panel and the back panel as shown in the image, and it is made to break lightly.
[ASUS ZenPad Z380KL LCD repair and disassembly method Step 3]
I think that it is easy to work if you insert the spatula in that part because I think that it can confirm that it floated a little if i insert the spatula one place and make it a little bit stiff.
If there is nothing to insert, it is possible to substitute it with a plastic card, but in the image we use a plastic spatula.
[ASUS ZenPad Z380KL LCD repair and disassembly method Step 4]
If you can remove the back cover, you can confirm that there is a large amount of screws on the back of the main body.
There are screws in the red circle, but try to remove all visible screws in the part that is not enclosed in the red circle.
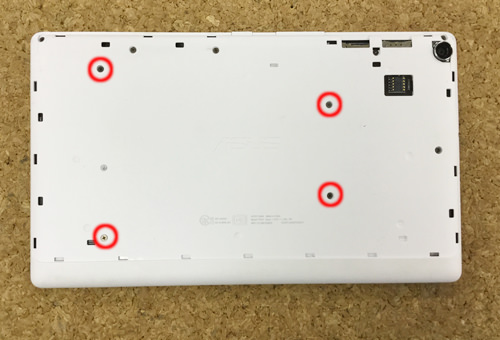
[ASUS ZenPad Z380KL LCD repair and disassembly method Step 5]
I think that I was able to remove the back cover easily when All screws can be removed, but from here it becomes the production of decomposition.
Please be careful not to apply iron products (drivers) because it is still energized.
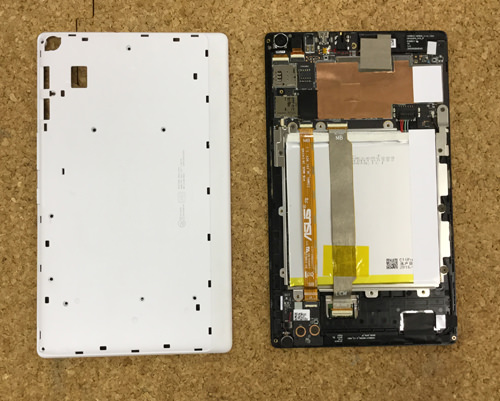
[ASUS ZenPad Z380KL LCD repair and disassembly method Step 6]
Unlike a personal computer, the structure is made easily, so it is a good idea to grasp the position of the screws instead of disassembling them suddenly.
When the part of the camera is "up", it is a simple making of the top (camera side), the middle (battery), and the bottom.
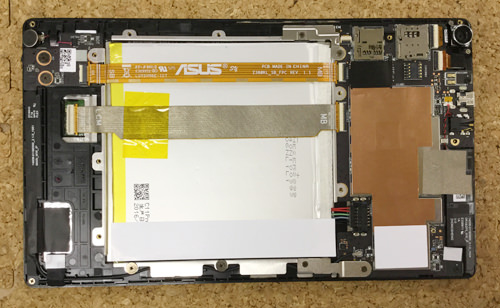
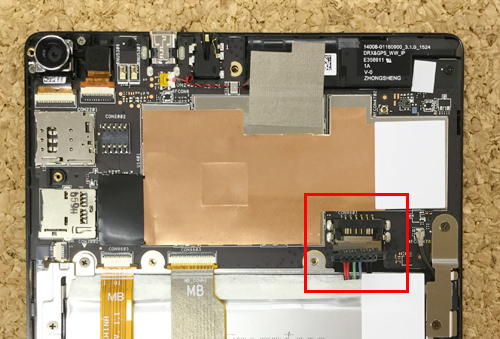
[ASUS ZenPad Z380KL LCD repair and disassembly method Step 7]
The battery connector is connected to the "top" base.
The part that is enclosed in red waku becomes the connection point, but it is possible to remove the connector if the tool is used and it is lifted from the bottom to the top.
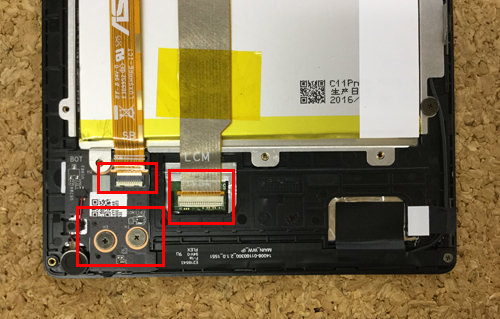
[ASUS ZenPad Z380KL LCD repair and disassembly method Step 8]
Because the structure is simple, it may be disassembled from anywhere, but in the image it becomes the lower side.
Two red frames have connectors and one screws, but let's remove the Phillips screwdriver on the screw part.
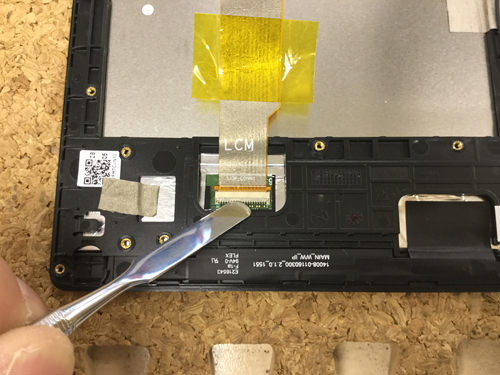
[ASUS ZenPad Z380KL LCD repair and disassembly method Step 9]
It is how to remove the cable, but instead of pulling it out suddenly, it causes a plastic claw and pulls it out.
Please note that if the cable is damaged or damaged, it may become defective in the table after the LCD is replaced, or the operation of the touch may become strange.
[ASUS ZenPad Z380KL LCD repair and disassembly method Step 10]
All parts were assembled to their original state and powered on, but now they appear normally.
Unlike the iPad, there aren't many shops that repair Zenpad, so if you can see how to disassemble this time, please try it!