If the screen of ASUS UX310U is cracked, cracked, display defective, and there is a line, a liquid crystal panel replacement is required, but I think that it is possible to refer to it because the decomposition method is open to the public.
[ASUS UX310U LCD replacement 1]
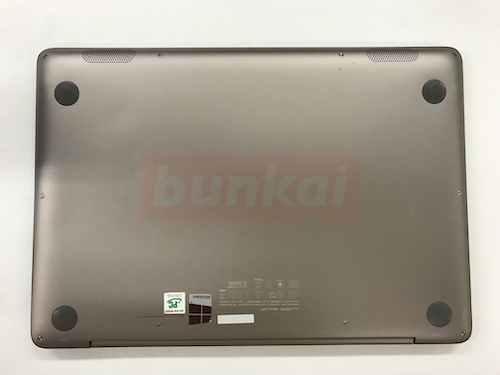
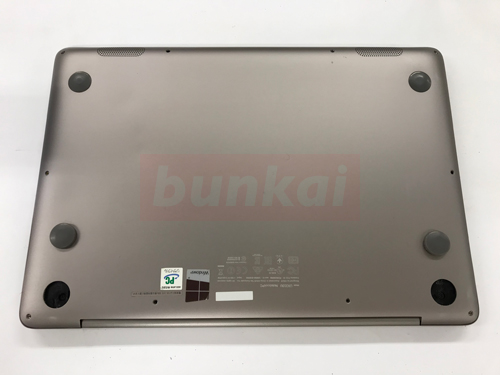
First of all, the work of removing the battery by turning the main unit over is the first priority, but because the battery of the UX310U is built-in, it is necessary to disassemble because it can not be easily removed.
[ASUS UX310U LCD replacement 2]
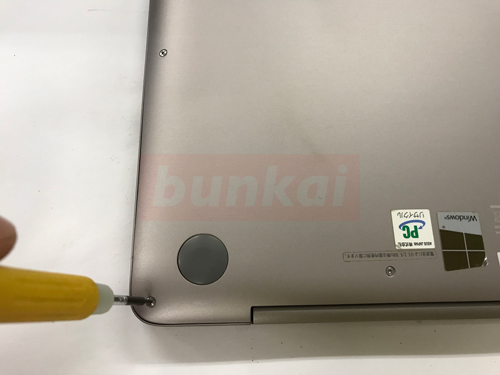
First of all, let's remove all the screws of the visible part.
It is not possible to remove it with a Phillips screwdriver, and a Torx screwdriver is required.
[ASUS UX310U LCD replacement 3]
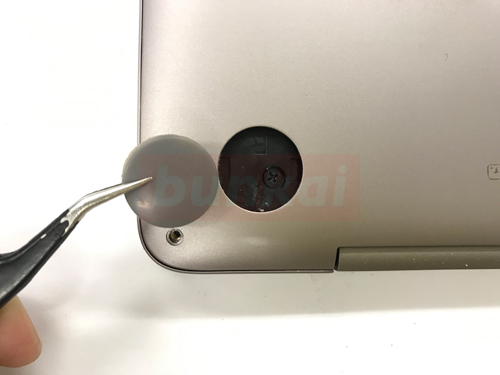
There is a rubber foot of the main body near the back of the hinge connecting the liquid crystal and the main body, but please do not forget to remove it because there is a screw when the rubber foot is removed.
There are four rubber feet in total, but there are two parts where the screws are hidden.
[ASUS UX310U LCD replacement 4]
All screws on the back of the main body could be removed.
[ASUS UX310U LCD replacement 5]
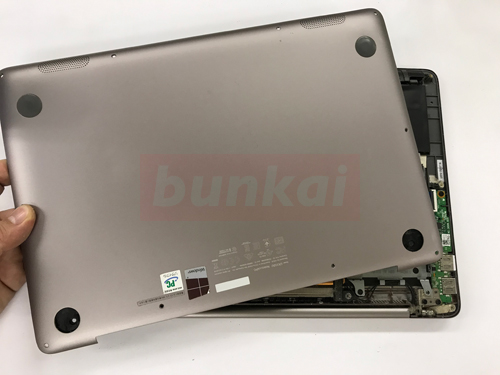
The back cover can be easily removed by hand.
[ASUS UX310U LCD replacement 6]
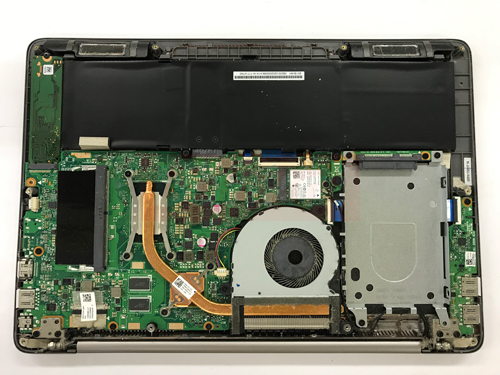
Since the battery is now visible, I will remove the battery first.
[ASUS UX310U LCD replacement 7]
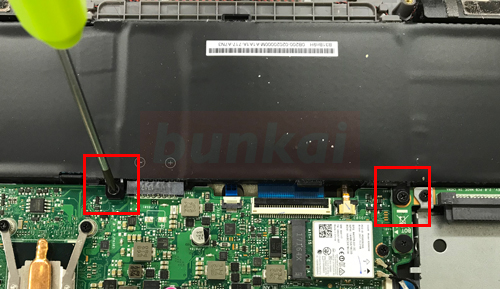
Since the battery is secured by a screw in the main body, let's remove the screw in the red frame part.
[ASUS UX310U LCD replacement 8]
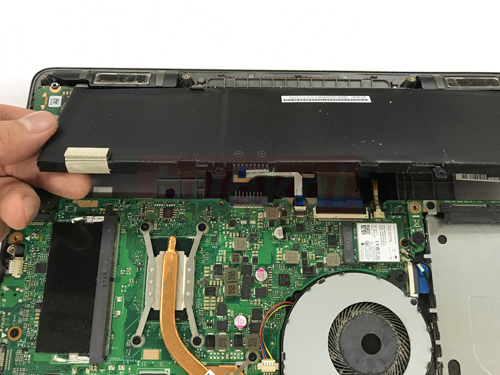
You can remove the battery if you try to lift it up as it is.
[ASUS UX310U LCD replacement 9]
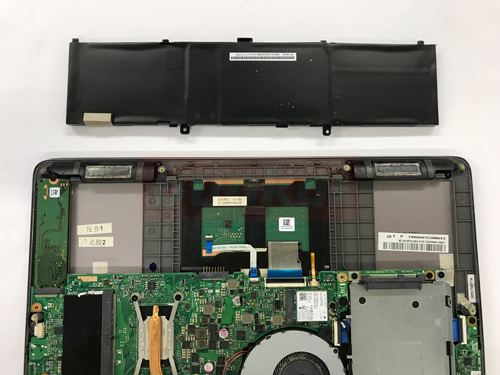
The battery could be removed.
[ASUS UX310U LCD replacement 10]
I want to remove the liquid crystal from here.
[ASUS UX310U LCD replacement 11]
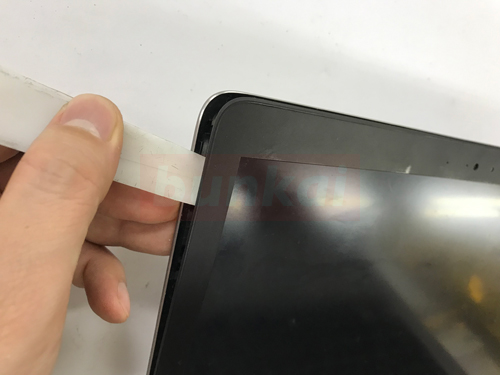
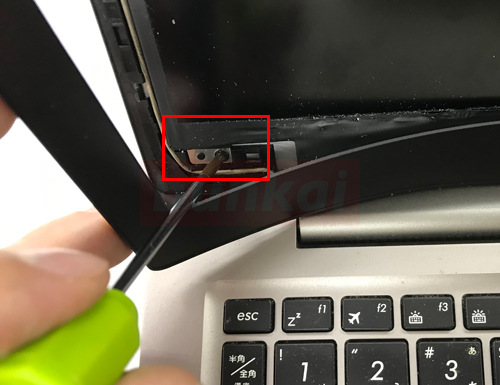
To remove the LCD panel, you need to remove the surrounding frame.
When removing the frame with a typical laptop, it is necessary to remove the screw, etc., but in the case of UX310U, since no screws are used, it will be disassembled as it is.
As shown in the image, plastic tools are inserted into the gap between the frame and the rear panel and disassembled, but if you have never disassembled a personal computer, you may think it is a difficult task.
However, there is no problem if only the left and right, the top can be removed from the rear panel without removing the frame completely.
[ASUS UX310U LCD replacement 12]
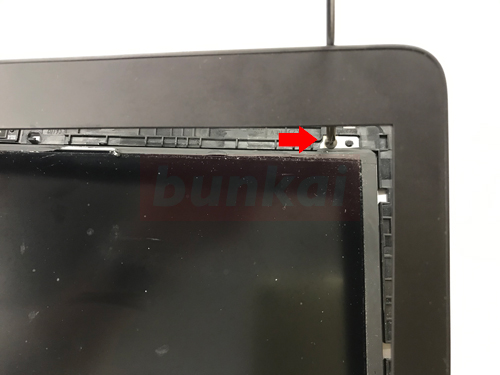
You can see that there is a screw under the frame, but let's remove the screwdriver.
[ASUS UX310U LCD replacement 13]
The screw is hidden on the lower side, so don't forget to remove it.
[ASUS UX310U LCD replacement 14]
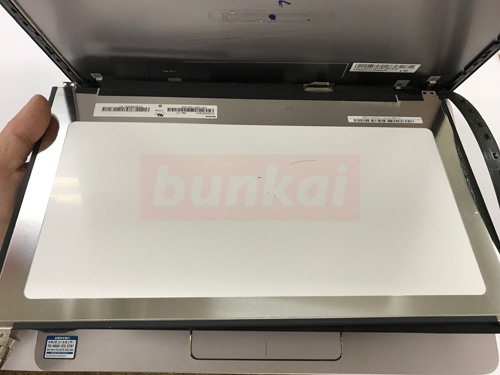
When it is possible to remove the screws of four places, it is possible to put the liquid crystal panel to some extent in the front direction as in the image, and the cable is connected to the back of the liquid crystal panel, so it will be removed.
[ASUS UX310U LCD replacement 15]
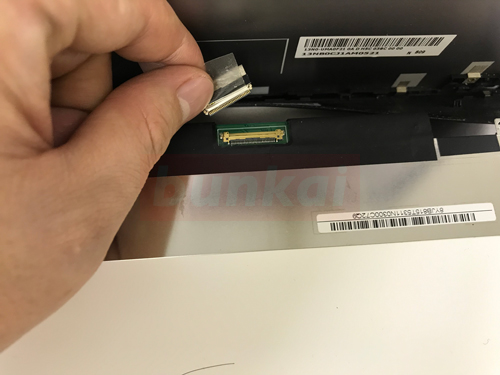
It is possible to remove the cable if you grasp the connector and slide it.
[ASUS UX310U LCD replacement 16]

Only the liquid crystal paneli was able to be removed.
After that, the repair is completed if you replace it with a newly prepared liquid crystal and incorporate it with the original procedure.