ASUS TransBook T100HA LCD Cracking Screen Replacement Repair Method, Decomposition Procedure
The T100HA will be a popular series of ASUS, but there is a T100TA in a near by model.
Because the structure is almost the same, I think that you can refer to those who have T100TA,
If you look at this decomposition method, glass cracking, because it can cope with such poor display of the liquid crystal, those who are confident in the decomposition please try to challenge!
[ASUS TransBook T100HA LCD Repair and Decomposition Method STEP 1]
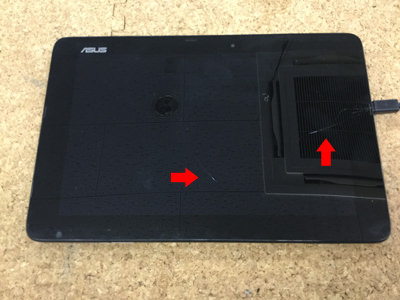

- It is hard to understand in the image, but there is a crack in the red arrow part.
Because the touch panel is in a state where the touch panel malfunctions due to this crack, I want to change the liquid crystal.
If you want to exchange the liquid crystal of T100HA, you will need all the balasis, so please consult the repair shop if it seems difficult to see the decomposition procedure below!
Of course, repair is also possible in our company!
[ASUS TransBook T100HA LCD Repair and Decomposition Method STEP 2]
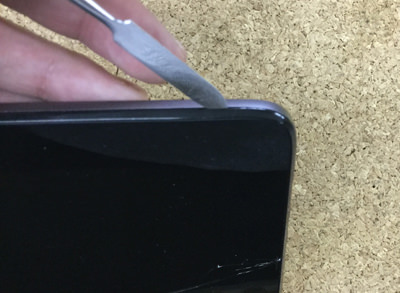

- As far as the exterior of the T100HA is concerned, screws are not used, so the rear panel is decomposed as it is, but the tool is inserted into a small gap between the glass part and the rear panel.
If you insert the tool and slide it sideways little by little, you will see the feeling that it is coming off.
[ASUS TransBook T100HA LCD Repair and Decomposition Method STEP 3]
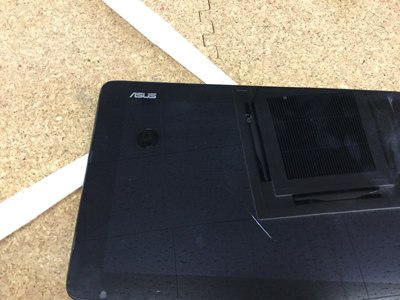
- It is easy to disassemble if you insert a tool such as an image in the part where it was possible to float even a little.
You can easily remove the back cover by inserting the tool around the liquid crystal.
[ASUS TransBook T100HA LCD Repair and Decomposition Method STEP 4]
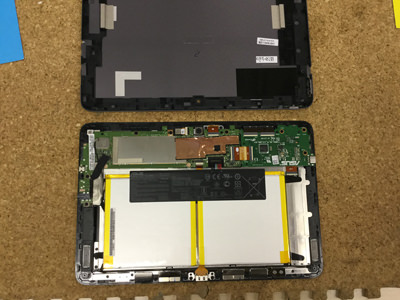
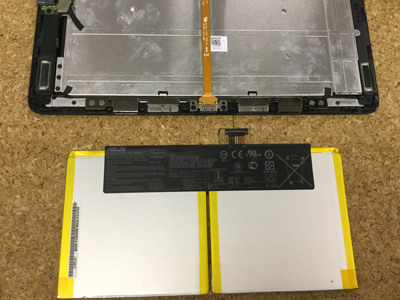
- Only the rear panel was able to be removed from the main body, but as a decomposition, it is the production from here.
[ASUS TransBook T100HA LCD Repair and Decomposition Method STEP 5]
- First of all, I want to remove the battery from the T100HA body.
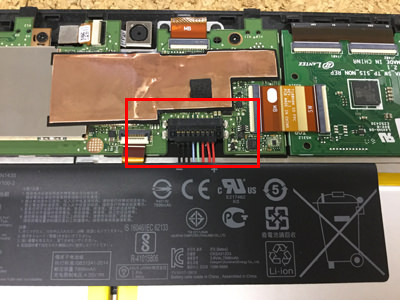
The battery connector is connected to the motherboard in the red frame, so lift the black connector part from the bottom to the top using a plastic tool.
[ASUS TransBook T100HA LCD Repair and Decomposition Method STEP 6]

- The connector is removed with a plastic tool, but the tool should not be made of metal.
It may be short-circuited due to the state in which the electricity has not yet been cut off.
[ASUS TransBook T100HA LCD Repair and Decomposition Method STEP 7]
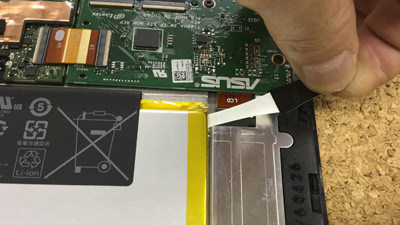

- The battery is fixed with double-sided tape to the main body, but this principle is exactly the same as the recent iPhone.
I think that you will know immediately if you have replaced the battery of the iPhone, but the tape is to extend by slowly pulling the black knob near the battery.
If you pull this tape slowly, it will come to come out smoothly, but if you pull too much force, the tape may be cut off.
There is no problem if it is cut off, but let's peel off all four corners of the tape.
[ASUS TransBook T100HA LCD Repair and Decomposition Method STEP 8]
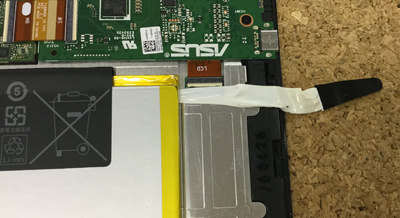

- The tape is growing considerably.
If the tape is cut off in the middle, insert a plastic spatula into the battery and peel it off with force.
So if you want to remove the battery easily, how to not cut this tape becomes important.
[ASUS TransBook T100HA LCD Repair and Decomposition Method STEP 9]
- Only the battery was able to be removed from the main body.
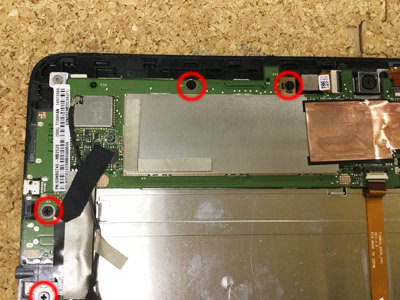
[ASUS TransBook T100HA LCD Repair and Decomposition Method STEP 10]


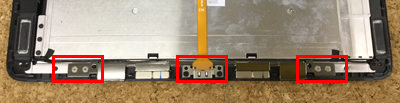
- Next, we will remove the base side, but let's remove the screw in the place surrounded by a red circle!
[ASUS TransBook T100HA LCD Repair and Decomposition Method STEP 11]
- Because there is a screw here, I remove all.
[ASUS TransBook T100HA LCD Repair and Decomposition Method STEP 12]
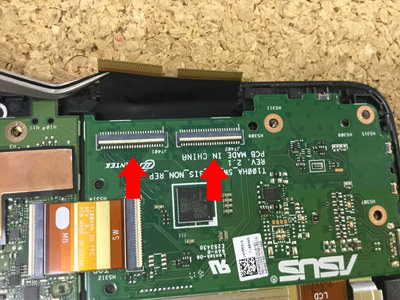
- After removing all the screws, remove the peraky cable.
There is a part that is off one place, but by causing the white knob of the red arrow, the cable of the perapera comes off.
[ASUS TransBook T100HA LCD Repair and Decomposition Method STEP 13]
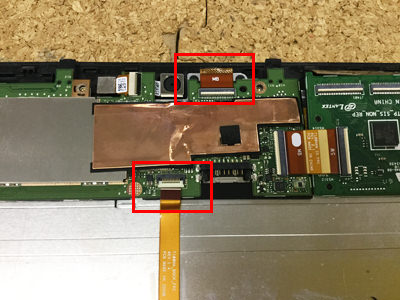
- Remove each connector in the same manner as before.
[ASUS TransBook T100HA LCD Repair and Decomposition Method STEP 14]

- The lower side of the cable that I removed earlier becomes the position of the image, but if you remove all the screws, you can remove each iron plate, so let's remove it.
[ASUS TransBook T100HA LCD Repair and Decomposition Method STEP 15]
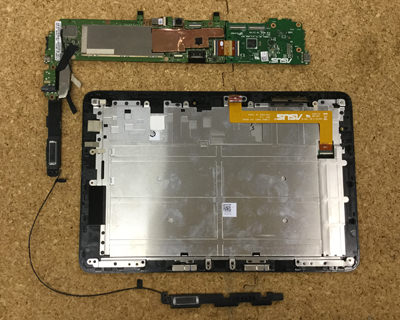

- I was able to remove the base and speakers.
[ASUS TransBook T100HA LCD Repair and Decomposition Method STEP 16]


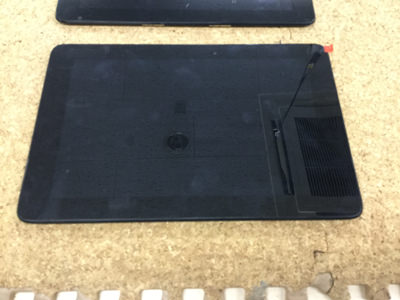
- There is still a cable under the base, so Remove it.
Now that you can remove all the parts except the liquid crystal, the repair will be completed if you incorporate the parts prepared in the original procedure.
[ASUS TransBook T100HA LCD Repair and Decomposition Method STEP 17]
- When replacing the T100HA LCD, parts such as motherboards and speakers must be removed, so care must be taken to prevent failure.
If you damage the motherboard, it will not turn on, or it will be rather expensive expenses, so if you do not have yourself in disassembly, please consult a repair shop!