The method of LCD replacement and decomposition of ASUS X200M is explained in an easy-to-understand manner with an image.
If the screen of ASUS X200M has a crackin lcd or a bad display on the LCD, a liquid crystal panel replacement (LCD replacement) is required!
[ASUS X200M LCD repair and disassembly method STEP 1]
It is not displayed normally because the LCD panel has broken, but you can check the start screen of windows8 faintly in the lower right part.
There is a worry of data because the screen is not visible at all, but there is no worry about data because it was confirmed that it is displayed normally in the place using an external display!
By replacing the LCD panel, we would like to perform liquid crystal repair that can be used in the same environment as before.
Be sure to remove the built-in battery when disassembling the laptop.
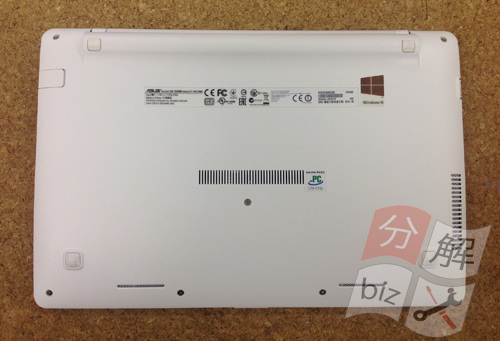
[ASUS X200M LCD repair and disassembly method STEP 2]
First, remove the battery, but the X200M battery is built-in and cannot be easily removed.
Turn the laptop inside out and remove all screws on the back side.
Remove the battery because the cover will come off if all screws can be removed.
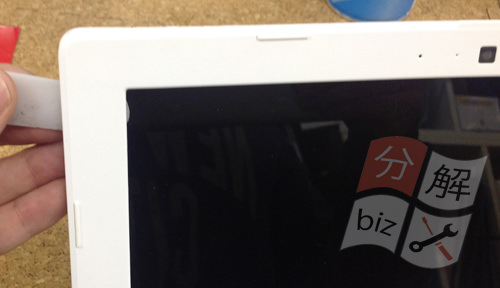
[ASUS X200M LCD repair and disassembly method STEP 3]
From here on, we will break down the liquid crystal, but there is no screw in the liquid crystal frame, so we will use a spatula (tool) like the image as it is to decompose.
It is the place where the spatula is inserted, but it is between the rear panel and the LCD frame.
The LCD frame is only fixed with plastic claws, but I think that it can be easily removed if you get the knack.
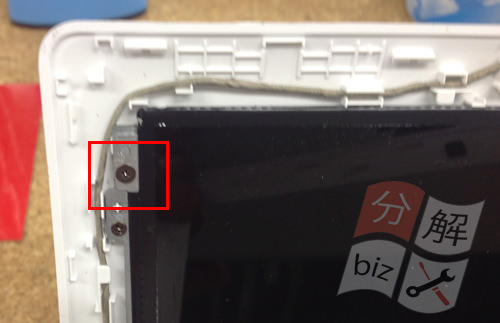
[ASUS X200M LCD repair and disassembly method STEP 4]
If the LCD frame can be removed, I think that the LIQUID panel came into view.
There were no screws in the LCD frame, but the LCD panel is secured with screws.
Because there is a screw to be removed in the red frame part, please remove all screws that secure the liquid crystal panel.
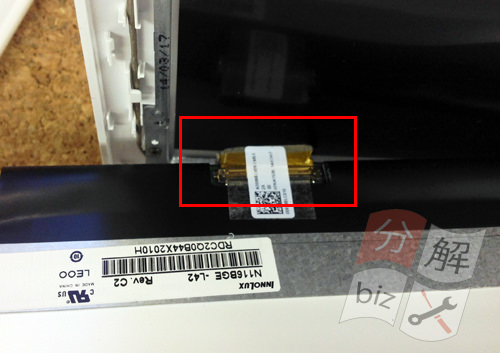
[ASUS X200M LCD repair and disassembly method STEP 5]
When the screw that fixed the liquid crystal panel can be removed, it is possible to move the liquid crystal panel.
First of all, the LCD panel is laid to the keyboard side slowly as it is.
Then, there is a liquid crystal cable on the back of the LIQUID panel and I think that it is possible to confirm it, but I think that the connector of the liquid crystal cable can be removed if the seal with the QR code can be peeled off.
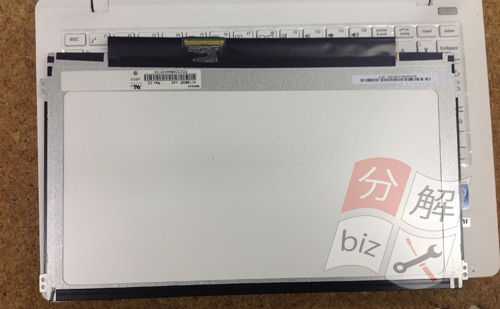
[ASUS X200M LCD repair and disassembly method STEP 6]
Only the LCD panel was able to be removed from the PC body.
If you replace the newly prepared LCD panel and reassemble it according to the original procedure, the LIQUID repair of ASUS X200M will be completed.
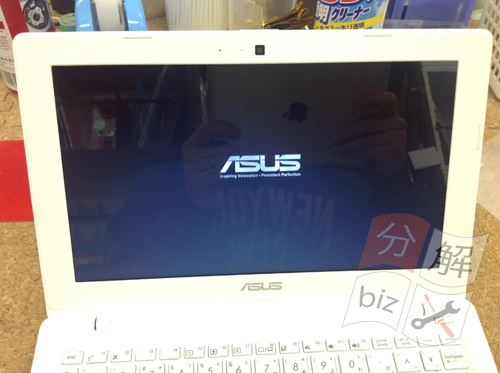
[ASUS X200M LCD repair and disassembly method STEP 7]
Before the liquid crystal repair, it was in a state that was not visible at all, but it was confirmed that it was displayed normally by replacing the LIQUID crystal panel!

 If the screen of ASUS X200M has a crackin lcd or a bad display on the LCD, a liquid crystal panel replacement (LCD replacement) is required!


コメントを残す