Toshiba PT55258GBHK LCD screen cracking, LCD panel replacement (LCD replacement) is required if there is a display failure in the liquid crystal!
[Toshiba PT55258GBHK LCD repair and disassembly method STEP 1]
Just half of the LCD panel has cracked.
This symptom will be a problem of the personal computer that occurs due to the impact from the outside, but I think that it is possible to use the PERSONAL computer in the same environment as before only by the liquid crystal panel exchange because the confirmation of the data is made on the right side.
I want to disassemble the personal computer immediately.
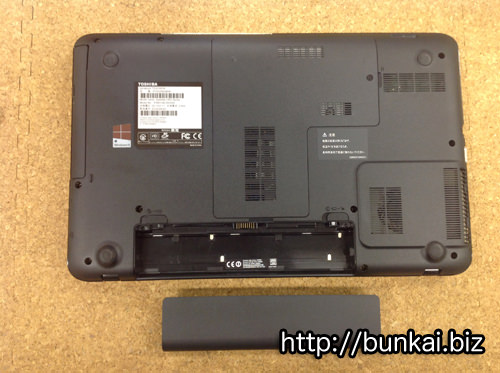
[Toshiba PT55258GBHK LCD repair and disassembly method STEP 2]
Be sure to remove the battery when disassembling the laptop.
The battery is attached to the back side of the main unit, so remove it.
[Toshiba PT55258GBHK LCD repair and disassembly method STEP 3]
From here on, we will take apart the liquid crystal.
To remove the LCD panel, first remove the liquid crystal frame, but the liquid crystal frame itself is secured with screws.
Because there is a seal called screw concealing in the image part, please remove the tweezers.
[Toshiba PT55258GBHK LCD repair and disassembly method STEP 4]
If you remove the screw hidden, the screw will be visible inside, so remove the Phillips screwdriver.
[Toshiba PT55258GBHK LCD repair and disassembly method STEP 5]
Once all screws can be removed, the LCD frame can be disassembled.
Because it is fixed with plastic claws, it is possible to easily disassemble the liquid crystal by using a spatula such as an image.
If you can disassemble everything around the liquid crystal, you can remove the liquid crystal frame.
[Toshiba PT55258GBHK LCD repair and disassembly method STEP 6]
When the liquid crystal frame can be removed, the liquid crystal panel is removed, but the LCD panel is fixed to the hinge part.
Loosen the screws in the image part by about half.
[Toshiba PT55258GBHK LCD repair and disassembly method STEP 7]
If you loosen the screw above, you can put out the LCD panel slightly in front.
You can also see the image, but the LCD panel is fixed to an iron frame called a hinge, so remove all the screws on the left and right.
When the screw can be removed, the LCD panel can be knocked forward, so slowly turn it down.
The LCD cable is still connected to the back of the LCD panel, so be careful to knock it down.
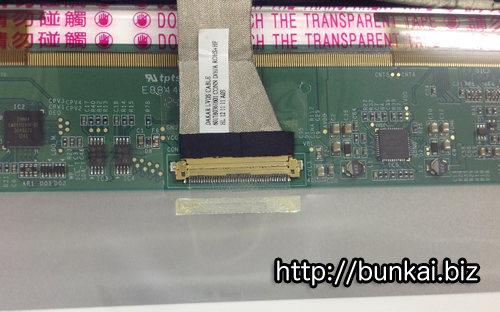
[Toshiba PT55258GBHK LCD repair and disassembly method STEP 8]
The LCD panel and the LCD cable are connected.
You can remove the LCD cable by removing the transparent tape and then sliding it.
I think that i was able to remove the LCD panel from the laptop body if it is possible to disassemble up to this point, so if you replace it with a newly prepared liquid crystal panel, liquid crystal repair will be completed.
[Toshiba PT55258GBHK LCD repair and disassembly method STEP 9]

 Toshiba PT55258GBHK LCD screen cracking, LCD panel replacement (LCD replacement) is required if there is a display failure in the liquid crystal!
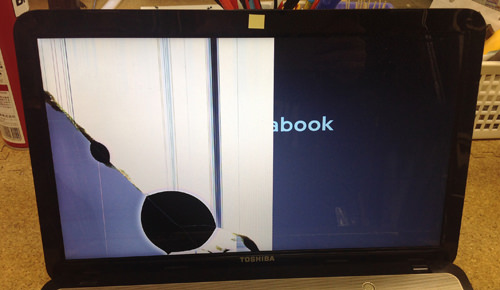

 Be sure to remove the battery when disassembling the laptop.
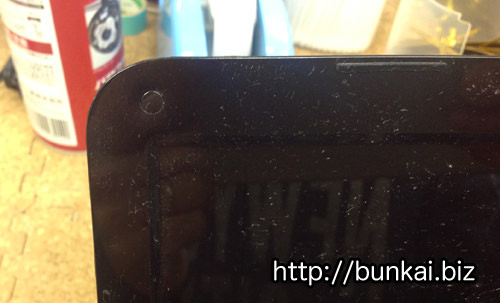
 From here on, we will take apart the liquid crystal.
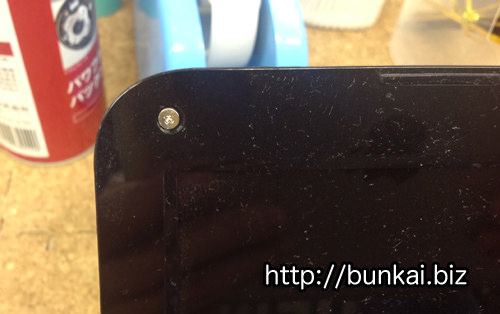
 If you remove the screw hidden, the screw will be visible inside, so remove the Phillips screwdriver.
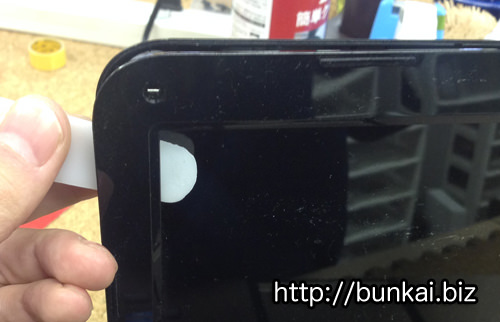
 Once all screws can be removed, the LCD frame can be disassembled.
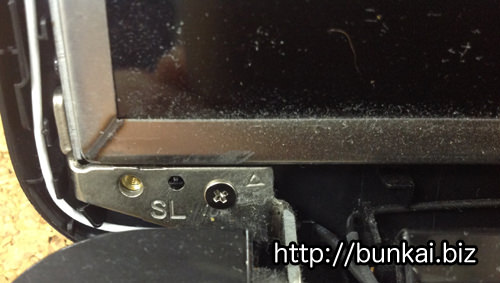
 When the liquid crystal frame can be removed, the liquid crystal panel is removed, but the LCD panel is fixed to the hinge part.
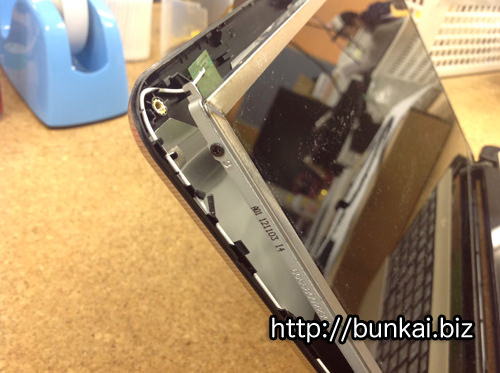
 The LCD panel and the LCD cable are connected.
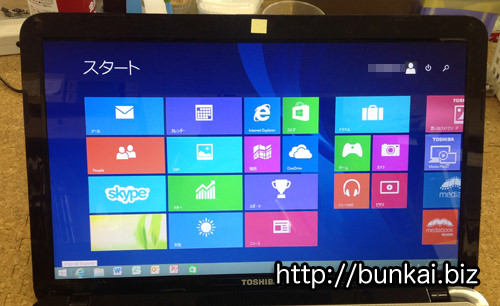
 You can see the normal login screen of windows8!

コメントを残す