Toshiba dynabook R634 keyboard does not work, if not responsive, keyboard replacement is required.
Even if only one or two places do not work, it is necessary to replace the keyboard completely, so please check the decomposition method below.
[Toshiba R634/K Keyboard Replacement 1]

First of all, let's turn over the main body and remove all the screws of the part surrounded by a red circle.
[Toshiba R634/K Keyboard Replacement 2]

Because the screw is hidden in the middle, let's remove it to the forgotten lesbian.
[Toshiba R634/K Keyboard Replacement 3]

This is a rubber foot, but i remove it because the screw is hidden when I turn the rubber.
[Toshiba R634/K Keyboard Replacement 4]

Because there is a screw when I turn the rubber as before, it removes it.
[Toshiba R634/K Keyboard Replacement 5]

If you can remove all the screws on the back of the main body, you can remove the back cover.
[Toshiba R634/K Keyboard Replacement 6]

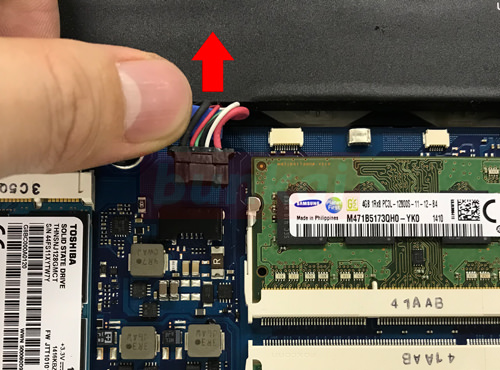
No matter which parts you replace, you will cut off the computer's electricity before you work, but first remove the battery connector.
The red frame is the connection between the battery and the motherboard.
[Toshiba R634/K Keyboard Replacement 7]

You can remove the connector by sliding the connector in the direction of the arrow as shown in the image.
[Toshiba R634/K Keyboard Replacement 8]

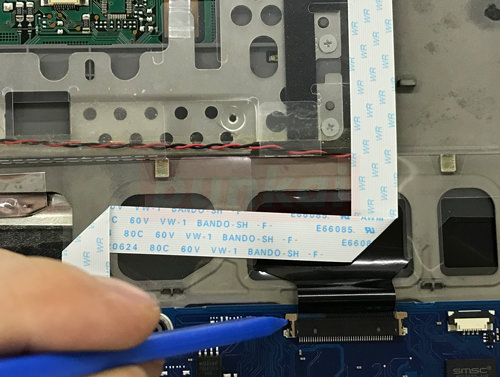
This is where the keyboard wiring is connected to the motherboard.
In the image, the brown plastic part is slid upward, but because it is a little projection, it is made to slide in parallel from both sides.
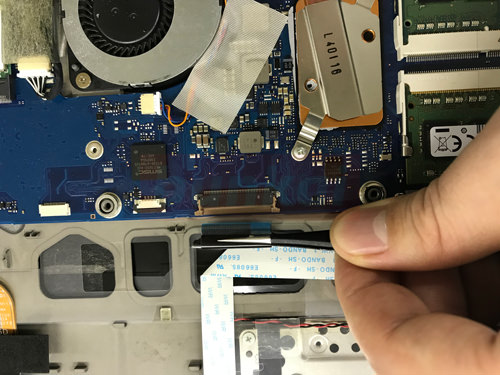
[Toshiba R634/K Keyboard Replacement 9]

I think that I was able to remove the cable when I slide the brown plastic of the previous.
[Toshiba R634/K Keyboard Replacement 10]

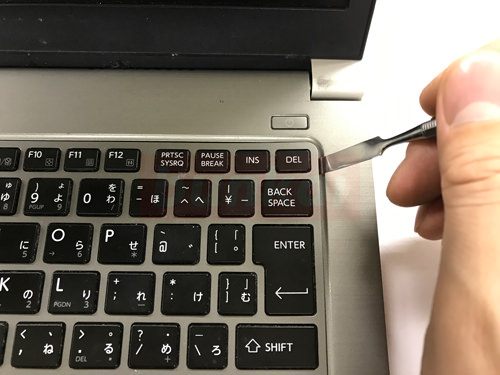
The R634 keyboard is not screwed and is only pasted on double-sided tape.
Therefore, the tool is inserted into a slight gap of the keyboard though it becomes the form which peels off with a little force.
[Toshiba R634/K Keyboard Replacement 11]

If there is a slight float, replace the tool with a plastic object, and tear the tape to the back.
[Toshiba R634/K Keyboard Replacement 12]

Tear the double-sided tape in the same way from the other side.
[Toshiba R634/K Keyboard Replacement 13]

If you can peel off the double-sided tape to some extent, you can lift it little by little like the image, so please check whether you forget to peel it off with the tape on the back side.
[Toshiba R634/K Keyboard Replacement 14]

Only the keyboard was able to be removed from the main unit.
It is good to replace it with a newly prepared keyboard, but please attach it after putting double-sided tape!


