There is a screen crack in the upper left, and the display failure has come out to the whole.However, since the login screen is visible, it is possible to use it as it is in the data up to now by the panel exchange.
I want to enter liquid crystal repair immediately.
First of all, it enters from the discharge work before the decomposition of the liquid crystal.
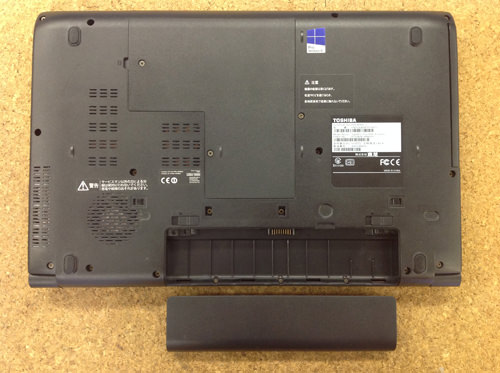
There is a battery when you turn the inside out of the main body, but you can easily remove it by sliding the knob nearby.
The next part of the hinge part on the left and right is removed.
Because the screw comes into view when it is possible to remove the rubber using tweezers etc. as shown in the image, let's remove the Phillips screwdriver!
[Toshiba B553 /J Decomposition Method STEP 4]
If you can remove the screw on the back side of the previous, you can remove the parts as in the image, so please remove both the left and right.
In the image, three screws can be seen, but you can see that there is one screw on the frame side separatefrom the two on the hinge side.
Just remove only the part that the driver is hitting.
It will be on the left side in the image, but please do not forget to remove it because it is also attached to the hinge part on the right side.
If it is possible to remove the screw of the hinge part of the previous, the frame itself is removed.
The frame is fixed with plastic claws, but it is possible to easily disassemble when inserting a spatula as shown in the image.
If you can remove the frame, I think that the liquid crystal will be exposed, but if there is no fixed panel, please lower it to the keyboard side as it is.
I think that it was able to confirm that the cable is connected to the back side if it is possible to knock the panel down to the keyboard side.
You can easily remove the cable by sliding it parallel.
I think that only the panel was able to be removed if the decomposition up to this point was able to be done accurately.
After that, if you replace the parts that you have prepared and reassemble them according to the original procedure, the work will be completed.

 Toshiba B553/J screen cracking, if there is a display failure on the display, panel replacement (LCD replacement) is required!
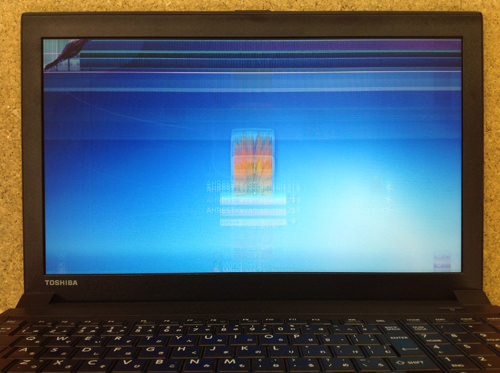

 First of all, it enters from the discharge work before the decomposition of the liquid crystal.
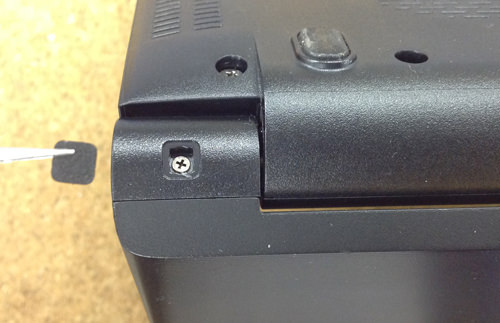
 The next part of the hinge part on the left and right is removed.
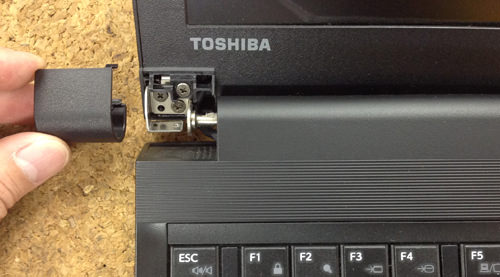
 If you can remove the screw on the back side of the previous, you can remove the parts as in the image, so please remove both the left and right.
 In the image, three screws can be seen, but you can see that there is one screw on the frame side separatefrom the two on the hinge side.
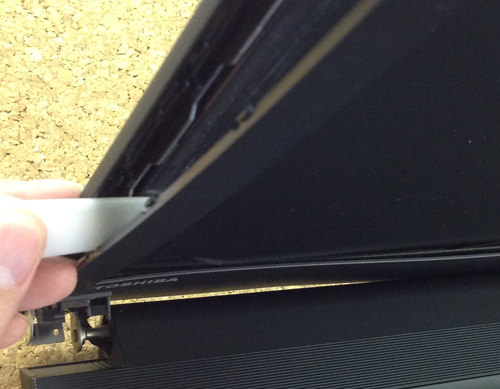
 If it is possible to remove the screw of the hinge part of the previous, the frame itself is removed.
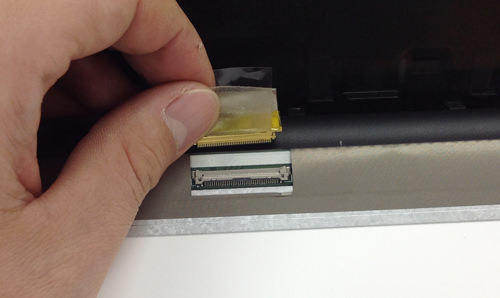
 I think that it was able to confirm that the cable is connected to the back side if it is possible to knock the panel down to the keyboard side.
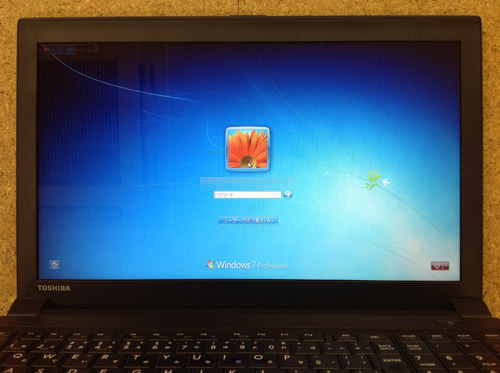
 I just replaced the new part and turned it on.

コメントを残す