Fujitsu AH77/M LCD screen cracking, if there is a display failure in the liquid crystal, liquid crystal panel replacement (LCD replacement) is required!
[Fujitsu AH77/M LIQUID Crystal Repair and Decomposition Method STEP 1]
The AH77/M has a two-layer display that is divided into a touch panel on the surface and an inner liquid crystal panel.
This time we will replace the lcd panel on the inside, but I think that it is understood that the color is strange though there is no liquid crystal crack ing, etc. as in the image.
I would like to change the LCD panel immediately because there is a suspicion of liquid crystal panel failure because it becomes a normal color when displayed on an external monitor.
[Fujitsu AH77/M LIQUID Crystal Repair and Decomposition Method STEP 2]
First of all, it enters from the discharge work that is always done in disassembling the laptop.
The body is turned over and the parts of the image are removed, but it is only fixed with plastic claws, so you can easily remove it if you try to break the gap lightly.
[Fujitsu AH77/M LIQUID Crystal Repair and Decomposition Method STEP 3]
If you can remove the parts of the previous, you can confirm that there is a screw under it, but the screw of the part where the screwdriver is hitting will be removed.
[Fujitsu AH77/M LIQUID Crystal Repair and Decomposition Method STEP 4]
When the screw can be removed, it is possible to remove the back of the main body, but it can be easily removed by sliding it downward.
[Fujitsu AH77/M LIQUID Crystal Repair and Decomposition Method STEP 5]
When you can remove the back cover, the battery will be visible, but you can easily remove it by sliding the switch just below the battery.
[Fujitsu AH77/M LIQUID Crystal Repair and Decomposition Method STEP 6]
Next, remove the screw son on the back of the hinge.
Since this part is on both the left and right, it is necessary to remove the screw without foretry, but please keep it because plastic can be removed if the screw can be removed.
Since there is no screw that secures the touch panel with this, only the frame can be removed.
[Fujitsu AH77/M LIQUID Crystal Repair and Decomposition Method STEP 7]
The touch panel is only fixed with light plastic, but the wiring and foundation are precise, so be careful not to break or break.
If this part fails, the touch panel may not work or will not respond.
If you can shift the frame carefully, let's slowly knock it down to the forward direction (keyboard side)!
[Fujitsu AH77/M LIQUID Crystal Repair and Decomposition Method STEP 8]
I think that the liquid crystal panel came out, but the panel itself is also fixed, so I will remove the screw like a red circle part.
Be careful on the touch panel side to remove it.
[Fujitsu AH77/M LIQUID Crystal Repair and Decomposition Method STEP 9]
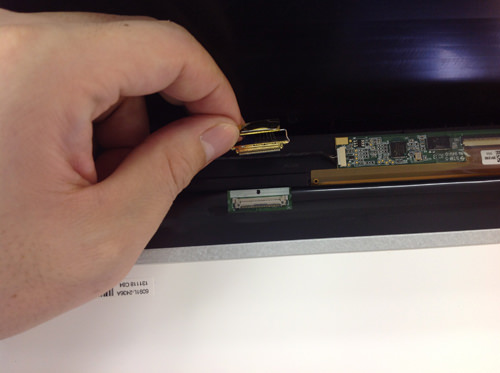
I think that it is possible to knock it forward if it is possible to remove all the screws that secure the liquid crystal panel.
The LCD cable is connected to the back of the panel, but you can easily remove it by slid ingress it from the pin.
I think that i was able to remove the panel itself from the main body by this.
The work itself is completed if you replace the newly prepared parts and reassemble them with the original procedure.
[Fujitsu AH77/M LIQUID Crystal Repair and Decomposition Method STEP 10]
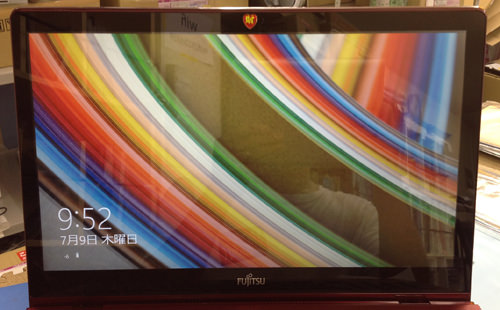
It may be difficult to understand, but I think that it was able to confirm that it is displayed normally compared with before the panel replacement.

 Fujitsu AH77/M LCD screen cracking, if there is a display failure in the liquid crystal, liquid crystal panel replacement (LCD replacement) is required!


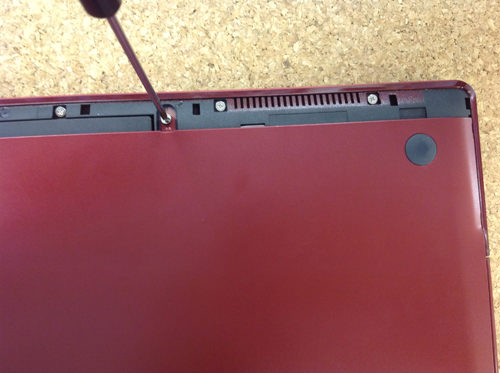
 If you can remove the parts of the previous, you can confirm that there is a screw under it, but the screw of the part where the screwdriver is hitting will be removed.
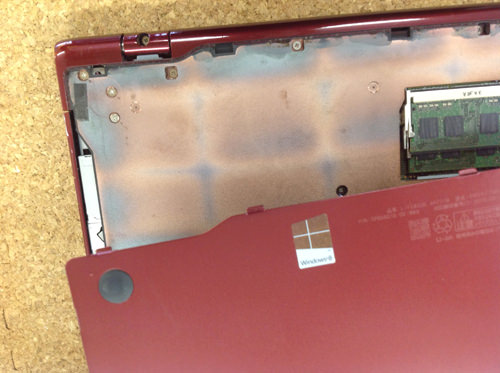
 When the screw can be removed, it is possible to remove the back of the main body, but it can be easily removed by sliding it downward.
 When you can remove the back cover, the battery will be visible, but you can easily remove it by sliding the switch just below the battery.
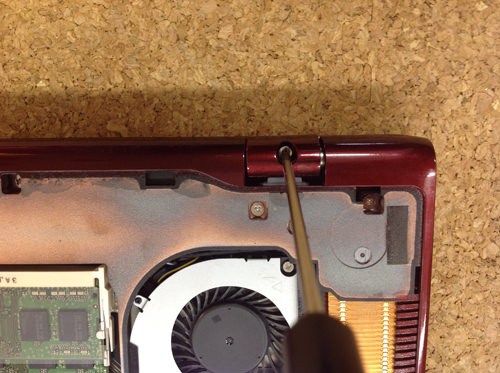
 Next, remove the screw son on the back of the hinge.
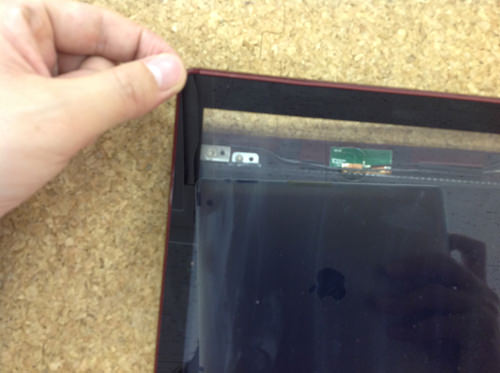
 The touch panel is only fixed with light plastic, but the wiring and foundation are precise, so be careful not to break or break.
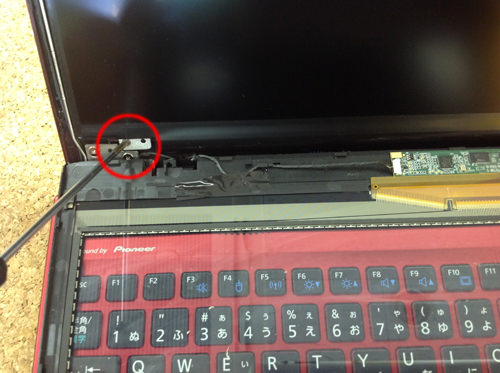


コメントを残す