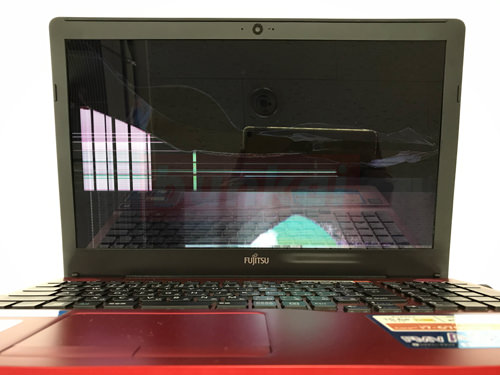
Fujitsu LIFEBOOK AH53/X FMVA53XRKS screen has broken, if the line enters, lcd panel replacement is necessary, but repair method and disassembly method are open to the public, so I hope you can refer to it.
[Fujitsu AH53/X LCD replacement 1]
Be sure to remove the battery first before removing the LCD.
Please note that there is a possibility of short-circuiting if you do not remove the battery of the laptop and disassemble it.
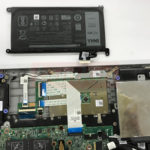
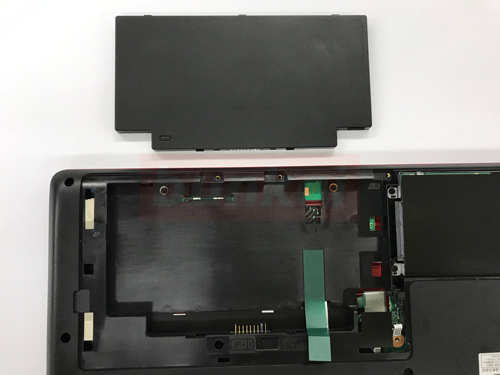
The battery of the AH53 / X becomes a built-in type, so you can not check the battery just by turning the inside out of the main unit.
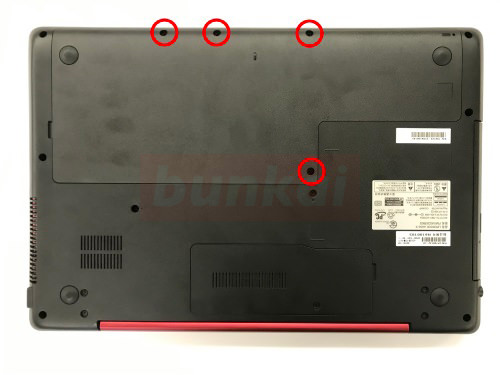
Some decomposition is necessary, so turn the body inside out and remove the red circle screw.
[Fujitsu AH53/X LCD Replacement 2]
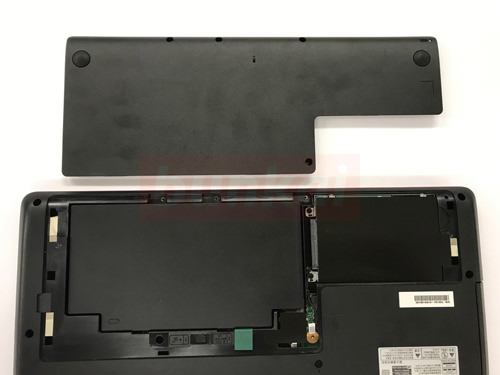
I was able to remove the back cover by removing the screw, but I was able to check the battery.
[Fujitsu AH53/X LCD Replacement 3]
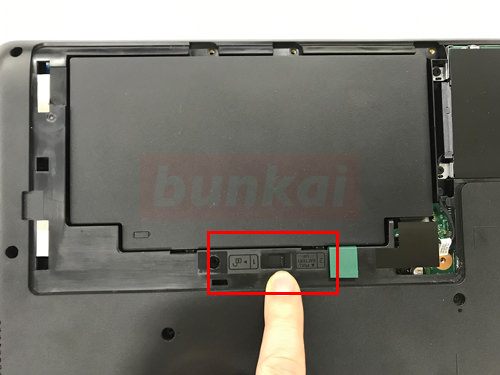
To remove the battery, slide the knob on the red screen, but slide the knob in the direction where the key is free.
[Fujitsu AH53/X LCD replacement 4]
The battery could be removed.
[Fujitsu AH53/X LCD replacement 5]
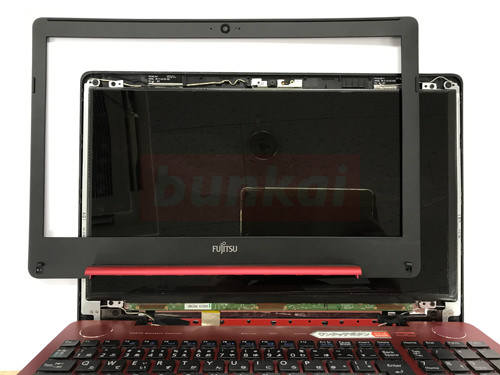
From here, the panel that has broken the screen will be removed, but the surrounding frame must be removed to remove the LCD panel.
So let's remove the LCD frame first.
[Fujitsu AH53/X LCD replacement 6]

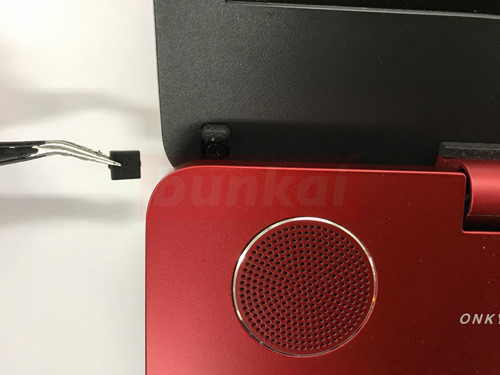
Because there is a blindfold edging rubber in the position of the arrow, it peels off with a sharp tool such as tweezers.
[Fujitsu AH53/X LCD replacement 7]
I was able to confirm that there is a screw when I remove the blindfold.
[Fujitsu AH53/X LCD replacement 8]
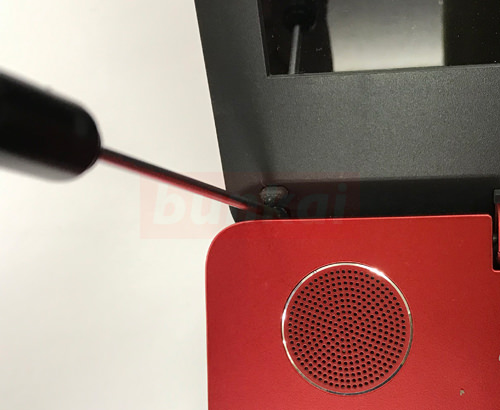
Let's remove it with a Phillips screwdriver.
This is on the left side, but it is in the same position on the right side, so please remove it.
[Fujitsu AH53/X LCD replacement 9]

After removing the screw, we will remove the frame as shown in the image, but in the image we use a plastic spatula.
If you insert the tool into a slight gap between the frame and the rear panel, slide the tool or make it lightly, you will see the feeling that is coming off, but this work will be carried out on the periphery of the liquid crystal.
[Fujitsu AH53/X LCD replacement 10]
Only the frame was able to be removed.
I think that it is difficult to remove the lower side for the first time to disassemble the personal computer, but I think that it is not so difficult because it is only fixed with the nail as well as the left and right.
[Fujitsu AH53/X LCD replacement 11]
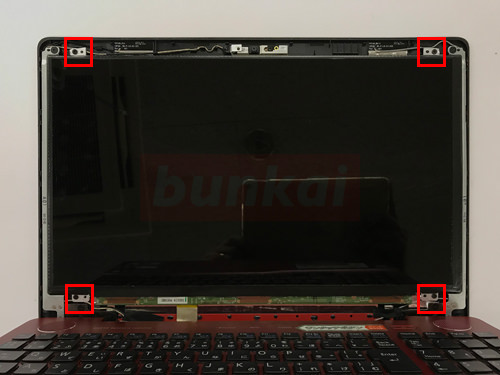
The LCD panel is secured to the rear panel side with four screws in all.
[Fujitsu AH53/X LCD replacement 12]
Let's remove all screws.
[Fujitsu AH53/X LCD replacement 13]
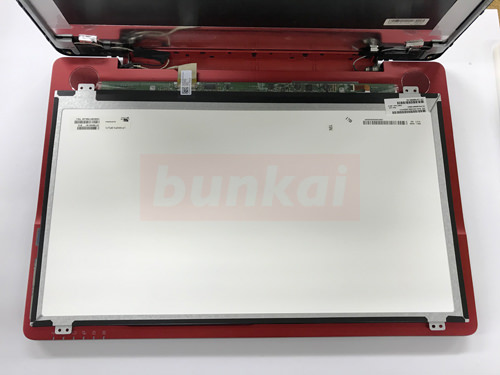
If you can remove the four screws, you can knock the LCD down to the front side (keyboard side) as shown in the image, but be careful not to break it because the liquid crystal cable is connected to the back.
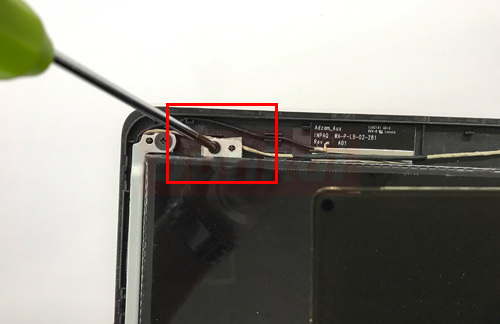
[Fujitsu AH53/X LCD replacement 14]
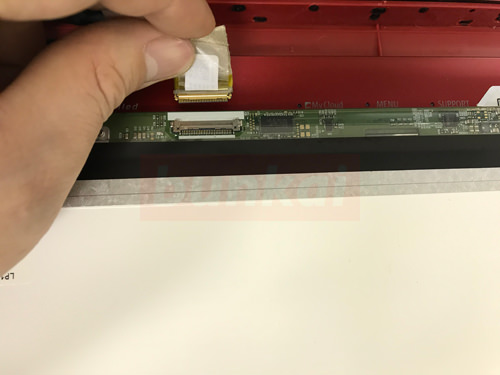
Slide the cable on the back of the LCD panel as shown in the image.
I think that only the liquid crystal panel was able to be removed by this, but it is completed if I replace it with a newly prepared panel and incorporate it in the original procedure.
[Fujitsu AH53/X LCD replacement 15]
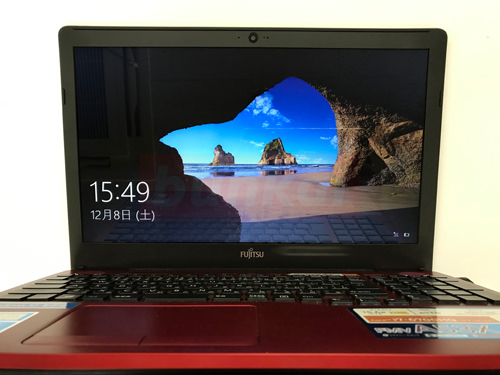
It is in a state of turning on the power after the liquid crystal replacement, but it was confirmed that it came to be displayed normally.
Because the data remains as it is, you can use the personal computer in exactly the same environment as before.