Repair in case of MacbookAir LCD cracking, poor display, or line on the screen
[Macbook A1370 LCD replacement and repair method STEP 1]
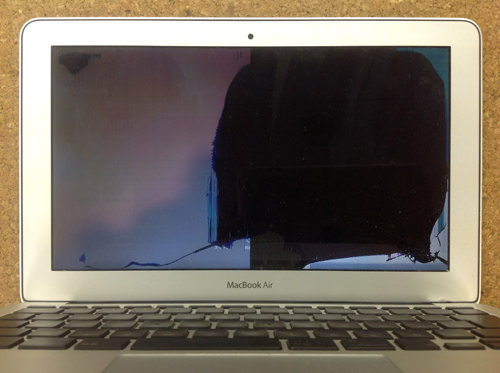
Pressure is applied to the liquid crystal panel, cracking occurs, causing leakage inside, and the display is not visible for more than half.
The MacBook Air display is very thin, so there are many people who break between earphones, USB, ballpoint pens, etc.
In the case of such a screen crack, it is necessary to replace the panel, but there are two ways of replacing the liquid crystal of the MacBook Air, and in the case of a request from the manufacturer, it will be replaced with the upper body of the liquid crystal part, which will be expensive repair costs.
The other one is to replace only the panel that is cracked and actually causing the defect, but the difficulty of the repair is very high, so it is necessary to work carefully.
Now, let's introduce how to disassemble the LCD panel in MacBookAir11 inch Model No.A1370 2010 in an easy-to-understand manner! Click here to replace the MacbookAir 13-inch LCD
[MacbookAir A1370 LCD replacement and repair method STEP 2]
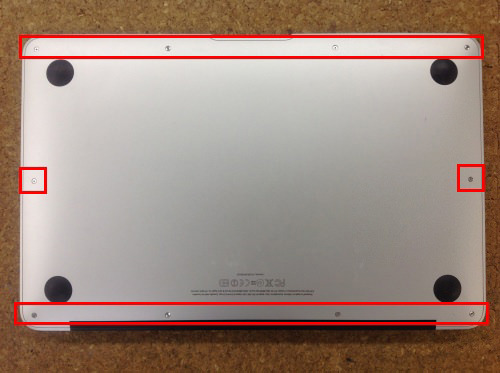
First of all, when the body is turned over, it is stuck to 10 places of a special shape in the bottom case (back lid).
Remove all 10 red-marked Torx screws.
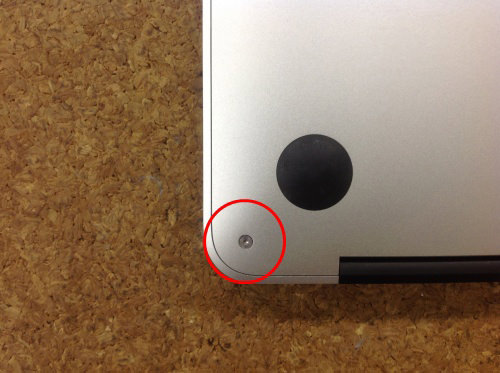
[MacbookAir A1370 LCD replacement and repair method STEP 3]
Since 10 screws are made of torx screws of a special shape, please prepare a thing called a Torx screwdriver because it is sold in the home center and the web.
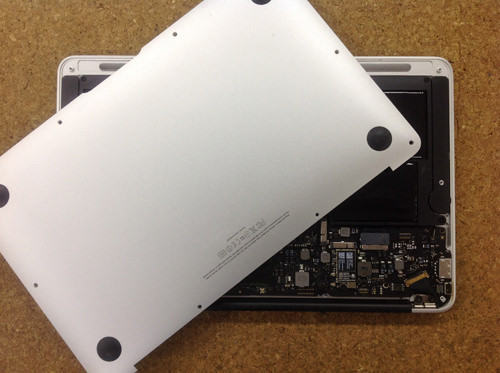
[MacbookAir A1370 LCD replacement and repair method STEP 4]
The bottom case can be easily removed by removing the screw and lifting the back cover.
[MacbookAir A1370 LCD replacement and repair method STEP 5]
Be sure to remove the battery when disassembling your PC, not just for Mac.
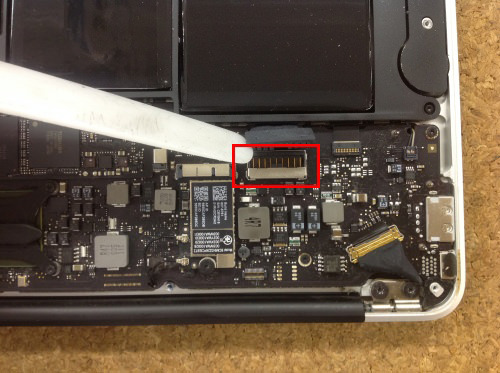
In the decomposition process, it is okay to remove only the connector from the main body, but I would like to remove the battery in order to make this decomposition method easier to understand.
You can easily remove the red battery connector in the image by lifting it up using a plastic spatula.
[MacbookAir A1370 LCD replacement and repair method STEP 6]
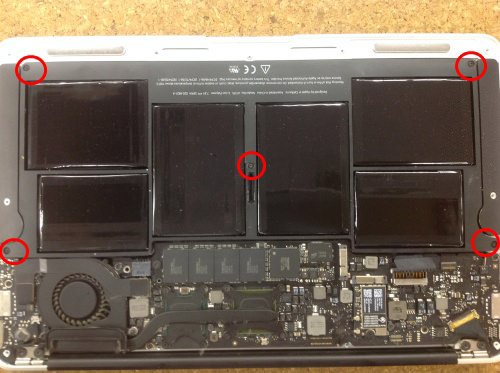
Because the screw is stopped in five red circle parts, it removes everything.
[MacbookAir A1370 LCD replacement and repair method STEP 7]
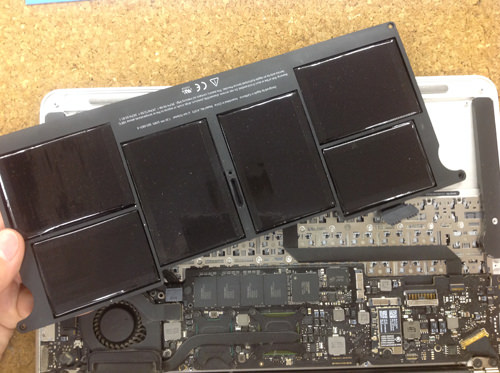
After removing all screws, the battery is completely removed.
[MacbookAir A1370 LCD replacement and repair method STEP 8]
Because there is a rubber cushion on the left and right in the red mark part of the image, remove it with tweezers etc.
[MacbookAir A1370 LCD replacement and repair method STEP 9]
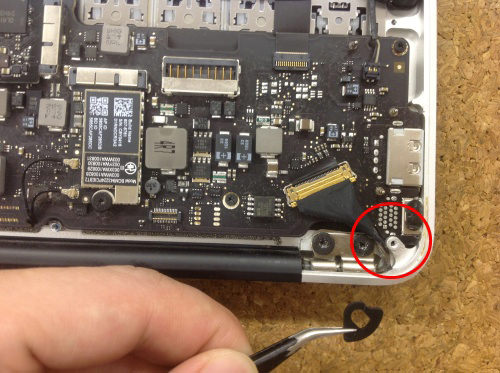
Since the LCD cable is connected to the logic board from the upper body of the display, pull out the connector so that the pin is raised and it slides.
Work carefully to avoid damaging wiring and connectors at this time!
[MacbookAir A1370 LCD replacement and repair method STEP 10]
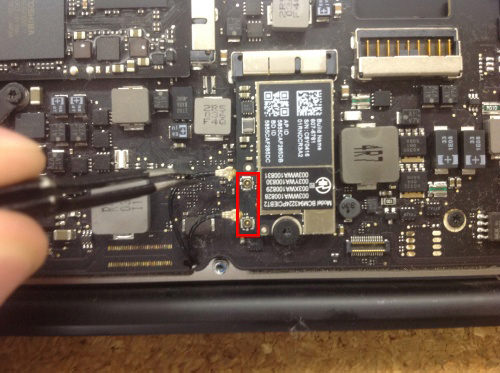
The WiFi antenna cable is connected to the WiFi card of the logic board with two small connector pins, so use tweezers and lift it up and remove it.
[MacbookAir A1370 LCD replacement and repair method STEP 11]
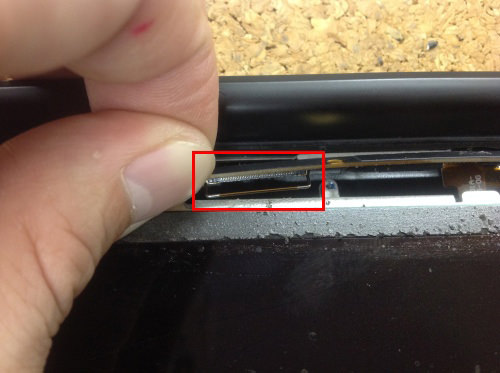
This is also connected to the power board from the webcam in the upper center of the upper part of the display, so remove it while carefully sliding with tweezers.
[MacbookAir A1370 LCD replacement and repair method STEP 12]
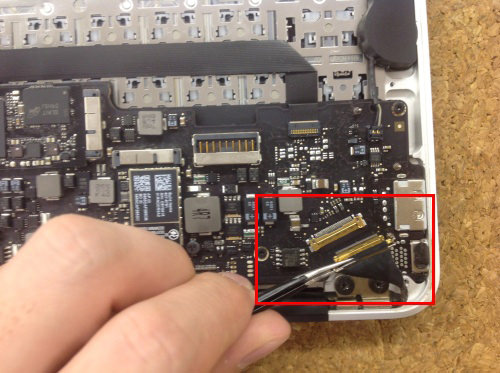
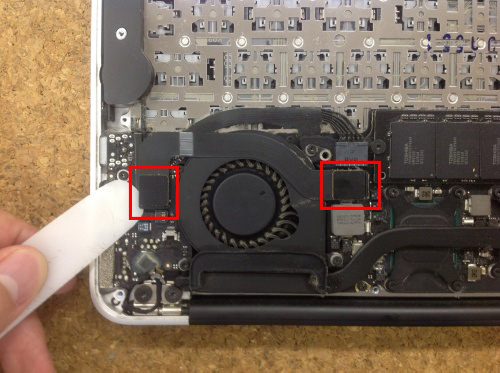
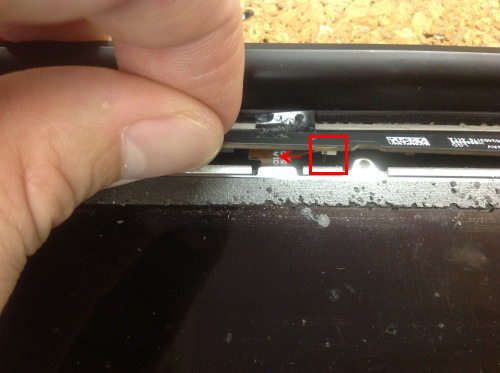
The red mark part of the cable that connects the power board and the logic board is a connector, so use a spatula (tool) like the image to lift it up and remove it.
[MacbookAir A1370 LCD replacement and repair method STEP 13]
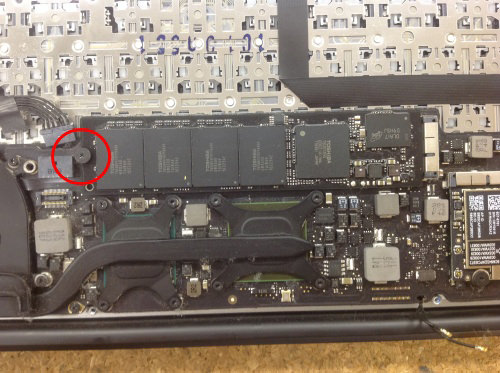
The red circle in the image is the screw that secures the SSD, but it is fixed in one Torx screw, so remove it.
[MacbookAir A1370 LCD replacement and repair method STEP 14]
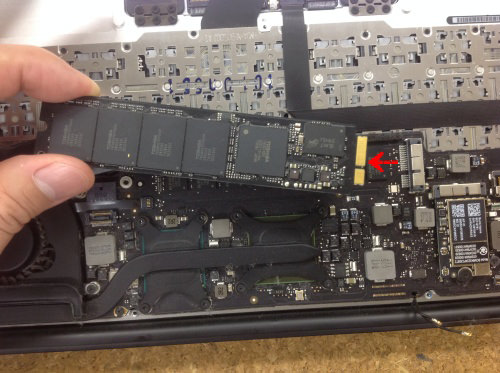
When the screw comes off, gently lift the SSD and slide it in the direction of the arrow in the image to pull it out.
[MacbookAir A1370 LCD replacement and repair method STEP 15]
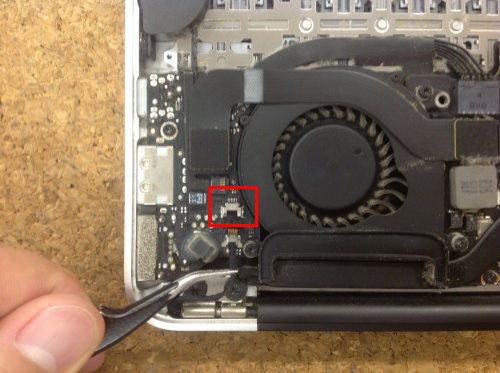
The FAN cable is connected to the bottom of the SSD with a small connector, so raise the pin and pull it out carefully.
[MacbookAir A1370 LCD replacement and repair method STEP 16]
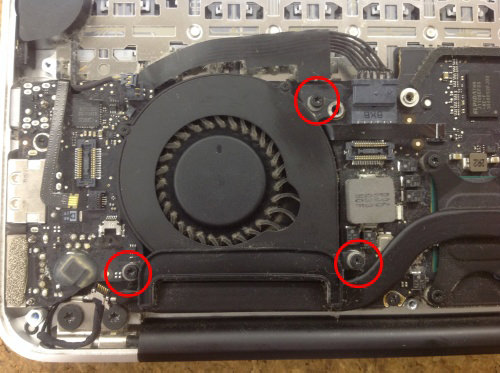
When the FAN cable is complete, remove the three torx screws on the red mark on the FAN body.
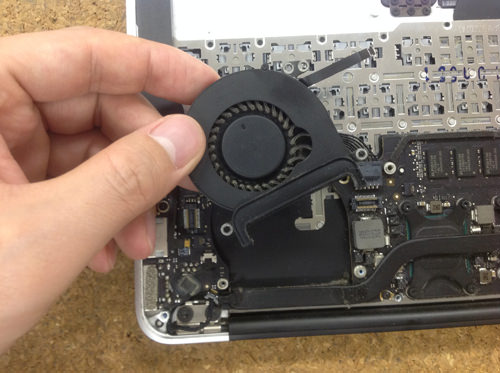
[MacbookAir A1370 LCD replacement and repair method STEP 17]
When all the cables and screws are removed, the FAN body can be easily removed, so if dust or dirt is attached, it will increase the cooling effect by cleaning cleanly using a soft brush.
Let's work carefully over time because it will be a precise part!
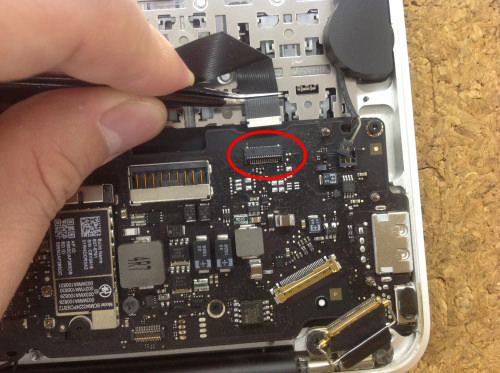
[MacbookAir A1370 LCD replacement and repair method STEP 18]
The wiring of the opposite speaker is removed by lifting it up while pinching using tweezers as before.
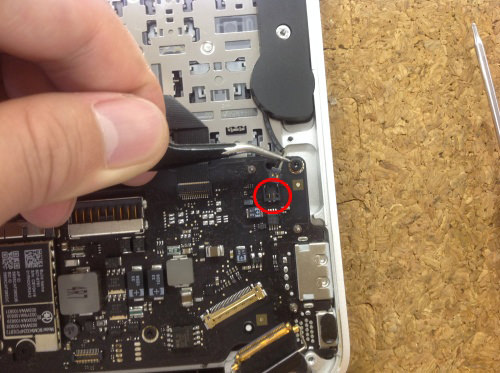
[MacbookAir A1370 LCD replacement and repair method STEP 19]
The cable is connected from the trackpad to the connector of the logic board of the red mark of the image, so raise the pin and pull out the cable.
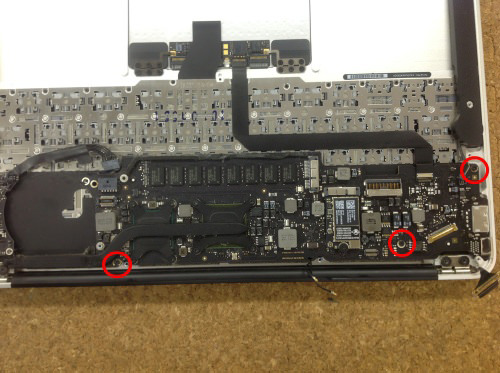
[MacbookAir A1370 LCD replacement and repair method STEP 20]
The three red marks of the logic board are secured with Torx screws, so remove them all.
[MacbookAir A1370 LCD replacement and repair method STEP 21]
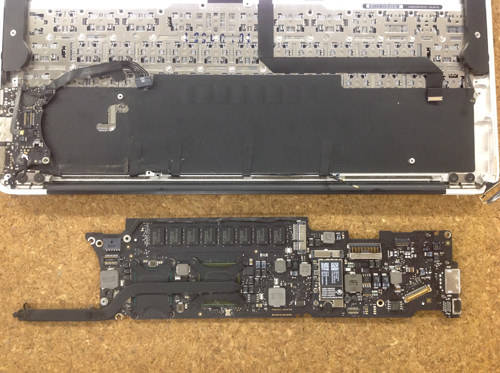
I was able to remove the logic board like the image when All the screws were removed!
[MacbookAir A1370 LCD replacement and repair method STEP 22]
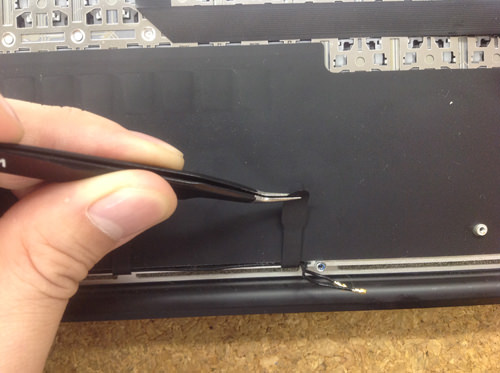
The WiFi antenna cable is fixed several places with black tape under the logic board, so carefully peel off the tape using tweezers.
[MacbookAir A1370 LCD replacement and repair method STEP 23]
Take the time to peel off the cable fastening tape or cable to avoid damaging it.
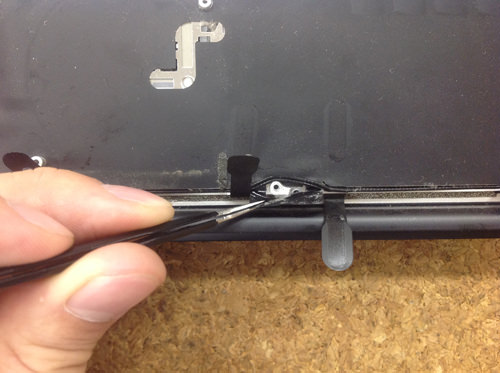
[MacbookAir A1370 LCD replacement and repair method STEP 24]
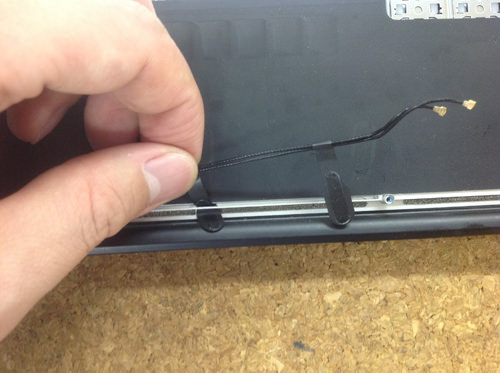
When all the tape is peeled off, the tape is passed through the hole in the groove of the main body, so pull it out.
[MacbookAir A1370 LCD replacement and repair method STEP 25]
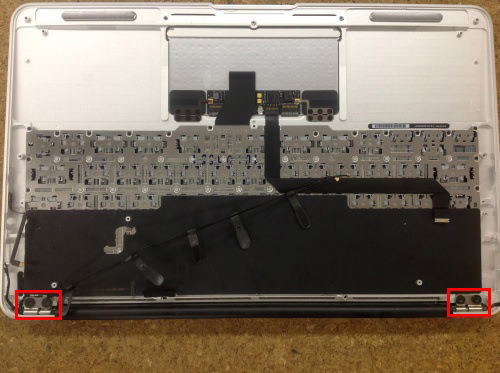
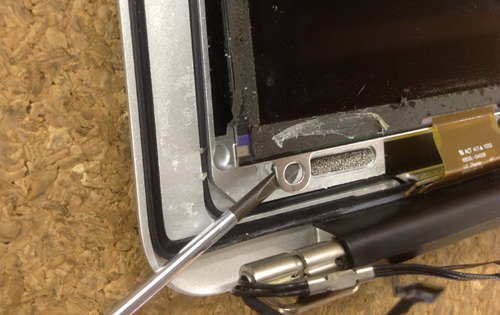
The upper body of the liquid crystal and the top case of the main body are fixed three places with a torx screw like a red mark on the hinge part that secures the top case of the main body, so remove everything.
[MacbookAir A1370 LCD replacement and repair method STEP 26]
Since the plate is placed between the top case and the hinge after removing the screw, let's remove it beforehand so as not to lose!
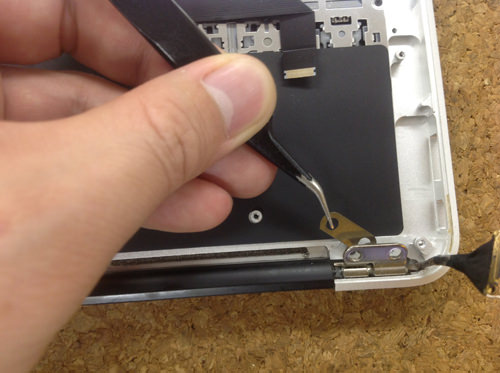
[MacbookAir A1370 LCD replacement and repair method STEP 27]
Next, remove the top case and lcd upper body so as to open.
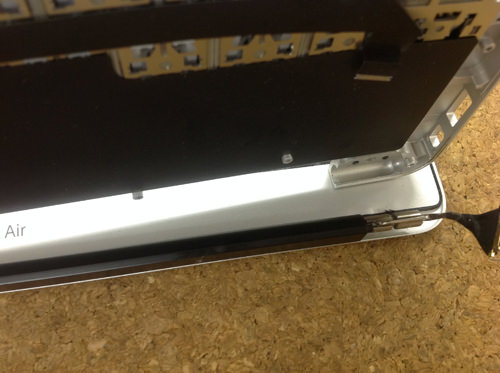
[MacbookAir A1370 LCD replacement and repair method STEP 28]
At last I was able to remove only the upper body!
If you want to replace the upper body, let's put it back in the reverse procedure after the replacement because decomposition is finished here.
If you only replace the panel, we will continue to disassemble it.
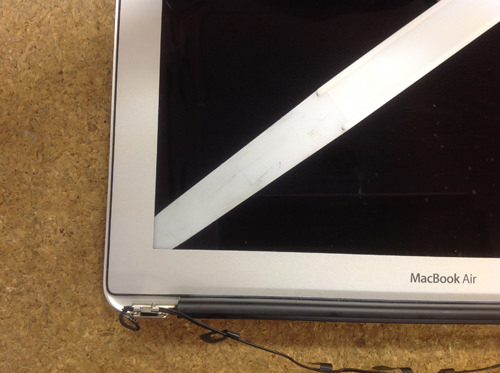
[MacbookAir A1370 LCD replacement and repair method STEP 29]
It is not an exaggeration to say that the panel replacement method is the production from here!
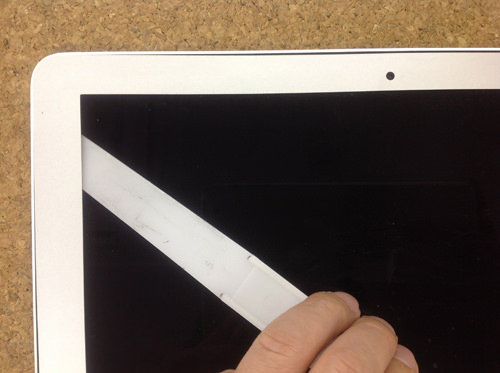
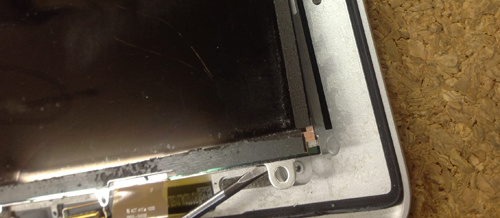
The bezel with the LCD panel and silver MacBookAir logo is glued to a very strong adhesive tape, so carefully peel off the bezel so that the spatula is placed in parallel in between and slides clockwise from the left hand side.
[MacbookAir A1370 LCD replacement and repair method STEP 30]
Take your time to get used to it and peel it off carefully.
Because there is a webcam body and a cable under the bezel, work is done so as not to damage it.
[MacbookAir A1370 LCD replacement and repair method STEP 31]
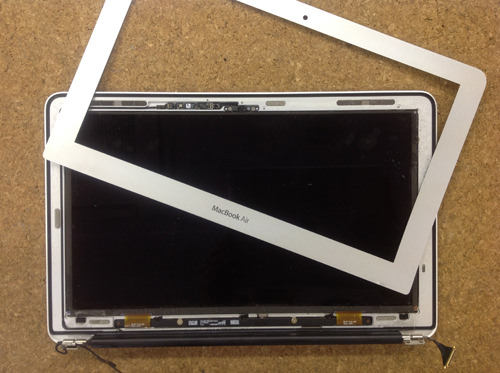
You can peel off the bezel by going around.
Please be careful because it is difficult to return to the original state beautifully because the bezel becomes distorted or bent if you force force when peeling off!
[MacbookAir A1370 LCD replacement and repair method STEP 32]
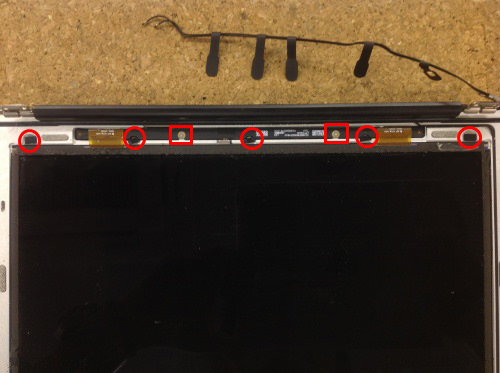
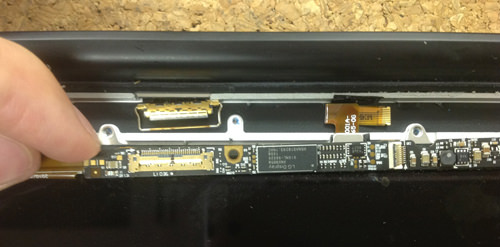
Remove all five screws (round red marks) with two philophila (square red marks) on the long, narrow base of the panel and five screws with black tape on the base side of the panel.
[MacbookAir A1370 LCD replacement and repair method STEP 33]
Because black tape is affixed near the center of the base, I use tweezers and peel it off carefully.
[MacbookAir A1370 LCD replacement and repair method STEP 34]
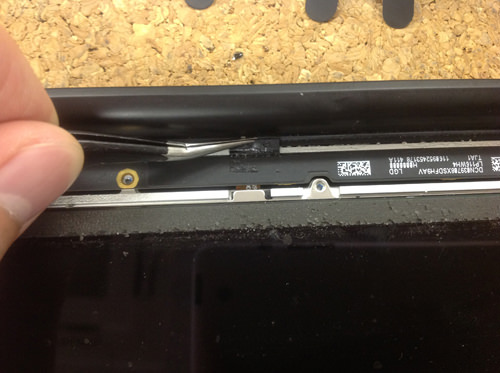
Next, lift the long and narrow base of the LCD lightly and pull it out, and the thin orange cable of the LCD backlight which was fixed with black tape is connected to a small connector of the base, so carefully raise the pin and pull it out so as not to damage it.
[MacbookAir A1370 LCD replacement and repair method STEP 35]
Next, the LCD cable next to it is connected, so lift the pin and pull it out carefully.
[MacbookAir A1370 LCD replacement and repair method STEP 36]
Since the back of the base of the liquid crystal is like an image, please refer to it when disassembling.
[MacbookAir A1370 LCD replacement and repair method STEP 37]
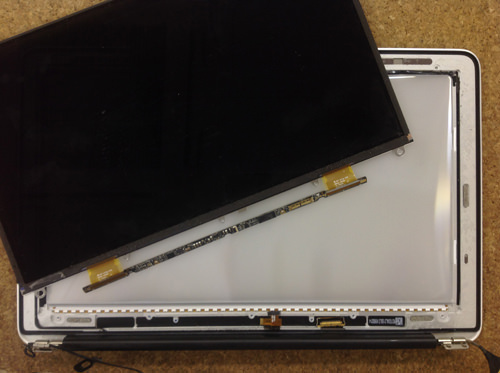
Next, the very thin LCD panel itself will be peeled off, but it is glued with strong double-sided tape.
With the base of the panel in front of you, gradually lift up from the front side of the right hand and peel off.
[MacbookAir A1370 LCD replacement and repair method STEP 38]
When the right side is finished peeling off, the left side will be peeled off as well, but let's do carefully because it is difficult to peel off further because the width of the double-sided tape is wider than the right side!
[MacbookAir A1370 LCD replacement and repair method STEP 39]
When the left and upper sides have also been peeled off, the LCD panel removal is complete.
Since the special polarizing film on the back of the panel is delicate, dust, fingerprints, scratches are very easy to stick, so be careful when handling!
[MacbookAir A1370 LCD replacement and repair method STEP 40]
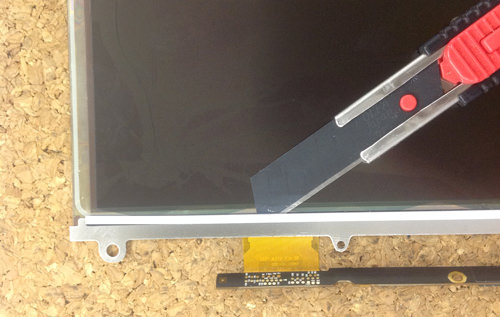
When replacing the panel, a thin metal reflector is glued to the panel base side, so use a cutter to peel it off and reuse it.
[MacbookAir A1370 LCD replacement and repair method STEP 41]
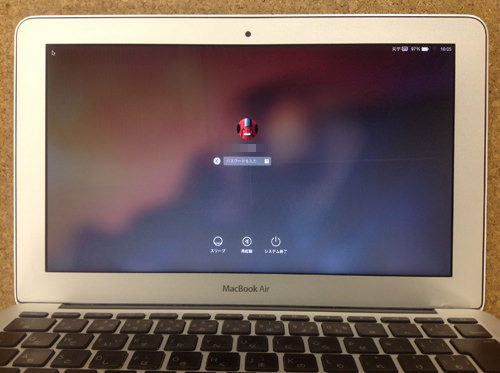
It is now possible to display normally by replacing it with a new panel!
I think that there is a person who can replace only the upper body, but replacing only the panel may be difficult if you are not used to disassembling.
If you break down only the panel, you will not be able to go back, so if you are not confident in disassembly, we recommend only the upper body replacement!


コメントを残す