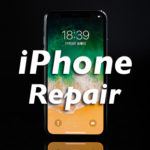
how to repair and disassemble iPhone7 LCD cracking, glass cracking, screen replacement
iPhone7 iPhone XS, XS Max, but has become a model a little before that XR has been released, it is still a model that can be used in active service.
Compared to the past, the price of the parts themselves has dropped, and there is an impression that the price of the repair shop has also dropped significantly.
There is also a cheap repair shop that cuts 10000 yen in a shop where the repair price of the glass crack is cheap, but it is possible to fix it even cheaper if you can change the liquid crystal by yourself.
If you are confident in your skills, please challenge and watch!
Please think about the emergency and take a backup before disassembling.
Will the data disappear if I change the LCD?
Data will not disappear just by changing the LCD of the iPhone.
Since the data of the iPhone is recorded in the part called NAND on the logic board, the data is not lost just by replacing the liquid crystal.
However, the data is not lost only if you repair it yourself or repair it at a non-regular store.
If you want to replace the liquid crystal with the data left, you want to avoid manufacturer repair because it is almost 100% of the initialization of data when you ask Apple or an authorized service provider.
In addition, if you can take a backup in iTunes, etc., there is no problem with the manufacturer repair, but you can not take the backup, if you feel troublesome please consult a non-regular store.
The advantage of non-regular stores is that most of the repairs that are not related to the data will proceed with the data as it is.
If you can replace the liquid crystal by yourself with reference to the decomposition method below, you can use the iPhone as it is with the data up to now.
However, it is safe to back up and remember how to back up in case of a failure that you do not know when it will happen.
iPhone7 LCD glass, panel replacement, disassembly procedure, repair method
- [iPhone7 LCD glass replacement, decomposition method STEP 1]

- The iPhone7 was released on September 16, 2016, and it is still new as a model because it will be 9/25 that published this decomposition method!
Because the decomposition method is very different compared to iPhone6s etc., I think that the person who swed by any chance the screen is helpful.
The basic decomposition flow will be the same, but the position of the connector of the liquid crystal and the Y-shaped screw adopted from this time have been newly added, so please note that it is not possible to disassemble only by the conventional tool.
Y-shaped drivers have been sold in home centers, etc., but it is difficult at this time to obtain Y-shaped drivers that fit the iPhone7 because of their large shape.
We recommend that you always use a screwdriver that suits your iPhone7 because there is a possibility that the screw will lick or fail if you disassemble forcibly.
- [iPhone7 LCD glass replacement, decomposition method STEP 2]

- I will continue to disassemble the iPhone7 from here, but let's remove each tray of sim card first!
The sim tray can be easily removed using the pins that were included in the accessories at the time of iPhone purchase.
- [iPhone7 LCD glass replacement, decomposition method STEP 3]

- Decomposition of the iPhone7 will start from the place where all the screws are removed, but it will be removed from the Torx screwdriver.
- [iPhone7 LCD glass replacement, decomposition method STEP 4]

- Since the iPhone7 is waterproof, a waterproof seal is affixed around the inside of the liquid crystal.
The tool in the image is called a heat gun, and it is not necessarily an indispensable tool though it is a tool which made the dryer strong if it says plainly.
If you are new to disassembly of the iPhone itself, you can work smoothly because the seal will be soft if you use it, but it is possible to substitute even a dryer once.
- [iPhone7 LCD glass replacement, decomposition method STEP 5]

- Up to now, the iPhone has been to wake the LCD from the home button side to the camera side, but this iPhone7 will open the LCD so as to wake up from left to right.
First of all, the tool is inserted into the position where the spatula is located and it floats little by little, but it becomes easy to disassemble when the suction cup (orange) is used together.
If you try to cause it forcibly, the liquid crystal side will crack, or it will lead to other failures, so we will open it slowly. -
- [iPhone7 LCD glass replacement, decomposition method STEP 6]

- If you can float the liquid crystal even a little, it is good to insert a pick etc. like the image!
By doing this, the liquid crystal will not close again!
- [iPhone7 LCD glass replacement, decomposition method STEP 7]

- Now we will open the gap on the left side.
If you look closely at the inside of the part that could be opened, you will see a black seal or a white seal, but it will peel off regardless because it is a waterproof seal.
- [iPhone7 LCD glass replacement, decomposition method STEP 8]

- This time, it is on the right side, but the liquid crystal is floated in the same way as before.
- [iPhone7 LCD glass replacement, decomposition method STEP 9]

- A waterproof seal is attached to one lap of the liquid crystal, but please pay attention only around the camera (upper part).
At the moment, I think that I was able to float the liquid crystal of the left and right slightly below, but the upper part does not decompose in the same way because the nail is caught inside, and a little knack is done.
If you pull the liquid crystal lightly in the direction of the arrow, there will be a slight gap between the main body and the liquid crystal, but when the waterproof seal comes into view, please peel off the seal in the gap.
By doing so, it is possible to wake up the LCD panel from the left side to the right side.
- [iPhone7 LCD glass replacement, decomposition method STEP 10]

- I was able to open it, but please be careful not to break it because a lot of connectors on the liquid crystal side are connected to the logic board.
- [iPhone7 LCD glass replacement, decomposition method STEP 11]

- The first decomposition to be done after opening is work to remove the battery connector from the logic board, but since it is connected under the iron plate of the image, all screws of the red circle part are removed.
Four screws of this part are not Phillips, so please be sure to use a special tool because you can not open it unless you have a Y-shaped screwdriver!
I own several Y-shaped drivers, but I couldn't take them off right away because the sizes were slightly different.
I thought that I would try to disassemble it forcefully as it is, but I am using a special tool because the risk of licking from the experience up to now was high. -
- [iPhone7 LCD glass replacement, decomposition method STEP 12]

- I was able to remove the iron plate.
I think that it is good to understand the structure of the iPhone7 once in this state.
- [iPhone7 LCD glass replacement, decomposition method STEP 13]

- The red arrow part becomes the connector of the battery, but the connector can be removed from the logic board by lifting from the bottom to the top using the tool.
Be sure to use plastic tools when using tools.
Please note that if you try to remove it with a metal tool (such as tweezers), it may short-circuit if you touch the base by any chance.
- [iPhone7 LCD glass replacement, decomposition method STEP 14]

- Next, the cable on the liquid crystal side is removed, but it decomposes in the same way as the method which removed the connector of the previous battery.
In the previous iPhone series, the connector relationship of the LCD was all gathered on the upper side (upper right), but in the case of the iPhone7, it is one of the changes because it became the lower right!
- [iPhone7 LCD glass replacement, decomposition method STEP 15]

- There is one more connector under the cable, so let's remove it in the same way.
- [iPhone7 LCD glass replacement, decomposition method STEP 16]

- There is a cable of the camera in this part, but remove the screw attached to the iron plate as if the connector of the liquid crystal was removed.
- [iPhone7 LCD glass replacement, decomposition method STEP 17]

- Because there is a connector in the inside when the screw can be removed, it is possible to remove it if it is made to lift from the bottom to the top.
- [iPhone7 LCD glass replacement, decomposition method STEP 18]

- Now it was possible to separate the body side and the liquid crystal side of the iPhone7.
- [iPhone7 LCD glass replacement, decomposition method STEP 19]

- In the case of LCD replacement, it is necessary to port the front camera and home button attached to the original LCD.
The image becomes the front camera part, but remove all screws that are enclosed in red circles.
- [iPhone7 LCD glass replacement, decomposition method STEP 20]

- If it is possible to remove each iron plate, there is a screw that secures the ear speaker inside, so both will be removed.
- [iPhone7 LCD glass replacement, decomposition method STEP 21]

- The camera cable has come into view, but the rest will only be fixed to the main body with double-sided tape, so we will peel it off.
- [iPhone7 LCD glass replacement, decomposition method STEP 22]

- It is easy to peel off when using a tool such as an image, but please work carefully because there is a possibility that it will break!
It is easy to peel off when the work is done after applying a little heat such as a dryer and a heat gun.
- [iPhone7 LCD glass replacement, decomposition method STEP 23]

- The proximity sensor and light sensor part are a little stiff, but if you float a little, you can peel it off.
- [iPhone7 LCD glass replacement, decomposition method STEP 24]

- I was able to remove the front camera part.
- [iPhone7 LCD glass replacement, decomposition method STEP 25]

- Next, I will remove the home button, but there is an iron plate on top of the home button, so I will remove all the screws of the red circle part.
Please note that the screw of this part can not be removed if it is not a Y-shaped screwdriver!
- [iPhone7 LCD glass replacement, decomposition method STEP 26]

- I was able to remove the plate, but please keep it so as not to make a mistake because the length and thickness of the screw are slightly different.
- [iPhone7 LCD glass replacement, decomposition method STEP 27]

- The red circle part becomes the connector of the home button, but it opens like the image and it is removed.
The home button part is made very delicate, and it breaks, and it breaks immediately if it scratches it.
If it breaks, why don't you replace it with a new home button?
It does not go, it can be used as a home button even if you install a new home button, but you need to be careful because fingerprint authentication can not be used.
- [iPhone7 LCD glass replacement, decomposition method STEP 28]

- The home button cable is fixed with double-sided tape, so insert the tool under the cable and peel it off.
If you feel a little stiff, warm it lightly with a dryer and it is easy to remove it if you wipe the double-sided tape.
- [iPhone7 LCD glass replacement, decomposition method STEP 29]

- I was able to remove the home button from the LIQUID crystal.
It's amazing that such a small part is loading fingerprints.
- [iPhone7 LCD glass replacement, decomposition method STEP 30]

- Next, the heat shield will be removed, but this part of the screw will require a Y-shaped screwdriver instead of a Phillips screwdriver, but remove all the screws on the side. Because three screws are also stopped on the opposite side, let's do not forget to remove it!
- [iPhone7 LCD glass replacement, decomposition method STEP 31]

- If both screws can be removed, the heat shield can be floated as shown in the image.
- [iPhone7 LCD glass replacement, decomposition method STEP 32]

- I was able to remove the heat shield.
Since the parts attached to the liquid crystal were able to be removed by this, the liquid crystal replacement of the iPhone7 will be completed if the lcd is implanted into the liquid crystal to replace the part that was removed and incorporated in the original procedure.
If you are used to disassembling, please think that it takes about 1 hour to disassemble the iPhone7 for the first time, 20 minutes to 30 minutes.

コメントを残す