iPhone6s LCD glass, panel replacement and disassembly procedures
[iPhone6s LCD glass, panel replacement STEP 1]
It becomes an decomposition procedure which is effective when the liquid crystal crack of the iPhone6s, the display failure, and the line enter.
Basically, it is similar to the decomposition method of 6, but the liquid crystal itself is slightly different because 3D Totch is installed.
Please refer to it when it breaks down because I will explain it in an easy-to-understand manner as much as possible!
Basically, the tools you need are a Phillips screwdriver and a pentabebebef screwdriver (star type).If there is a small spatula, etc., the work efficiency will be high, so please use it if there is a tool that can be substituted.
[iPhone6s LCD glass, panel replacement STEP 2]
First of all, there is a small screw next to the dock connector, so I remove it from there.
This part requires a pentabebef screwdriver, and a normal screwdriver cannot remove the screw.
If you do not have it, please prepare it because you can purchase it on the net.
[iPhone6 LCD glass, panel replacement STEP 3]
In this case, I would like to use a suction cup because it is not a liquid crystal cracking.
Suction cups are also sold on the Internet, but they are not always necessary.In addition, if there is a crack or crack in the screen, it is not possible to use the suction cup well.
If the suction cup is not available, you can substitute it by using a spatula, tweezers, etc.
When using a spatula, insert it into the gap between the liquid crystal and the main body.
Make the LCD from the home button side to the camera side like an arrow.
However, the tape (waterproof?) that was not introduced at the time of the iPhone6Heat resistant?It is a little stiff because it is affixed to one lap inside around the liquid crystal.
If you force it, it will cause it to fail, so please repeat the process of removing the tape after causing a little liquid crystal.
Then, I think that it is possible to peel off gradually.
[iPhone6s LCD glass, panel replacement STEP 4]
I think that i was able to cause the liquid crystal like the image if the process of the previous one was successful.
Please take your time to state the image!
[iPhone6s LCD glass, panel replacement STEP 5]
Next, disconnect the battery and prevent electricity from flowing to the iPghone body.
I think that there is a part of the image around the lower right of the battery, but the connector is hidden by the iron plate.
The iron plate is fixed with two screws, so you will use the Phillips screwdriver.
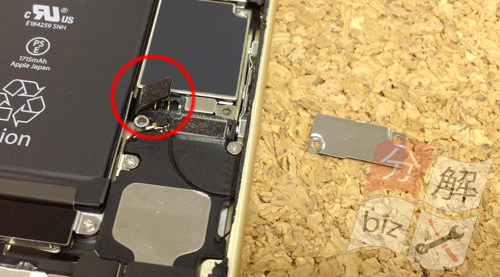
[iPhone6s LCD glass, panel replacement STEP 6]
The iron plate is removed.
Since the red circle portion is connected to the logic board, you can easily remove it if you try to lift from the bottom to the top.
Now that the iPhone6s body side does not flow electricity.
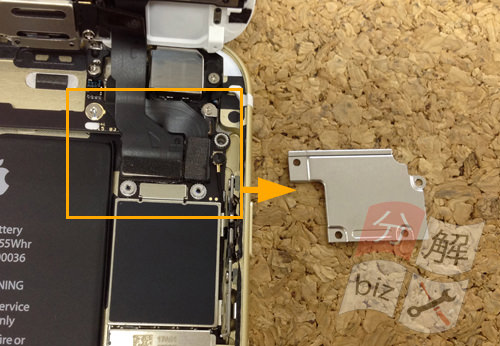
[iPhone6s LCD glass, panel replacement STEP 7]
Next, I want to remove the cable around the liquid crystal.
Remove all screws in the area that are enclosed in orange.
[iPhone6s LCD glass, panel replacement STEP 8]
Then, i was able to remove the plate of the iron of the previous.
The connector is connected to the logic board below, but these will be liquid crystal cables, camera cables, etc., so please remove them carefully.
It is a way to remove, but it can be easily removed if it is lifted from the bottom to the top, and there are three connectors in all.
[iPhone6s LCD glass, panel replacement STEP 9]
It becomes the part where the connector was removed.
[iPhone6s LCD glass, panel replacement STEP 10]
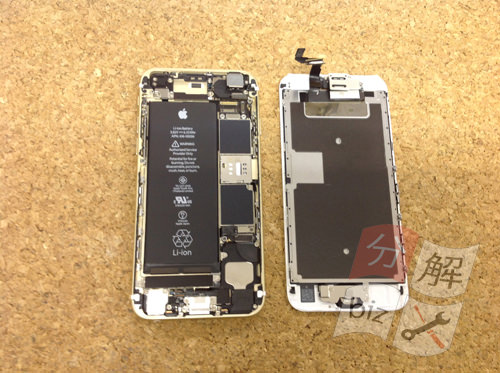
Now it was possible to separate the body side and the liquid crystal side of the iPhone6s.
[iPhone6s LCD glass, panel replacement STEP 11]
From here, we will enter the decomposition of the liquid crystal side.
The camera and the home button are attached to the liquid crystal side.
If you want to replace the screen due to a crack in the LCD, you need to port the camera and the home button.
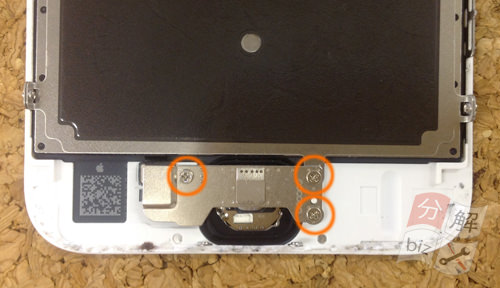
First of all, I want to remove it from the home button, but Remove the three screws on the iron plate.
[iPhone6s LCD glass, panel replacement STEP 12]
If you can remove the screw, you can remove the iron plate immediately.
The home button of the iPhone6s has a fingerprint authentication function, so it has become a very delicate part.
First, remove the orange connector.
You can easily remove the connector if you try to lift from the bottom to the top.
Next, the arrow part is peeled off, but it is fixed with light double-sided tape.
This place is very delicate, so please be careful not to break it or break it.
Because it is necessary to remove it in parallel so as not to bend, I think that it is good to remove it by inserting a considerably thin card etc. below.
This time I used a thin iron spatula!
I think that it will be removed as it is if you are not very concerned, but the part that was most carefully disassembled in all 25 steps was here.
[iPhone6 LCD glass, panel replacement STEP 13]
The home button was able to be removed from the LCD.
[iPhone6s LCD glass, panel replacement STEP 14]
Next, I want to remove the front camera.
First of all, it enters the decomposition of the camera side, but remove the screw of the part which is enclosed in a red circle.
[iPhone6s LCD glass, panel replacement STEP 15]
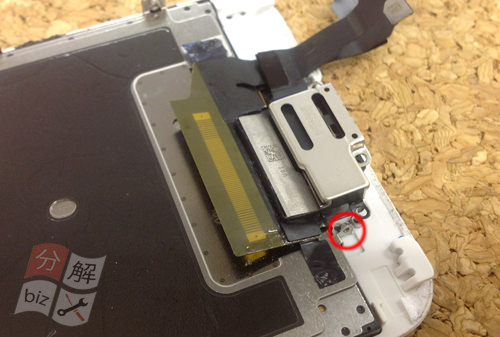
Do not forget to remove one screw hidden next to the screw that was removed in STEP14.
[iPhone6s LCD glass, panel replacement STEP 16]
In addition, the iron plate comes off by hand, but it is fixed to the lower side with light double-sided tape as shown in the image.
The tape is attached along the red line, but you can easily remove each plate if you slowly draw it to the front side.
[iPhone6s LCD glass, panel replacement STEP 17]
The ear speaker is hidden under the plate of the previous.
Let's remove it because it can be easily removed by hand!
[iPhone6s LCD glass, panel replacement STEP 18]
Only the arrow part (gold) is fixed with light double-sided tape, but it is possible to remove it easily if it is lifted from the bottom to the top.
The cable under the ear speaker can be removed by lightly twisting from the bottom to the top.
[iPhone6s LCD glass, panel replacement STEP 19]
Only the front camera was able to be removed from the liquid crystal.
[iPhone6s LCD glass, panel replacement STEP 20]
Next, I want to remove the heat shield of the iPhone6s.
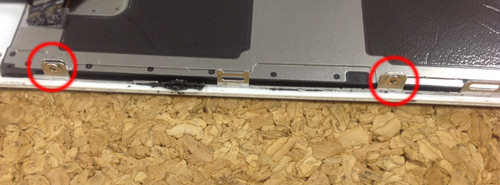
There are three screws on both sides, so remove them all.
There are only two red circles, but the image has been cut off.
[iPhone6s LCD glass, panel replacement STEP 21]
The screw on the opposite side is removed in the same way.
[iPhone6s LCD glass, panel replacement STEP 22]
Also disconnect the cable that was connected to the home button.
It is only fixed with light double-sided tape, so remove it from the bottom to the top as shown in the image.
[iPhone6s LCD glass, panel replacement STEP 23]
The arrow part is also fixed with tape, so it will be peeled off.
[iPhone6s LCD glass, panel replacement STEP 24]
It became such a feeling!
Since there is no one that secures the heat shield with this, it has become possible to remove it easily.
[iPhone6s LCD glass, panel replacement STEP 25]
If the process up to this point can be done, it is possible to replace the broken glass.
If you port the home button and camera to the newly prepared LCD panel and incorporate it according to the original procedure, all work will be completed.
 It becomes an decomposition procedure which is effective when the liquid crystal crack of the iPhone6s, the display failure, and the line enter.
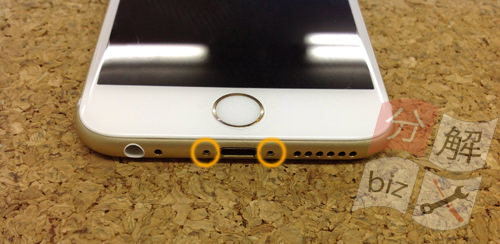
 First of all, there is a small screw next to the dock connector, so I remove it from there.
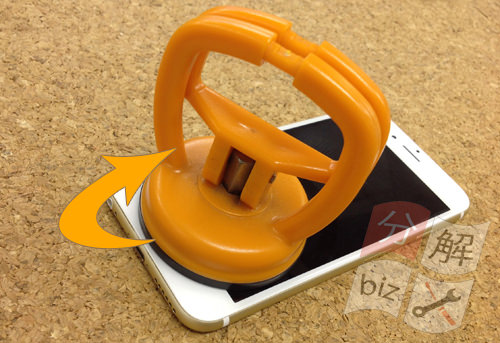
 In this case, I would like to use a suction cup because it is not a liquid crystal cracking.
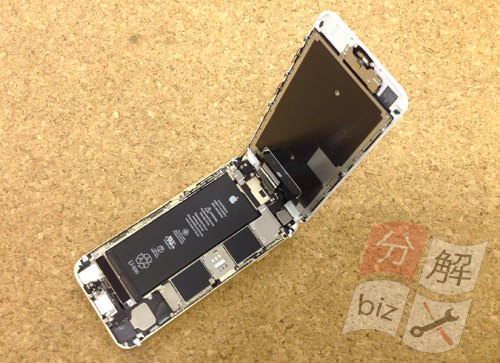
 I think that i was able to cause the liquid crystal like the image if the process of the previous one was successful.
 The iron plate is removed.
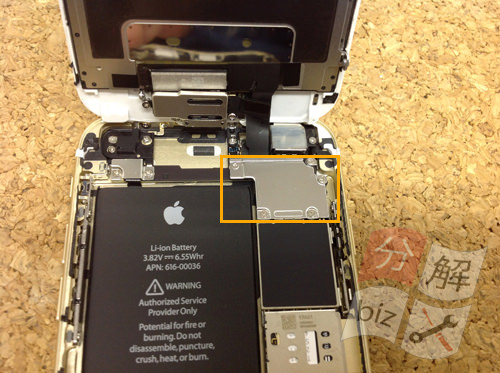
 Then, i was able to remove the plate of the iron of the previous.
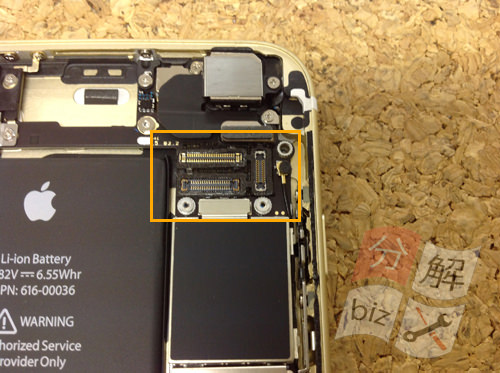
 From here, we will enter the decomposition of the liquid crystal side.
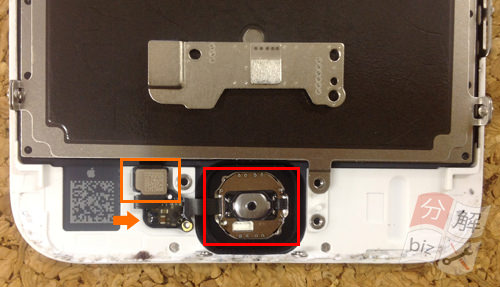
 If you can remove the screw, you can remove the iron plate immediately.
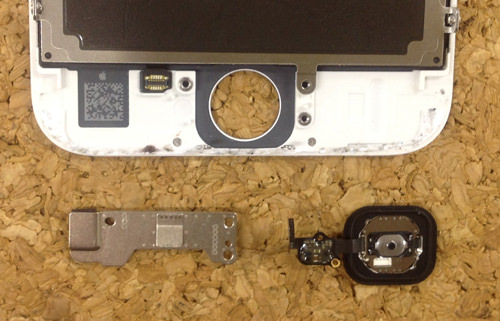
 The home button was able to be removed from the LCD.
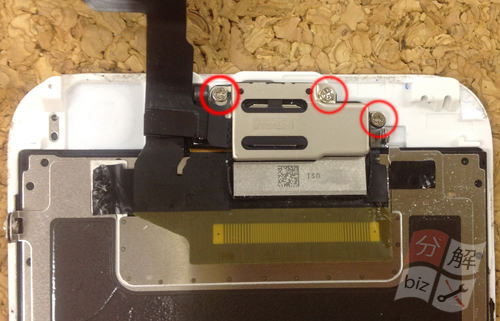
 Do not forget to remove one screw hidden next to the screw that was removed in STEP14.
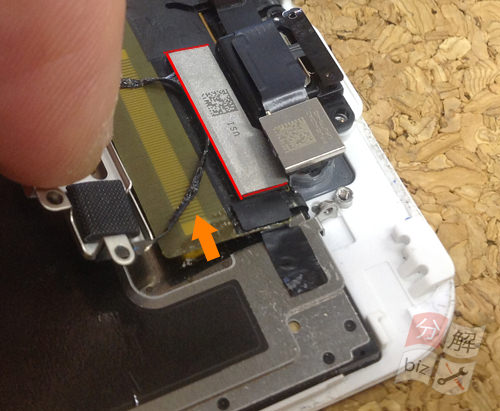
 In addition, the iron plate comes off by hand, but it is fixed to the lower side with light double-sided tape as shown in the image.
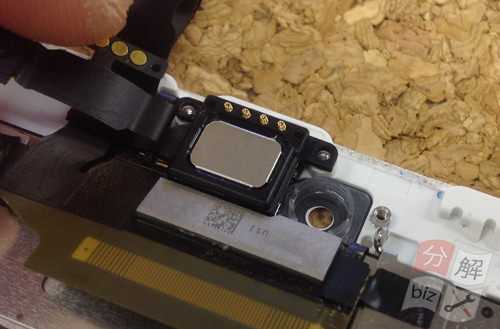
 The ear speaker is hidden under the plate of the previous.
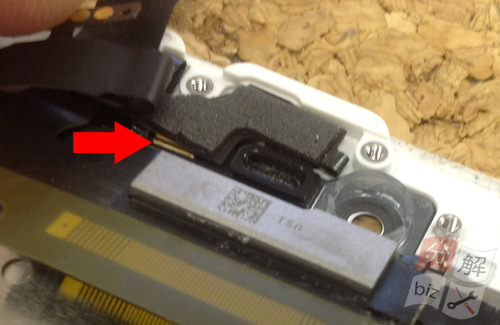
 Only the arrow part (gold) is fixed with light double-sided tape, but it is possible to remove it easily if it is lifted from the bottom to the top.
 Next, I want to remove the heat shield of the iPhone6s.
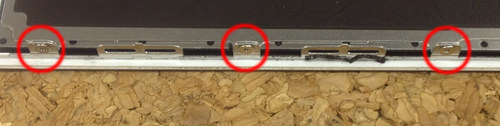
 The screw on the opposite side is removed in the same way.
 Also disconnect the cable that was connected to the home button.
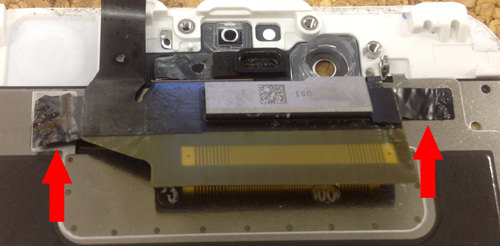
 The arrow part is also fixed with tape, so it will be peeled off.
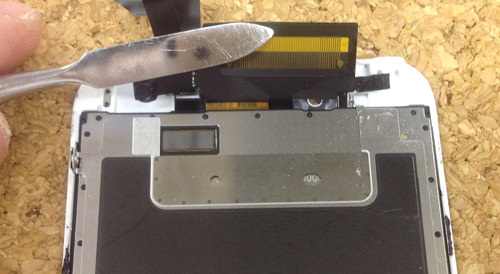
 It became such a feeling!
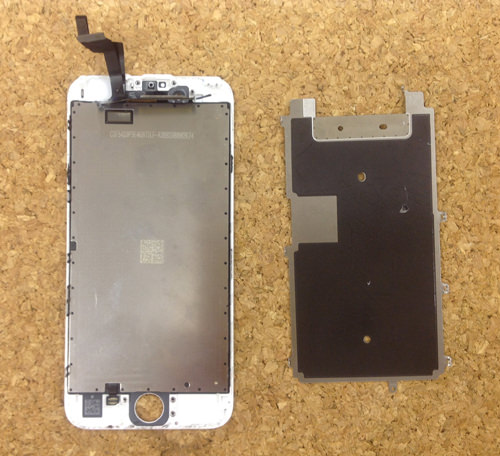
 If the process up to this point can be done, it is possible to replace the broken glass.

コメントを残す