iPhone4 LCD glass, panel replacement decomposition procedure
iPhone4 has become an initial model now, but I think some people are using only WIFI?
Even in iPhone repair shops all over the country, shops that can be repaired as reception ends have been quite limited, but if you can get even parts, you can repair it yourself.
When fixing at the repair point, it is a liquid crystal exchange that costs around 5000 yen, but if you prepare and fix the liquid crystal parts yourself, liquid crystal replacement is possible at a low price of about 1000 yen.
If you have confidence in your skills, please try it!
iPhone4 LCD glass, panel replacement and disassembly procedure
- [iPhone4 LCD glass, panel replacement STEP 1]

- If the touch panel is broken, the touch reaction becomes difficult, or if the LCD is displayed badly or the line enters, a liquid crystal replacement is required, so this decomposition method is an effective procedure.
Since the decomposition is slightly complicated unlike iPhone5, 6, etc., if you feel that it is difficult to see the contents of the following roughly, we recommend that you consult a repair shop.
In addition, since the screw to be removed on the decomposition will be very large, please manage so as not to lose!
- [iPhone4 LCD glass, panel replacement STEP 2]
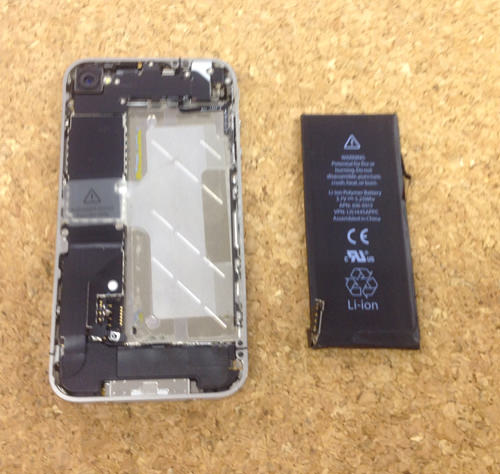
- Since the method of decomposition is all common until the battery replacement,Please check here to replace the battery.
- [iPhone4 LCD glass, panel replacement STEP 3]
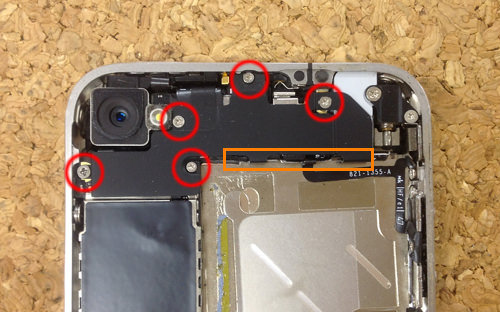
- Please do not lose it because i will remove a lot of screws from here.
Also, depending on the location to remove, the shape and length of the screw will vary, so please check the location.
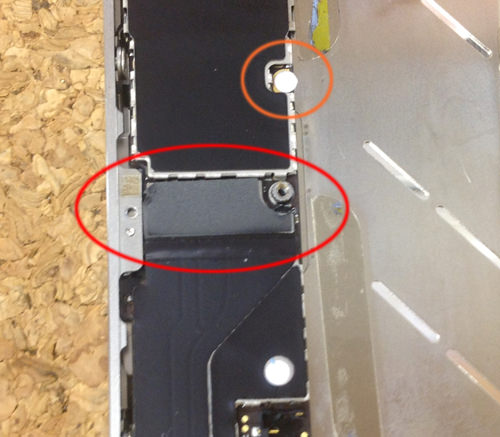
First of all, remove all the screws of the red circle part.
Then, the plate of black iron comes to be removed, but it might be difficult to remove it a little because there is a nail in the orange part.
It is safe to disassemble after understanding the structure because it becomes a place that can be removed without putting power.
- [iPhone4 LCD glass, panel replacement STEP 4]
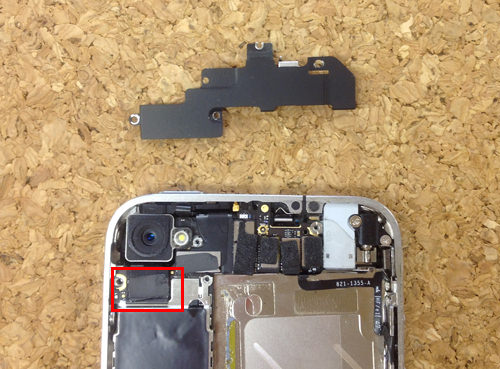
- I was able to remove the iron plate from the iPhone4 body.
The camera is connected to the logic board on the left side (red frame) that was removed, so remove the connector.
You can easily remove it if you try to lift it from the bottom to the top.
- [iPhone4 LCD glass, panel replacement STEP 5]
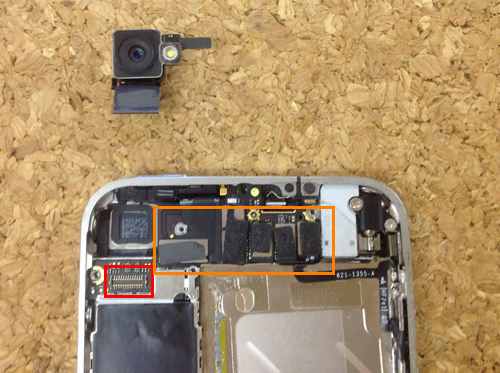
- I was able to remove the camera safely.
When the connector of the camera of the previous is removed, it becomes like a red frame, but there are five connectors similar to the orange part in all.
Remove all connectors from the logic board as if they were removed from the camera.
After removing the connector, it is OK as it is for the time being.
There is a slightly larger screw in the upper right part of the orange frame, but please remove it here.
- [iPhone4 LCD glass, panel replacement STEP 6]
- Next, there is an image part around the middle of the logic board, but because the plate of iron is attached to the red circle part, I use the Phillips screwdriver.
Then, let's remove it as well here because a slightly larger connector comes out!
This connector is the wiring cable of the dock connector (charge plug).
In addition, there is a screw of the shape that changed to the right side of the connector, but i also remove it using a small flat-blade screwdriver, a ply screwdriver, etc.
- [iPhone4 LCD glass, panel replacement STEP 7]
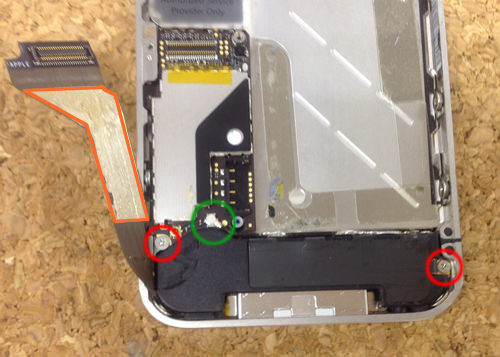
- If you remove the connection part of the dock connector of the previous, you can peel off the cable itself to some extent as shown in the image.
A light double-sided tape is attached to the part which is enclosed in the frame of orange, but it can be made to the state like the image if it wakes up slowly.
Next, the screw is attached to the red circle part, so I remove it.
And, it is possible to remove it if it causes it from the bottom to the top though the pattern of the connector which was not before becomes a round connector of the green part.
This round connector is the wiring of the loudspeaker.
- [iPhone4 LCD glass, panel replacement STEP 8]
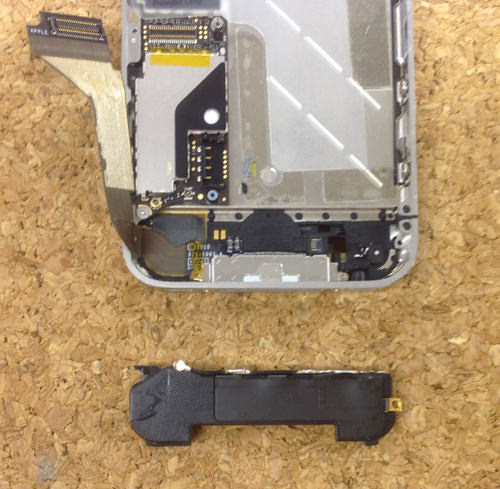
- I was able to remove the dock connector.
- [iPhone4 LCD glass, panel replacement STEP 9]
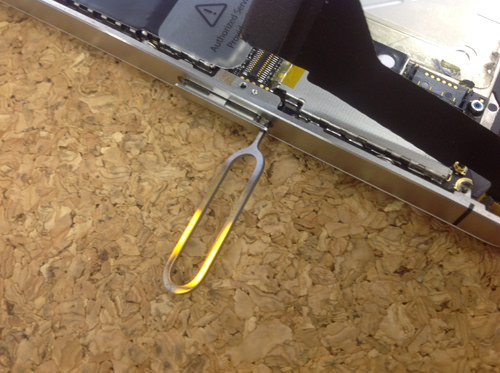
- Next, remove the SIM card and sim tray from the iPhone4 body.
This can be the first thing to do.
To remove the liquid crystal, it is necessary to remove the logic board, but if there is a SIM card or tray, it will be caught when removing the logic board, so it is necessary to remove it.
You can remove the tool like the image just by inserting it into a small hole, but this tool is the one that is genuine and attached at the time of iPhone purchase.
If it is gone, you can also substitute it at the tip of the clip.
- [iPhone4 LCD glass, panel replacement STEP 10]
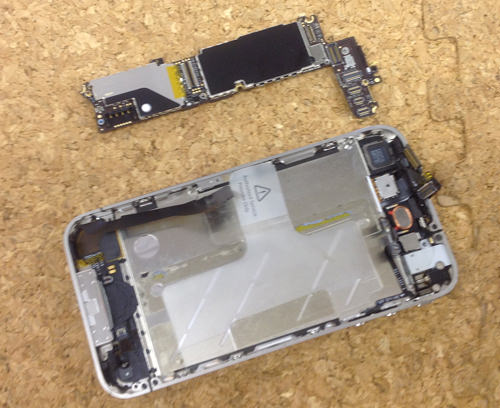
- Only the logic board could be removed.
The logic board is not an exaggeration to say that it is the most important part of the iPhone part, so be careful not to break it.
- [iPhone4 LCD glass, panel replacement STEP 11]
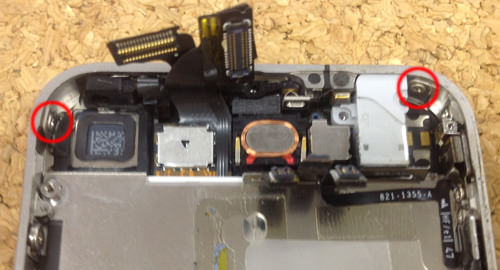
- Next, remove the four-cornered screw.
This is the upper part of the iPhone (camera side), but remove the red circle screw.
- [iPhone4 LCD glass, panel replacement STEP 12]

- This is the lower part (dock connector side), but remove the screw as before.
- [iPhone4 LCD glass, panel replacement STEP 13]
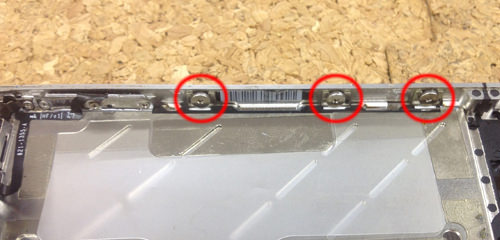
- Next, remove the three screws on the side side.
However, not only the screw is attached, but also the washer is attached, so please manage it so as not to lose it.
- [iPhone4 LCD glass, panel replacement STEP 14]

- Remove the opposite side in the same way.
Now all the screws and connectors that secure the liquid crystal can be removed!
- [iPhone4 LCD glass, panel replacement STEP 15]

- Insert spatulas into the gap between the liquid crystal and the main body.
Then, only the liquid crystal can be removed from the main body if the whole is floated because the gap can be done like the image.
- [iPhone4 LCD glass, panel replacement STEP 16]
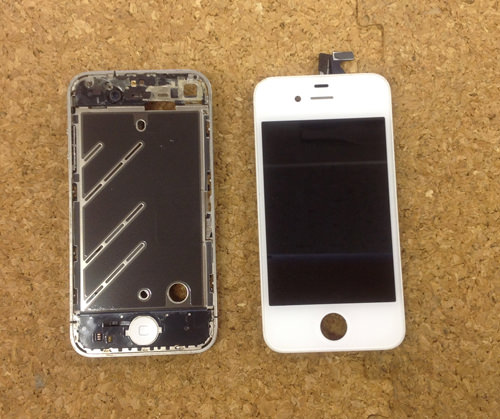
- I was able to remove only the liquid crystal from the iPhone4 body!
All work is completed by replacing it with a newly prepared part.
I think that the repair difficulty of the liquid crystal exchange is high compared to the recent model, so if you are using the iPhone4 as the main model, please try to disassemble it by thinking about the emergency!

コメントを残す