how to repair and disassemble iPhone SE screen cracks, cracks, cracks
IPhone SE LCD replacement and disassembly method, repair procedure is open to the public!
[iPhone SE LCD replacement and decomposition method STEP 1]
iPhone SE has become a model a little before now, but there are also compact size, there are quite a few people who are still used as active models.
If the glass becomes cracked by dropping it, or the line enters the display of the panel, it is necessary to replace it, but for such a time, I will introduce the decomposition method when performing the front panel exchange here, so please refer to it.
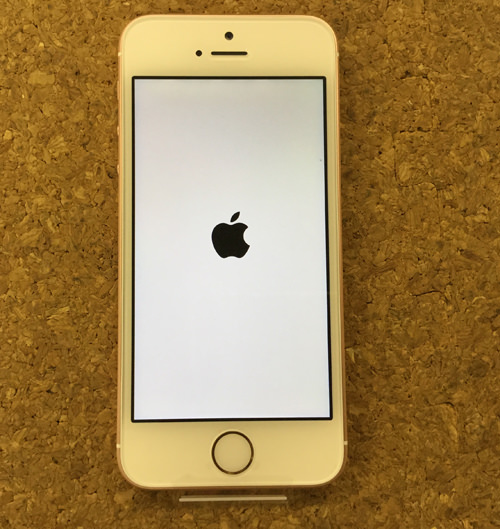
First, turn it off.
[iPhone SE LCD replacement and decomposition method STEP 2]
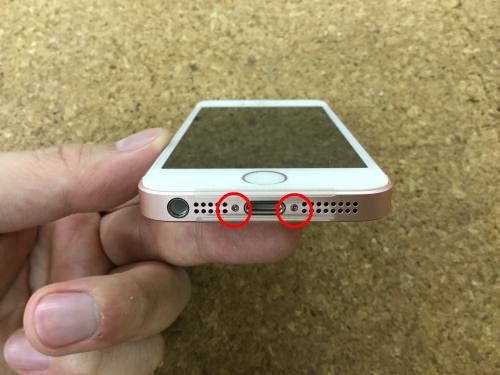
The Lightning Cable plug-in side of the charging at the bottom of the main unit is covered with two special screws, so remove it.
All the screws used for the iPhone SE are quite small, so keep them so that they don't lose them.
[iPhone SE LCD replacement and decomposition method STEP 3]
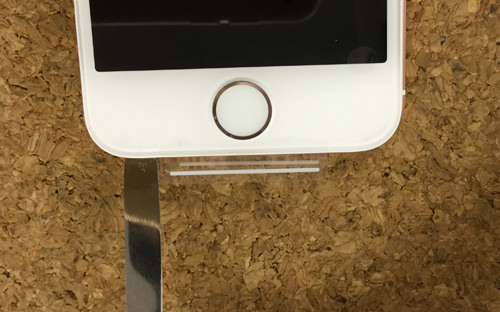
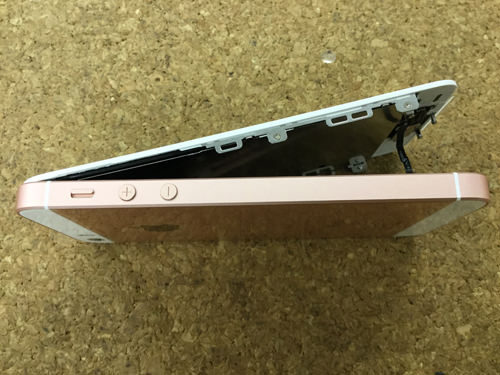
Look at the home button in front of you and gently insert a thin metal spatula on the left side and carefully lift the screen using the principle of Teco.
In the image, we use metal tools to disassemble, but if you are new to disassembly, you may get a lot of scratches if you use a metal tool, so please proceed with the decomposition using a tool made of soft material as much as possible.
If the tip is thin, you can substitute a card.
[iPhone SE LCD replacement and decomposition method STEP 4]
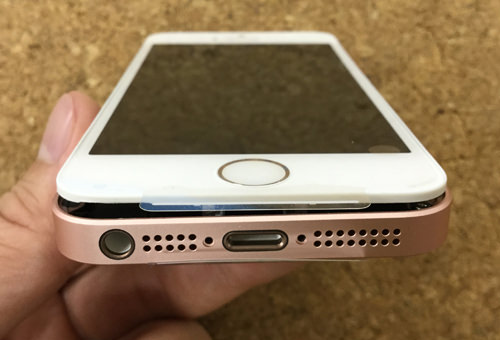
Let's float the right side as well if it floats lightly.
If you put the spatula too far in this case, it may damage other places, so be careful and proceed with your work.
Also, please note that the battery is still connected internally.
[iPhone SE LCD replacement and decomposition method STEP 5]
When the lower part of the main body floats, both sides will float a little with a spatula, but if it floats too much, the cable of the home button is connected and damaged.
Do not put a spatula on only one side of the upper part of the body.
There is a liquid crystal cable, etc., and it may damage it.
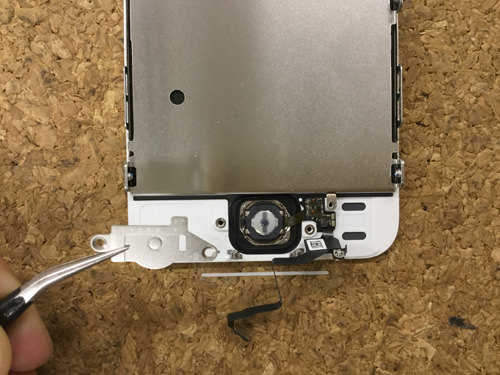
[iPhone SE LCD replacement and decomposition method STEP 6]
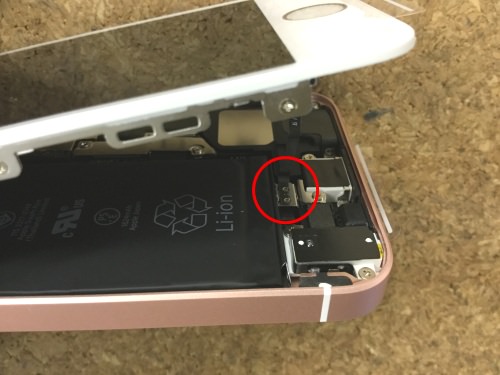
When you look in from the side as shown in the image, the cable of the home button is fixed with a small metal fittings on the dock connector of the charging Lightning cable outlet.
[iPhone SE LCD replacement and decomposition method STEP 7]
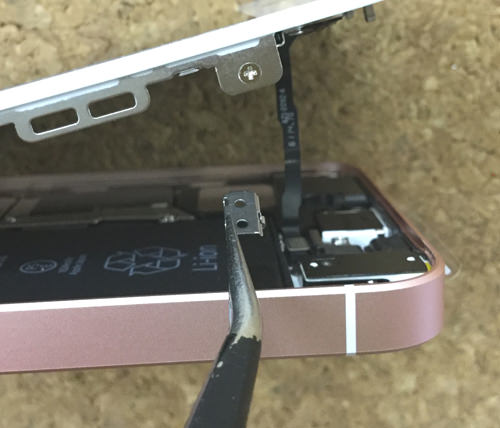
Remove this small metal fitting so that it is lifted up using tweezers.
It's not a twist, it's a feeling of lifting vertically.
[iPhone SE LCD replacement and decomposition method STEP 8]
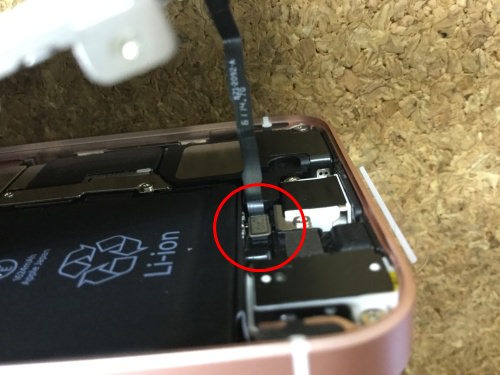
When the metal fittings are removed, a small touch connector is connected, so carefully remove it so that it is lifted up with tweezers.
[iPhone SE LCD replacement and decomposition method STEP 9]
You can remove the touch connector to open the top panel to the fulcrum, but be aware that the LCD cable and camera cable will still remain connected to the logic board.
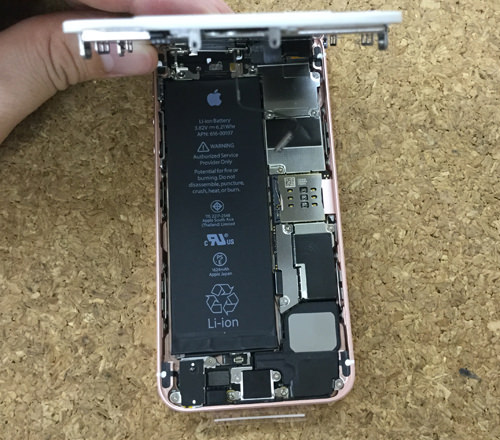
[iPhone SE LCD replacement and decomposition method STEP 10]

The battery is connected to the logic board of the main computer base and protected with a metal plate though the screen is still awake.
First of all, let's remove two screws of the metal plate.
[iPhone SE LCD replacement and decomposition method STEP 11]
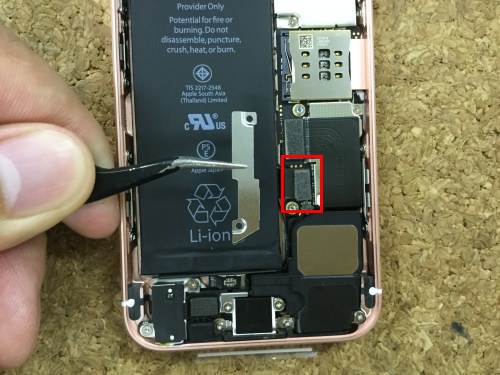
The metal plate can be easily removed by removing the screw.
Then remove the touch connector on the connection between the battery and the logic board so that it is lifted using a plastic spatula.
I remove the connector of the red frame part, but if I set the tool under the connector and lift it up, the connector will come off easily.
Now I was able to cut off the electricity than the iPhone body!
[iPhone SE LCD replacement and decomposition method STEP 12]
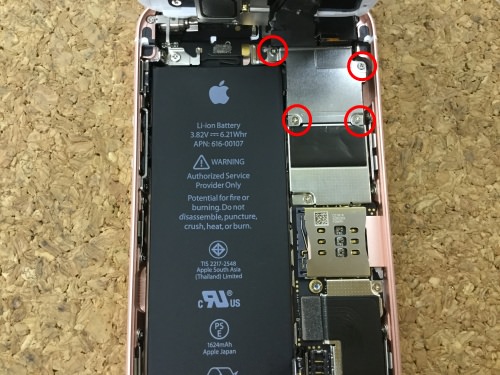
Next, remove the cable connected to the logic board from the LCD front panel, but here is also a metal plate, so remove all four screws.
[iPhone SE LCD replacement and decomposition method STEP 13]
If you remove all four screws, the metal plate can be easily removed.
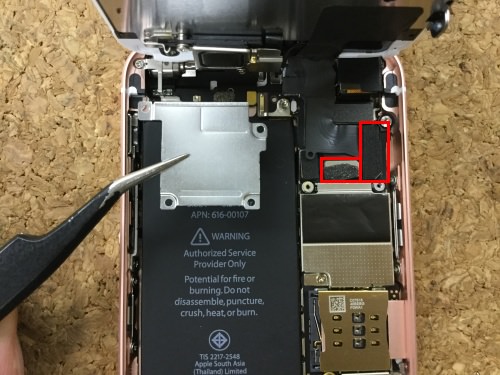
Since the cable is connected to the logic board three places from the liquid crystal front panel under the metal plate, remove two places of red marking to the top with a plastic spatula.
The way to remove it is the same way as when the battery connector is removed.
[iPhone SE LCD replacement and decomposition method STEP 14]

If you remove two places, you can see that it is connected to another place, so let's remove it by lifting it from the bottom to the top.
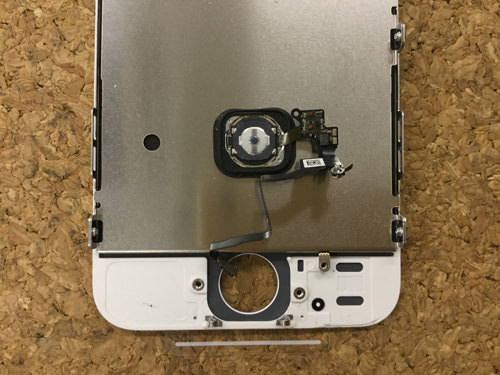
[iPhone SE LCD replacement and decomposition method STEP 15]
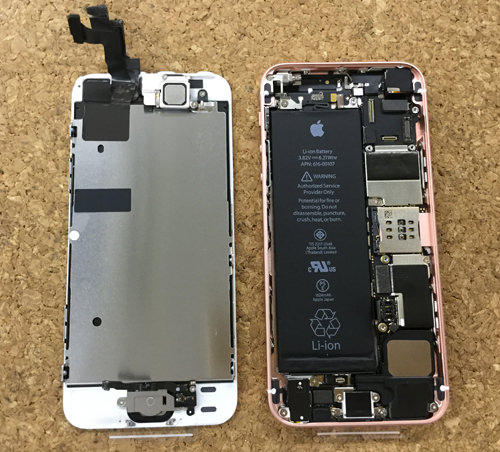
I think that it became the state of the image if it was possible to remove all the connectors of the previous.
However, since the entire liquid crystal side is removed, the home button and the camera are still attached.
Each part is removed to port a new liquid crystal.
[iPhone SE LCD replacement and decomposition method STEP 16]
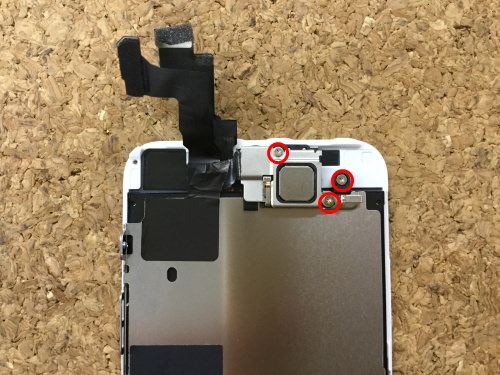
First, the area around the upper front camera is disassembled, but remove the three red-circled screws.
[iPhone SE LCD replacement and decomposition method STEP 17]
When all screws are removed, the metal fittings that secure around the camera can be removed.
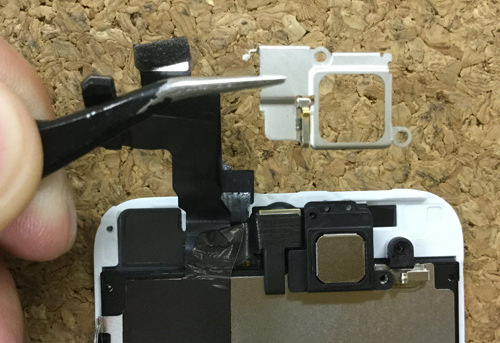
[iPhone SE LCD replacement and decomposition method STEP 18]
Next, I think that I was able to remove the ear speaker which can hear the other party's voice in the call etc. immediately.
If you can't hear the other person's voice, there are quite a lot of things that this part is out of order.
[iPhone SE LCD replacement and decomposition method STEP 19]
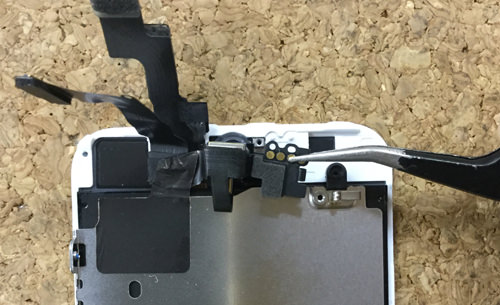
Carefully remove the integrated flex cable from the front camera and proximity sensor using tweezers and other materials.
The integrated flex cable is lightly adhesive, so it can be removed by peeling it off while lifting it carefully.
Surprisingly, this cable also plays an important role, so please be careful not to break it or bend it forcibly.
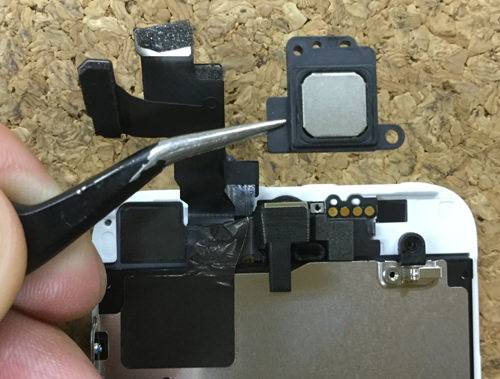
[iPhone SE LCD replacement and decomposition method STEP 20]
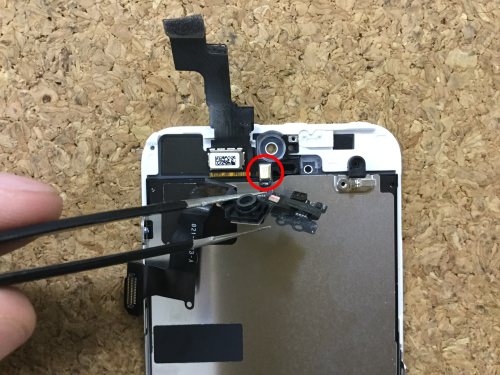
The removed ear speakers and cables will be reused when replacing with a new LCD, so handle them carefully!
The part of the red mark is inserted into the groove of the rubber, so use tweezers and remove it so that it lifts.
[iPhone SE LCD replacement and decomposition method STEP 21]
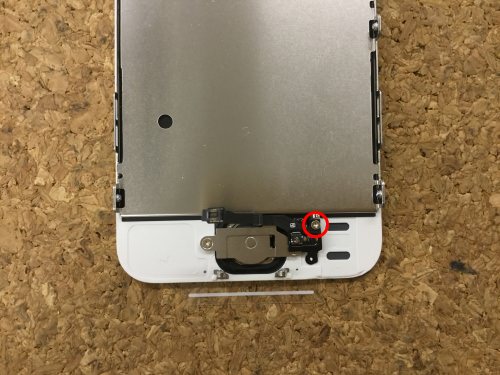
Next, we will break down the home button on the underside of the LCD!
First of all, let's remove one screw of the red mark.
[iPhone SE LCD replacement and decomposition method STEP 22]
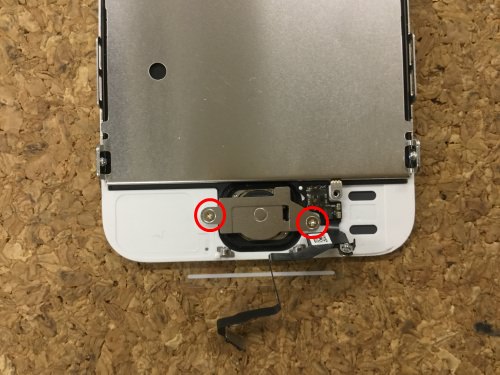
Next, there are two screws in the bracket that secures the home button, so I will remove it.
[iPhone SE LCD replacement and decomposition method STEP 23]
I think that I was able to remove the metal fittings easily, but please keep it so as not to lose because I reuse this home button part set later.
Especially, the home button of the iPhone SE has a fingerprint authentication function, so if you do not handle it carefully, it will cause a defect, and the function of fingerprint authentication will be disabled unless you replace the model.
Apple's security technology around here is really amazing!
[iPhone SE LCD replacement and decomposition method STEP 24]
Since the home button is fixed with adhesive tape, use tweezers and thin spatulas, etc., and carefully peel it off and remove it.
[iPhone SE LCD replacement and decomposition method STEP 25]
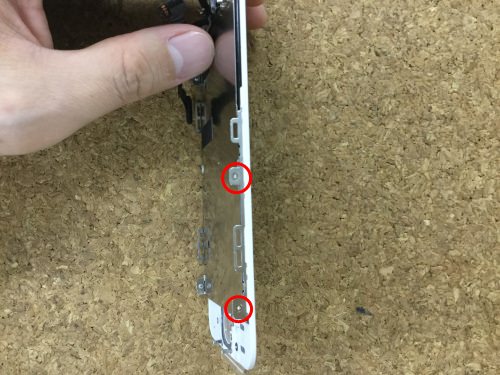
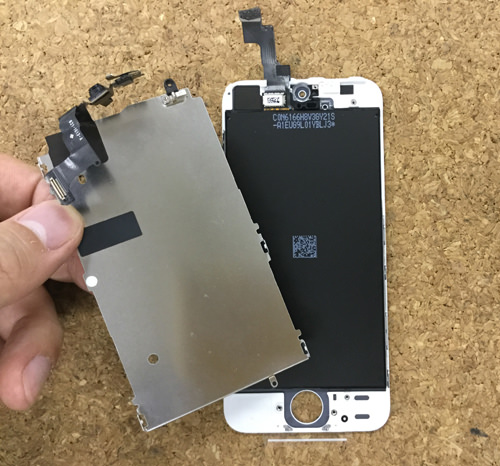
There is a thin iron plate on the back of the liquid crystal, and it is removed because it is bound by two screws next to the front panel on both sides.
[iPhone SE LCD replacement and decomposition method STEP 26]
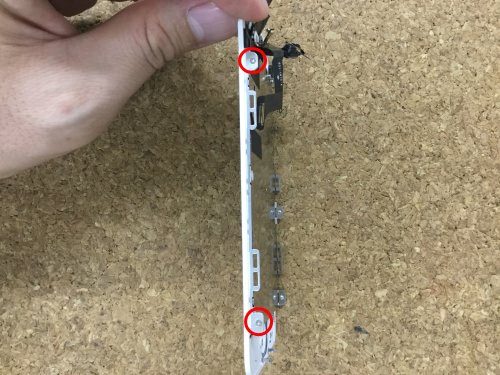
In the same way, remove the screw on the other side.
[iPhone SE LCD replacement and decomposition method STEP 27]
If all screws are removed, the iron plate on the back can be easily removed.
[iPhone SE LCD replacement and decomposition method STEP 28]
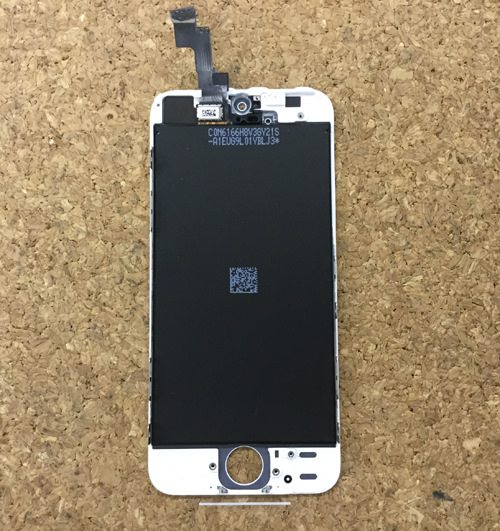
Finally, the disassembly of the panel is complete!
If you want to replace it with a new LCD, let's put it back in the reverse procedure while paying attention to the length and location of the screw!
If you are used to disassembly, it is possible to change the liquid crystal in about 15 to 30 minutes, but if it is the first time to disassemble, please take more than one hour to disassemble.
Because it becomes a rather expensive cost if other parts are damaged by the process in the middle by any chance.


コメントを残す