If the battery becomes bad, it will be due to the deterioration of the battery, so parts need to be replaced.
Since it has become relatively easy as decomposition difficulty, battery replacement is possible only by following the procedure in 20 minutes.
Tools are required with Phillips screwdrivers and iPhone-only pentabeberobe drivers.
I think that it is easy to disassemble if spatula and tweezers are prepared, so please prepare it.
Pentabebe drivers are almost unavailable at home centers, but they are sold on the Internet, so please get them.
The price is about a few hundred yen.
[iPhone4 Battery Replacement STEP 2]
First of all, I use a pentabebebe driver.
The iPhone4 looks like there are only two screws, but it can't be disassembled unless you remove it.
Remove the pentabeberobe screwdriver (star type) with two screws in the red circle.
[iPhone4 Battery Replacement STEP 3]
After removing the screw the previous, turn the iPhone4 inside out.
You can slide the rear panel in the direction of the arrow, but the range that can slide is about 5mm to 1cm as shown in the image.
If you have been using the iPhone4 for many years, there is also a case where it is hard to get dust in the gap of the panel itself, but you will be able to slide if you move it little by little.
If you slide it, you can remove the rear panel by lifting it upward.
[iPhone4 Battery Replacement STEP 4]
It was possible to remove the rear panel from the main body.
[iPhone4 Battery Replacement STEP 5]
From here, we will enter the disassembly of the main body side.
The red frame part has a battery connected to the logic board, but all disassemblies come from the work of removing this place.
Because one screw is attached to the lower side of the iron plate, I use a Phillips screwdriver.
[iPhone4 Battery Replacement STEP 6]
If you can remove the screw, all you have to do is remove the connector, but you can easily remove it if you try to lift it from the bottom to the top.
Do not use iron such as tweezers when removing the connector.Plastic spatula is effective because there is a risk of shorting because it is still connected.
Since it was possible to cut off the electricity in the process up to this point, the battery itself will be removed from the main body.
[iPhone4 Battery Replacement STEP 7]
There is a semi-transparent seat next to the battery, which is the seat used to remove the battery.
If you pinch it with your finger like an image and wake it up to the battery side, you will be able to remove it.
[iPhone4 Battery Replacement STEP 8]
I was able to remove only the battery from the iPhone4 body.
If the battery has become worse, you can easily charge it like at the time of new purchase by changing parts, so please try to challenge the target.


 If the battery becomes bad, it will be due to the deterioration of the battery, so parts need to be replaced.
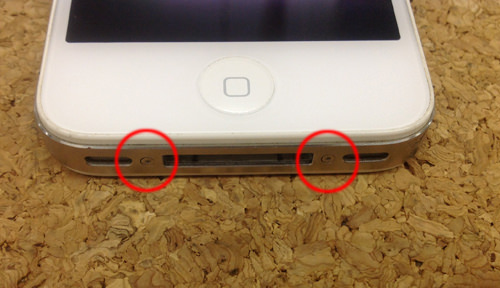
 First of all, I use a pentabebebe driver.
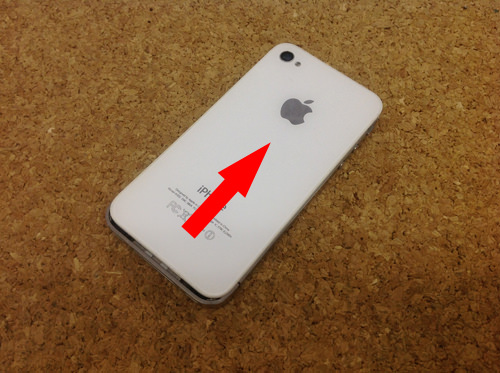
 After removing the screw the previous, turn the iPhone4 inside out.
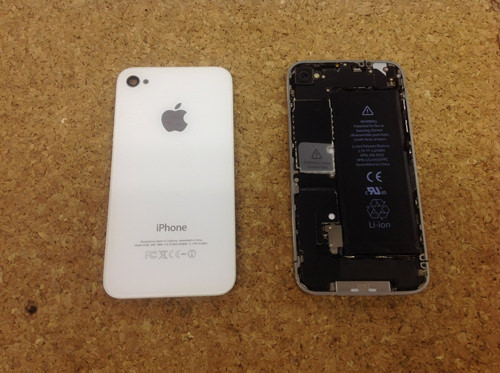
 It was possible to remove the rear panel from the main body.
 From here, we will enter the disassembly of the main body side.
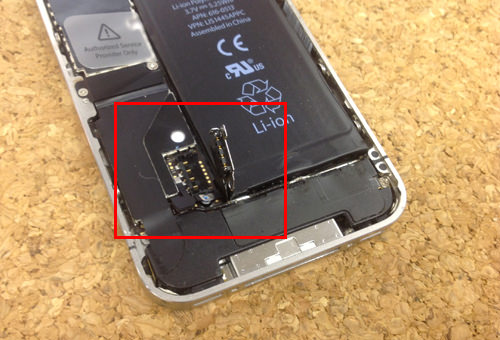
 If you can remove the screw, all you have to do is remove the connector, but you can easily remove it if you try to lift it from the bottom to the top.
 There is a semi-transparent seat next to the battery, which is the seat used to remove the battery.
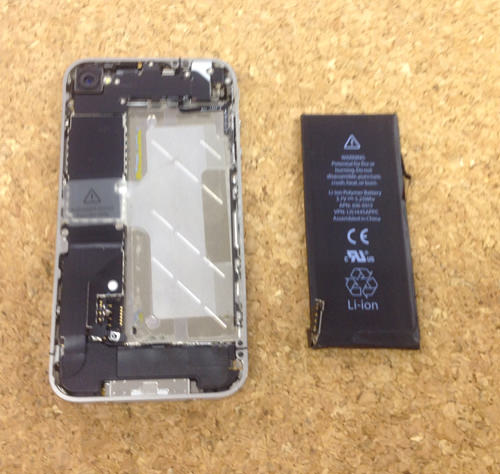

コメントを残す