Repair methods such as iPhone8 rear camera failure, do not start with sandstorm
The iPhone has a front camera and a rear camera, but the rear camera is often used.
When shooting something object, it is most likely to use the rear camera (outer camera), but it does not stand up even if you start the camera app, even if the app can be activated, it becomes a state of sandstorm and there are rare cases where you can not use the camera.
It is not a part that breaks down easily, but if you have symptoms such as the above, please refer to it if you want to disassemble it because it is likely to be physically faulty.
Camera failure of iPhone8 is cheap if you can repair it yourself!
- [iPhone8 Rear camera replacement repair and disassembly method STEP 1]
- I would like to disassemble the iPhone8, but it looks like an image is almost no different from the iPhone7.
There are many similar decomposition methods, but what is clearly different from the iPhone7 is that the battery can now be wirelessly charged (Qi).
Although the liquid crystal crack is not done in the image, the repair method is exactly the same even if it is not broken, so please refer to the person who has broken down!
- [iPhone8 Rear camera replacement repair and disassembly method STEP 2]
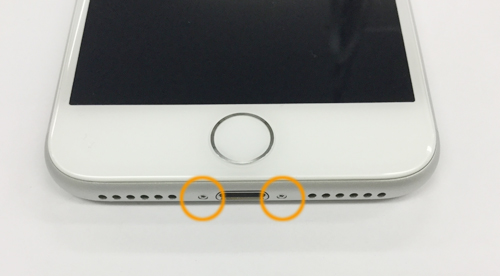
- Decomposition of the iPhone8 also starts from the place where to remove the screw here, but various parts have been changed in the iPhone that has been released so far, the only unchanged part is this screw part.
If you do not have a dedicated tool instead of a Phillips screwdriver, you cannot remove the screw, so please prepare it if you do not have a special tool.
It is very easy to remove if you can prepare a driver.
- [iPhone8 Rear camera replacement repair and disassembly method STEP 3]
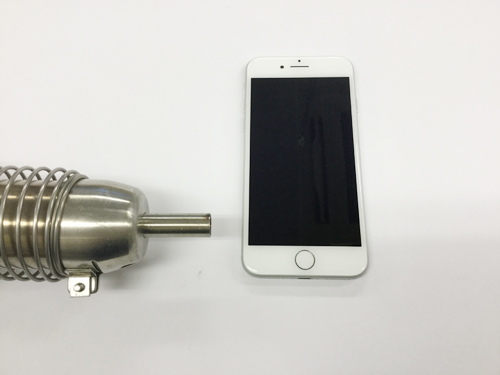
- The iPhone8 is marketed as a waterproof mobile phone, so waterproof tape is applied to the gap between the LCD and the main body.
It was easy to remove the LIQUID crystal with a past iPhone, but it is a little hard to remove the liquid crystal because the waterproof seal is attached to the inside from around the iPhone6s.
The tool in the image is called a heat gun, and it is a powerful version of the dryer if it says clearly.
It is recommended because the tape becomes soft by adding heat to the circumference of the iPhone lightly (white part in the image), and it is easier to work than the state where heat is not applied. - If there is no heat gun, it is also possible to handle a hair dryer for home use.
- [iPhone8 Rear camera replacement repair and disassembly method STEP 4]
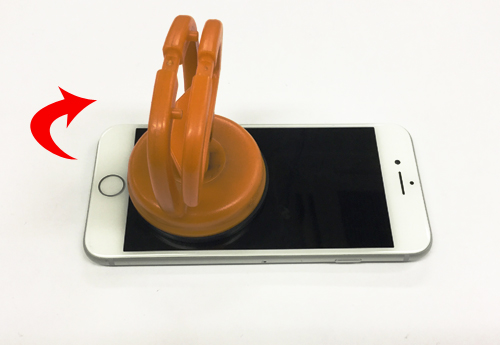
- If you can apply heat in the previous process, I think that waterproof tape is a little softer, so I will work to remove the liquid crystal before the heat cools down.
In this case, we use the tool because the screen is not cracked, but if there is a crack, you cannot use the tool (suction cup) of the image.
In that case, it is not possible to float the liquid crystal unless the tool is inserted from the side of the home button, but you can see the position where the tool is inserted by the next Step.
In Step5, the right side of the pick insertism is a guide.
- [iPhone8 Rear camera replacement repair and disassembly method STEP 5]
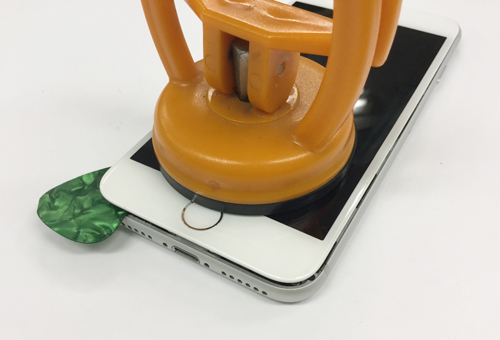
- I think that it was possible to float the liquid crystal a little like the image if it is possible to use the suction cup, but it is good to put a plastic thing such as a pick in the floating part.
If it is possible to float even a little in the front part, it is possible to float the horizontal side part if you slide the pick along the frame of the liquid crystal as it is.
If the screen is broken and you cannot use the suction cup, insert a tool (iron spatula) between the pick and the home button in the image, and insert the pick if there is a gap even a little.
- [iPhone8 Rear camera replacement repair and disassembly method STEP 6]
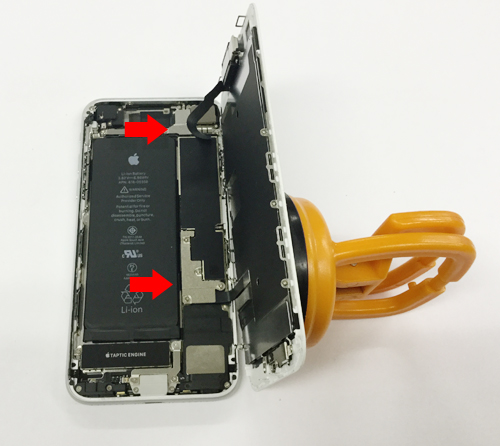
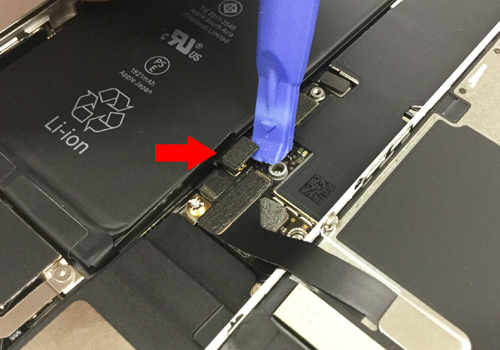
- Until iPhone6s, it has become to open vertically, iPhone7 and 8 are now open in the horizontal direction (right direction in terms of the image).
There are camera connectors and LCD connectors in the red arrow, so be careful not to break them.
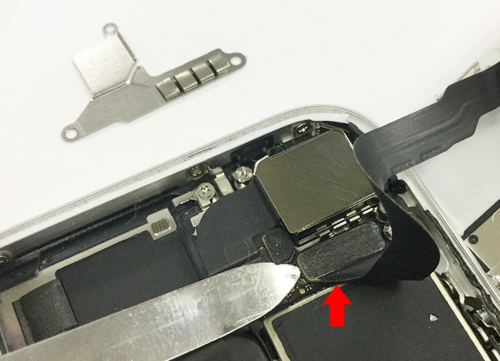
- [iPhone8 Rear camera replacement repair and disassembly method STEP 7]
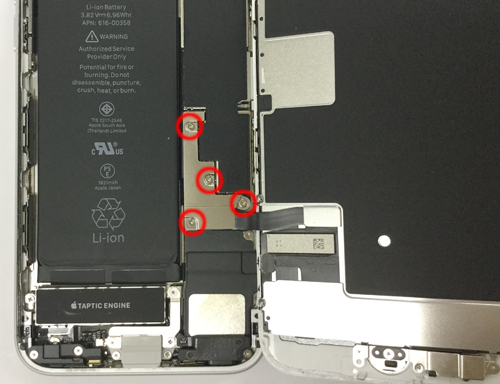
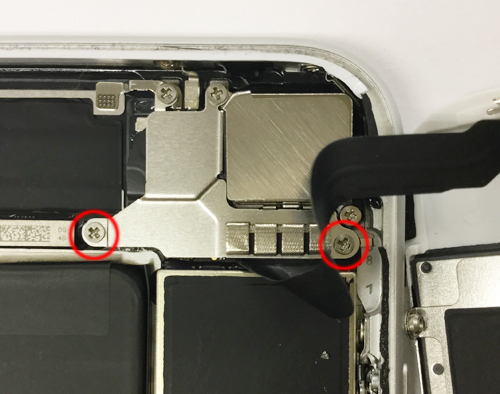
- This iron plate has battery connectors, LCD cables and home button cables.
There is a screw in the part which is enclosed in a red circle, but it cannot be easily removed because it is a special screw, and it is not sold easily in the home center.
I think that a tool is necessary if it seems to be disassembled for the first time iPhone, but please prepare it because you can buy it for about a few hundred yen on the Internet.
Please note that the screw thread is very small, so if you use a different tool, there is a high probability that the screw will lick, and opening will be difficult.
- [iPhone8 Rear camera replacement repair and disassembly method STEP 8]
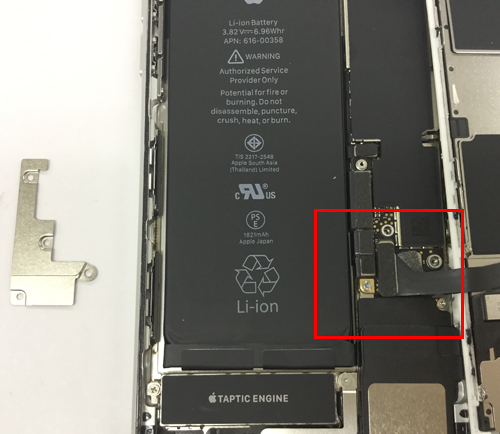
- It was possible to remove the iron plate when it was possible to remove all Y-shaped screws, but many connectors are connected to the red frame part, so please check the structure well.
- [iPhone8 Rear camera replacement repair and disassembly method STEP 9]
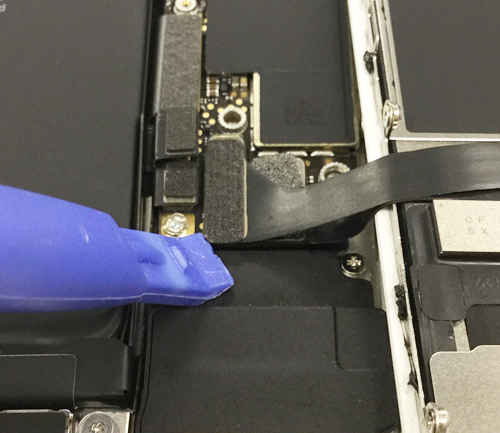
- First, work from the place where the connector of the battery connected to the logic board is removed.
You can easily remove the connector by inserting the plastic tool around the bottom of the connector as shown in the image and lifting it upward, but do not use a metal tool before removing the battery.
If you touch the metal part by any chance, it may be short-circuited, and the worst iPhone may not turn on, so be careful.
- [iPhone8 LCD replacement, glass cracking repair and disassembly method STEP 10]
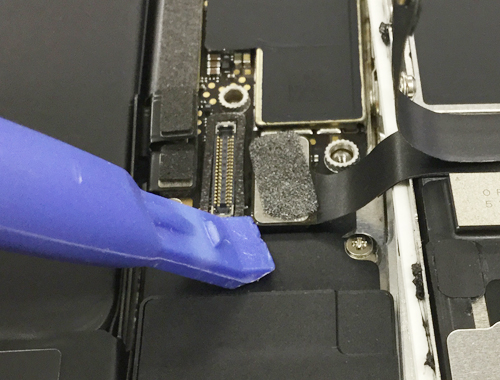
- When you can remove the previous battery, there is a part where the cable overlaps immediately nearby, but this is the home button cable and the liquid crystal cable.
The upper connector is removed first, but it is possible to remove it if it is made to lift from the bottom to the top as well as the battery.
- [iPhone8 Rear camera replacement repair and disassembly method STEP 11]
-
- Remove the cable below in the same way as before.
- [iPhone8 Rear camera replacement repair and disassembly method STEP 12]
- This is the camera side at the top of the liquid crystal.
The square part under the cable becomes the rear camera, but I want to remove it because the cable of the front camera is connected to the logic board.
Remove two screws in the red circle, but the screw of this part can be easily removed with a Phillips screwdriver.
- [iPhone8 Rear camera replacement repair and disassembly method STEP 13]
- I think that I was able to remove the iron plate when I was able to remove the screw of the previous.
It is possible to remove the connector by lifting the camera connector under the plate from the bottom to the top.
If you can remove the battery, you can use an iron spatula, but it is recommended because it is very easy to disassemble when the tip is thin tool.
- [iPhone8 Rear camera replacement repair and disassembly method STEP 14]
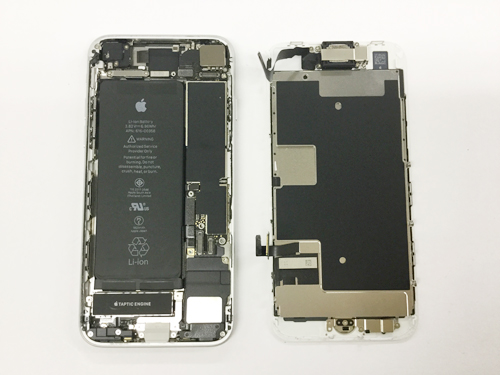
- I was able to separate the iPhone into the upper body, the lower body!
Since the rear camera is not on the liquid crystal side, but on the main body side, we will decompose further.
- [iPhone8 Rear camera replacement repair and disassembly method STEP 15]
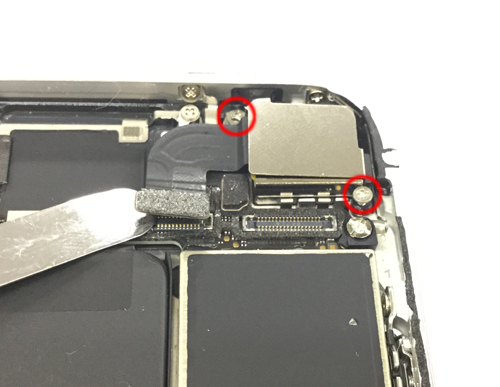
- There is a rear camera just below the front camera cable, but it is very easy to remove.
Remove the two screws enclosed in red circles with a Phillips screwdriver and remove the connector swayed to the logic board.
- [iPhone8 Rear camera replacement repair and disassembly method STEP 16]
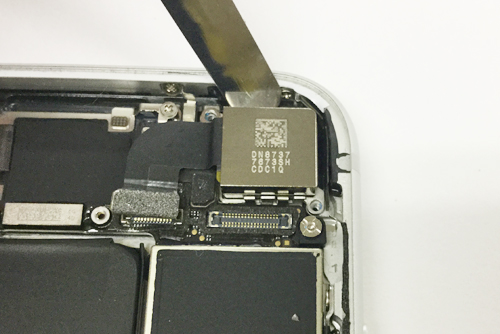
- When the cable can be removed, it is possible to remove the rear camera easily if the tool is used like the image and it is made to break lightly from the top.
- [iPhone8 Rear camera replacement repair and disassembly method STEP 17]
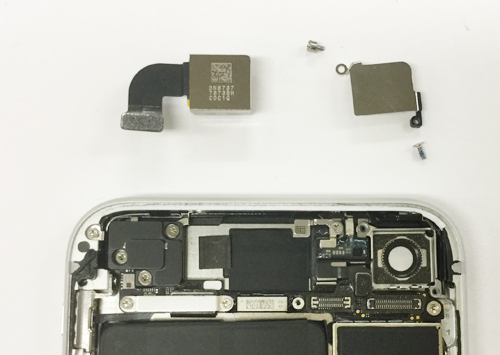
- I was able to remove the rear camera!
If you want to change the camera, it is OK if you assemble it by the reverse procedure, but if the problem is not improved even if you replace the camera by any chance, let's consult the repair shop because there is a high possibility of logic board failure.