iPhone4s LCD cracking, screen replacement repair method, disassembly method
It is iPhone4s which has become an old model a little now, but there are some people who are used.
There is no small thing like 4s in the recent iPhone, but it has become only those that feel big even if adult men use, iPhone4s iThink4s iPhone4s also have os os problems, so I think that someday model change will be necessary.
I think that it is better to repair the screen as soon as possible because there is an impression that the place where the repair is received in the iPhone repair shop in the whole country is considerably few, and the distribution of the parts is considerably reduced compared with the previous.
I think that you can refer to it because the method of the liquid crystal exchange of iPhone4s is published below.
IPhone4s LCD cracks, cracks, cracks, poor display can be fixed by LCD replacement!
- [iPhone4s LCD glass, panel replacement STEP 1]
- The liquid crystal crack has become the most common failure in the iPhone, but when it comes to requesting to the AppleStore, data erasure, if it becomes a body exchange.
I think that it is possible to fix it cheaply if it is possible to repair it by oneself, and it is possible to refer.
In addition, since it is necessary to remove the logic board in order to replace the lcd of the iPhone4s, repair difficulty is higher than the recent model, it will be very difficult work.
Of course, if you damage the logic board in the middle of the process, the power will not turn on, and there will be a problem such as not starting, so it is necessary to disassemble carefully.
Because the screw is also very large, let's keep it so that it does not lose.
- [iPhone4s LCD glass, panel replacement STEP 2]
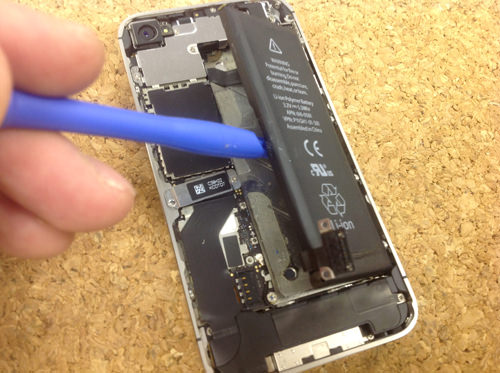
- The disassembly method until the battery replacement is omitted, but you can check it by iPhone4s battery replacement.
When disassembling, be sure to start with the work of removing the battery!
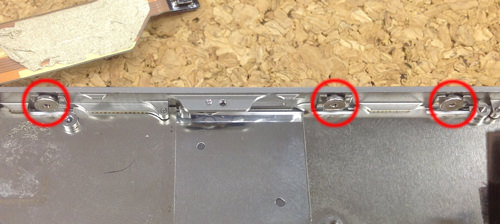
- [iPhone4s LCD glass, panel replacement STEP 3]

- From here, we will break down to remove the liquid crystal, but remove all the screws in the part surrounded by a red circle.
Please do not lose the position of the screw because it becomes a considerably fine work.
- [iPhone4s LCD glass, panel replacement STEP 4]
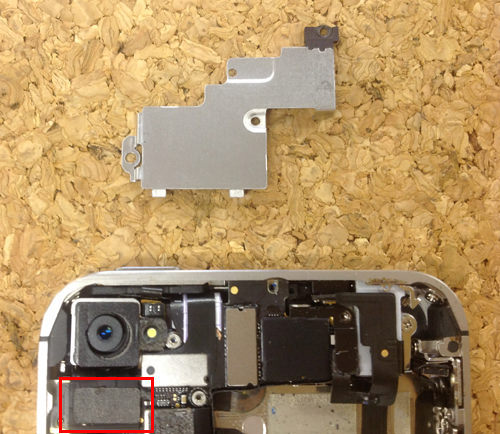
- If you can remove all the screws above, you can remove the iron plate, but there is a connector (red frame part) of the camera under the plate, so you can remove the rear camera if you try to lift it from the bottom to the top.
- [iPhone4s LCD glass, panel replacement STEP 5]
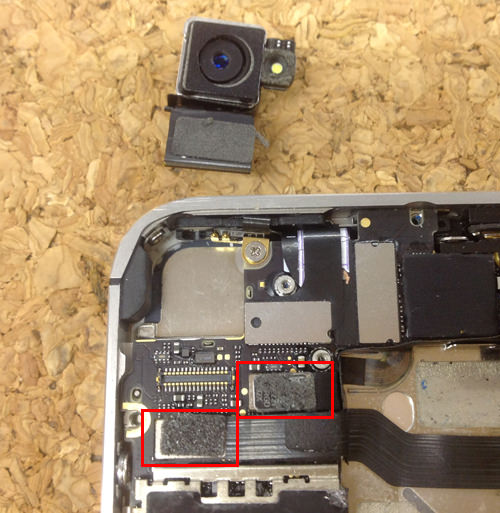
- I was able to remove the camera, but let's remove it in the same manner because there are two connectors (red frame part) on the side and below!
- [iPhone4s LCD glass, panel replacement STEP 6]

- Let's remove the connector of the red frame part as before!
You can easily remove it if you try to lift it from the bottom to the top.
- [iPhone4s LCD glass replacement STEP 7]
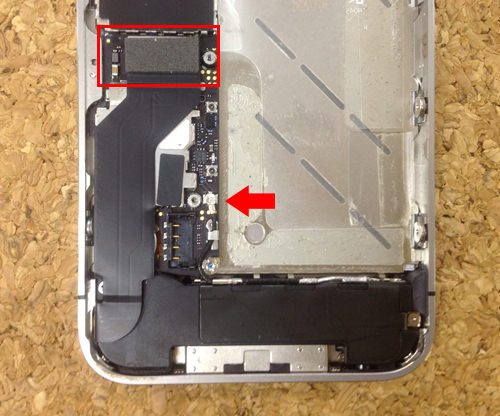
- The red frame part will be a cable that connects the dock connector and the logic board, so let it be lifted from the bottom to the top.
A small pin is connected to the logic board in the arrow part, but this is a loudspeaker cable, so it will be removed in the same way.
- [iPhone6 LCD glass, panel replacement STEP 8]
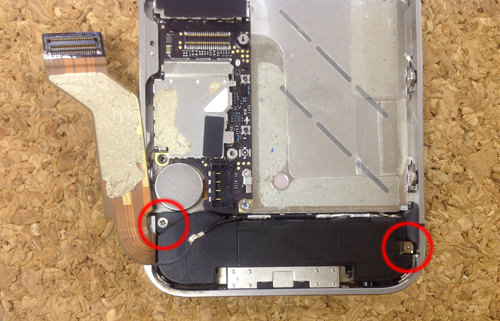
- If you peel off the cable of the dock connector above, the screw is hidden in the red frame on the left side, so remove the two screws of the red circle part.
- [iPhone4s LCD glass, panel replacement STEP 9]
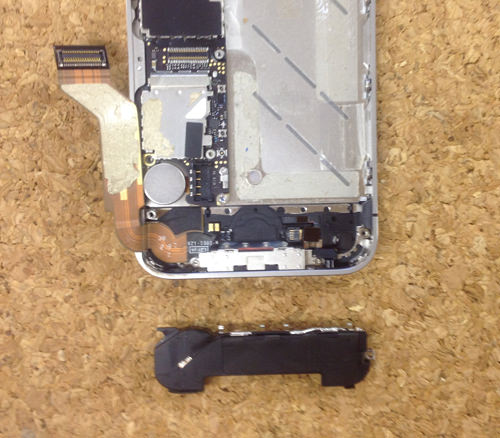
- The loudspeaker could be removed from the main unit.
- [iPhone4s LCD glass, panel replacement STEP 10]
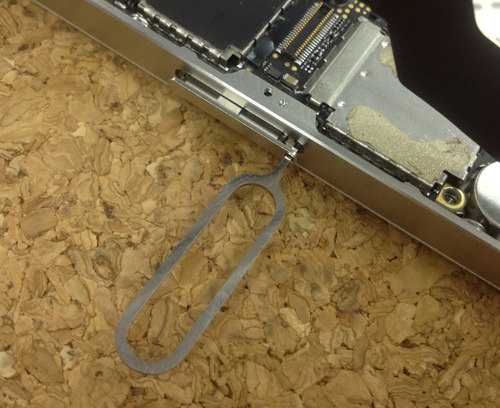
- Next, remove the sim tray, but you can pull out the entire tray by inserting the pin that was an accessory at the time of purchase into the hole.
At the moment, only screws are fixed logic boards, so let's remove all screws attached to the logic board!
- [iPhone4s LCD glass replacement STEP 11]
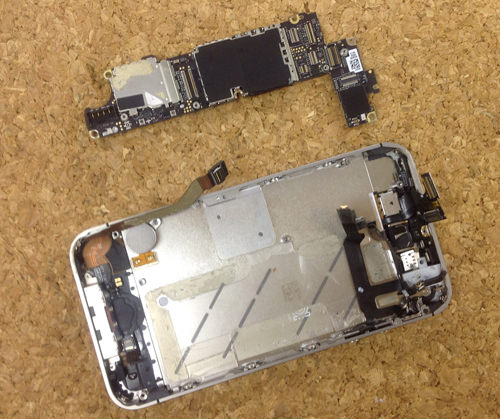
- It was possible to remove only the logic board from the iPhone4s body.
Logic board will be a part that is made very delicately in the iPhone, so be careful not to hurt or handle.
Symptoms such as a line entering the liquid crystal, a faint reflection, and not turning on the power supply are symptoms that occur if the logic board is broken.
- [iPhone4s LCD glass, panel replacement STEP 12]
- The decomposition process so far is to remove the logic board to the last, but from here it will be the work of removing the liquid crystal.
Because there is a screw in the red circle part, it removes it.
The same screws are attached to the top left, upper right, lower right, and lower left corners, so please remove them all.
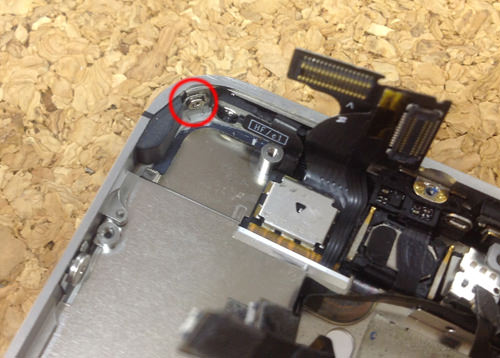
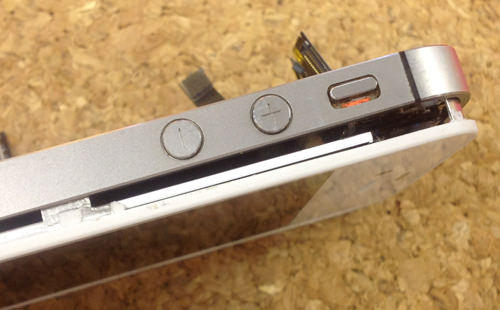
- [iPhone4s LCD glass, panel replacement STEP 13]
- This part will be the side part in the iPhone, but because there is a screw in the red circle part, it will remove all.
This is not only a screw but also a washer, so please keep it so as not to lose it.
- [iPhone4s LCD glass, panel replacement STEP 14]
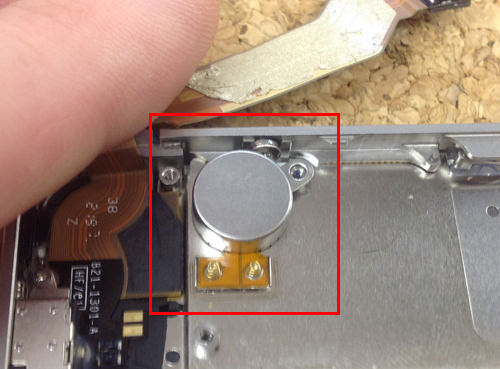
- This part will be a vibrator of iPohne4s, but the screw is hidden behind the vibrator, so it needs to be removed.
Because it is only fixed to the main body with a light double-sided tape, it can be removed if it is made to twist from the bottom to the top.
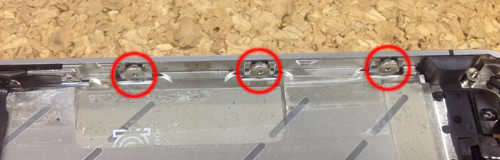
- [iPhone4s LCD glass, panel replacement STEP 15]
- There are three screws on the opposite side, so remove them all.
- [iPhone4s LCD glass, panel replacement STEP 16]
- If the process up to this point is accurate, there are no screws or connectors that secure the LCD panel.
If you insert a tool such as a spatula into the gap between the main body side and the panel, you can float the liquid crystal, so you can remove only the liquid crystal if you float the whole.
- [iPhone4s LCD glass, panel replacement STEP 17]
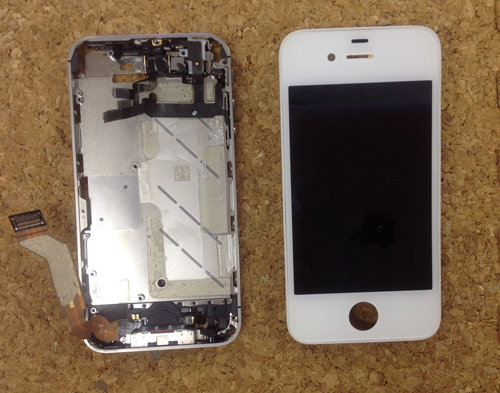
- Since only the liquid crystal was able to be removed from the main body, the liquid crystal replacement will be completed if you replace the newly prepared liquid crystal and incorporate it in the original procedure.
Since the operation process of the liquid crystal replacement of iPhone4s has become very long, if you are not confident in the decomposition, we recommend that you consult a repair shop without hesitation.
Even those who are accustomed to repair more than 30 minutes, if you are to replace the lcd of iPhone4s for the first time, it is safe to think that it takes more than one and a half hours to disassemble.

コメントを残す