how to repair and disassemble in case of iPhone6 camera not starting, falling, sandstorm
iPhone6 Camera Replacement and Disassembly Procedures
[iPhone6 Camera Replacement STEP 1]
I would like to remove both the front camera and the rear camera, but first I will disassemble it from the front camera.
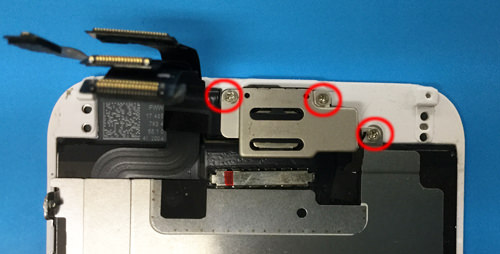
Please refer to the decomposition method so far because it can be confirmed by the liquid crystal exchange of the iPhone6.
If it is possible to put it in the state of only the liquid crystal, all screws attached to the red circle part will be removed, but the driver to be used will be a plus.
[iPhone6 Camera Replacement STEP 2]
I think that I was able to remove up to the plate if I could remove three screws.
Because the parts are fine, it is a good idea to store them with a magnet sheet.
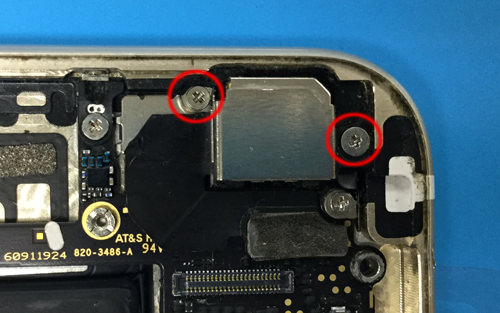
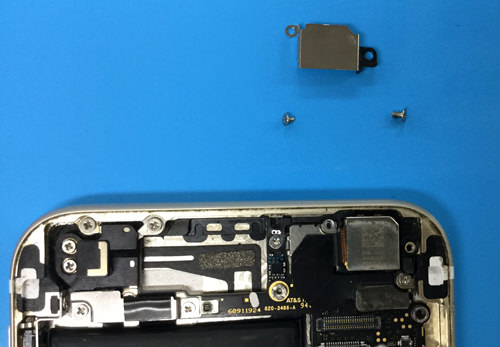
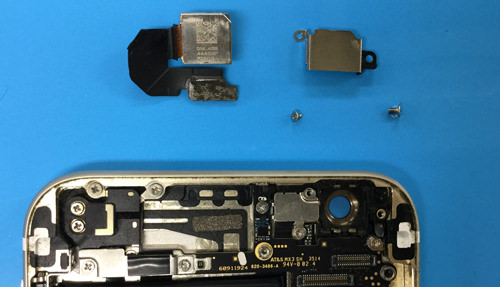
[iPhone6 Camera Replacement STEP 3]
There is a camera cable and ear speaker under the plate, but it is possible to remove the ear speaker easily by lifting the camera a little.
The ear speakers are only held down by the camera cable, so you can easily remove them.
[iPhone6 Camera Replacement STEP 4]
I feel that the proximity sensor part is a little stiff by removing the camera, but you can easily remove it when you lightly rub it with a tool like the image.
Basically, it's just fixed with double-sided tape, so it doesn't get much force.
[iPhone6 Camera Replacement STEP 5]
I was able to remove the front camera, but the front camera part is composed of such parts.
If the camera is not displayed or the camera does not start, it is expected to improve by replacing this part.
In addition, the camera cable has a function called proximity sensor, but this function is a function that the screen becomes brighter when you talk the iPhone from the ear, and the screen becomes dark when you put it on the ear.
If the screen does not darken even if you put an iPhone on the ear, this part may be damaged, so you need to do a cable replacement (camera replacement).
[iPhone6 Camera Replacement STEP 6]
From here, I would like to remove the rear camera (outer camera) attached to the main body side, but first remove the screw of the red circle part.
You can easily remove it by using a Phillips screwdriver as well as the front camera above.
[iPhone6 Camera Replacement STEP 7]
There is a plate on top of the camera, but I think that it came off by removing the screw.
[iPhone6 Camera Replacement STEP 8]
The connector of the rear camera is connected to the logic board.
You can easily remove it by using the tool as shown in the image and lifting it from the bottom to the top.
[iPhone6 Camera Replacement STEP 9]
I was able to remove the rear camera.
Please do not lose the parts because of the fine.
If the camera fails, reassemble it with the original procedure and it will be completed.
 I would like to remove both the front camera and the rear camera, but first I will disassemble it from the front camera.
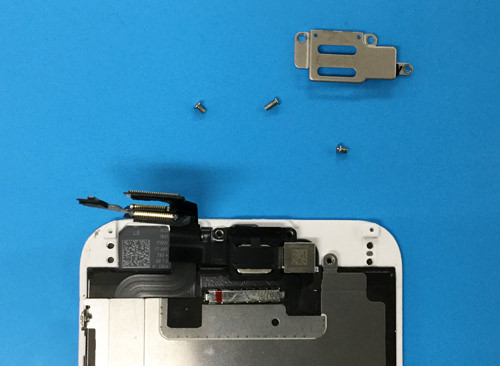
 I think that I was able to remove up to the plate if I could remove three screws.
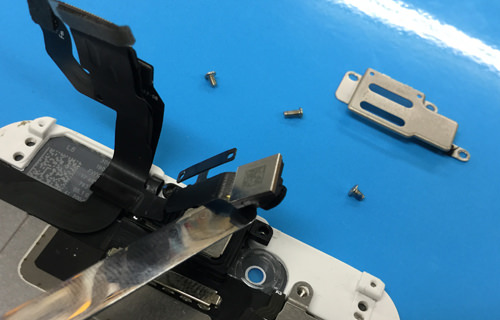
 There is a camera cable and ear speaker under the plate, but it is possible to remove the ear speaker easily by lifting the camera a little.
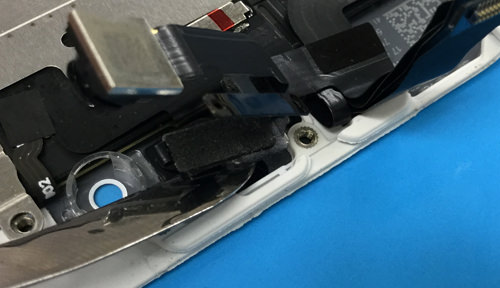
 I feel that the proximity sensor part is a little stiff by removing the camera, but you can easily remove it when you lightly rub it with a tool like the image.
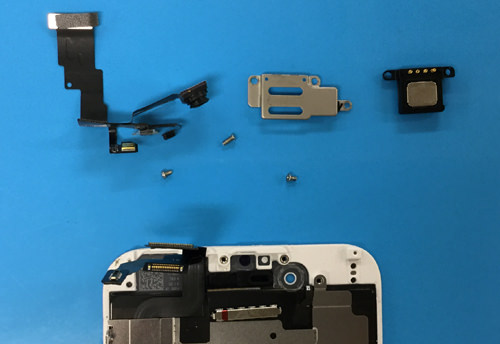


コメントを残す