This decomposition method is an effective repair procedure and decomposition method in the case of lcd cracking of iPhone6Plus, line on the screen, and poor display of liquid crystal.
Many causes when the screen is broken is that the liquid crystal is broken by the fall of the iPhone.
Even if you wear an iPhone cover, liquid crystal cracking is one of the trouble that does not prevent easily, but the liquid crystal screen crack is the most common trouble in the failure of the iPhone6Plus, so I want to suppress the repair fee even a little.
The repair price has become cheap even in the iPhone repair shop in the whole country, but there is no doubt that it will be the cheapest repair in order to become a cost if it is still possible to fix it by oneself.
Since the liquid crystal parts of iPhone6Plus can also be purchased for about 3000 yen from 2000 yen, if you have confidence in your arm, why not try Chiya Range?
iPhone6plus LCD glass, panel replacement and disassembly procedures
[iPhone6plus LCD glass, panel replacement STEP 1]
Then, I want to disassemble the iPhone6Plus, but let's keep it so as not to lose all the screws used in the iPhone because it is quite small.
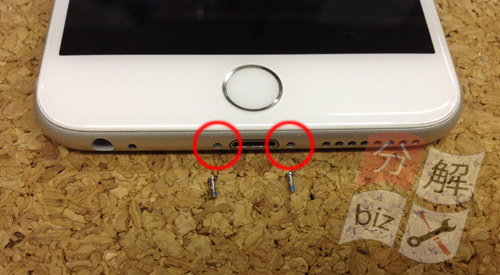
First, turn off the power of the iPhone and remove the two red-circled screws.
This screw can not be removed with a Phillips screwdriver, so be sure to use a special tool.
[iPhone6plus LCD glass, panel replacement STEP 2]
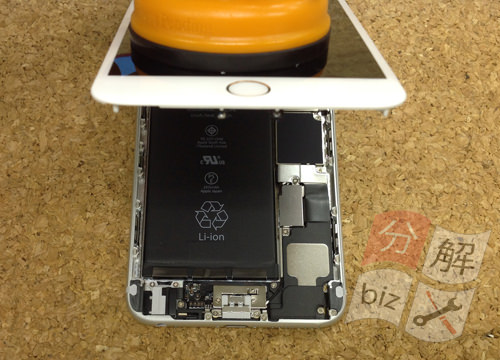
You can remove the suction cup by installing it on the home button side and lifting it from the bottom to the top.
After the liquid crystal floats slightly, it can be made to the state like the image if the tool such as the spatula is used.
The condition that the suction cup can be used is that there is no crack and crack in the liquid crystal.
Because the decomposition procedure is published in the image, the liquid crystal is not broken and it is possible to use it.
If the liquid crystal is broken, it is not possible to use a suction cup, so let's insert a thin tool of the tip into the gap between the liquid crystal and the main body and open it.
[iPhone6 plus LCD glass, panel replacement STEP 3]
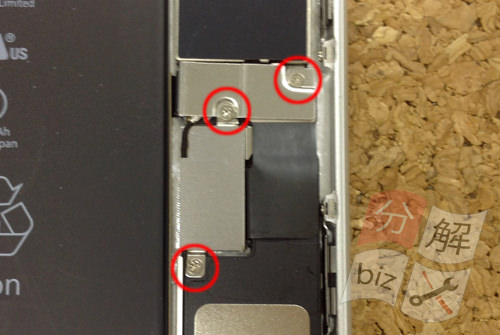
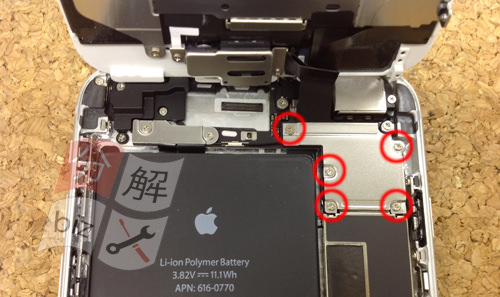
Even if the liquid crystal can be opened, do not try to remove the liquid crystal immediately, let's first remove the connector of the battery.
There are three screws in the iron plate shape, and there is no problem just by removing the top two, but I take it all to make the work easier to understand.
[iPhone6plus LCD glass, panel replacement STEP 4]
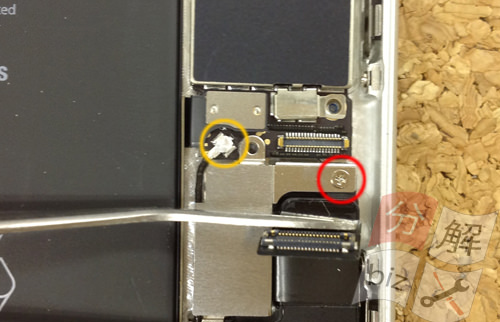
There is a connector relationship inside, but the battery connector is a square part on the yellow circle.
It is possible to remove the battery connector by lifting the plastic tool into the screw.
The yellow circle and the red circle screw are all right.
[iPhone6plus LCD glass, panel replacement STEP 5]
From here, we will remove the liquid crystal, which is also the main subject.
There is an iron plate on the upper right, but the cable of the part attached to the liquid crystal is connected to the logic board inside this plate.
Remove all the red-circled screws to remove the silver plate first.
[iPhone6plus LCD glass, panel replacement STEP 6]
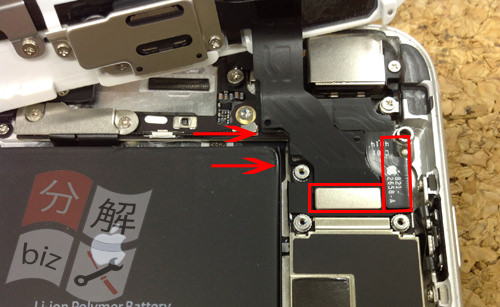
The connector connected to the logic board is now visible.
All connectors can be removed by lifting from bottom to top.
If you remove the connector that is enclosed in red frame, the connector is also hidden inside, so all connectors will be removed.
You will also remove the camera cable, but be careful not to break it for later reuse.
[iPhone6plus LCD glass, panel replacement STEP 7]
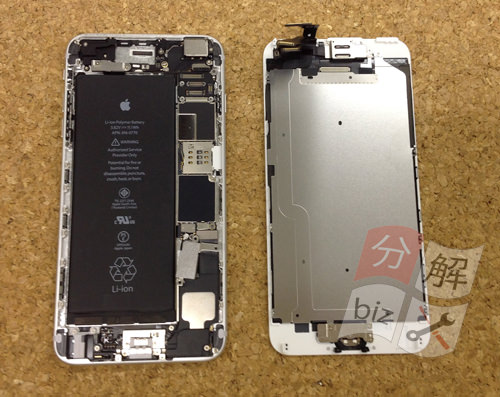
It was possible to separate the liquid crystal side and the main body side.
When replacing the LCD panel, it is necessary to transplant the camera and the home button to the liquid crystal side to be newly installed, but from here, only the liquid crystal side will be disassembled, so please keep the main body side.
[iPhone6plus LCD glass, panel replacement STEP 8]
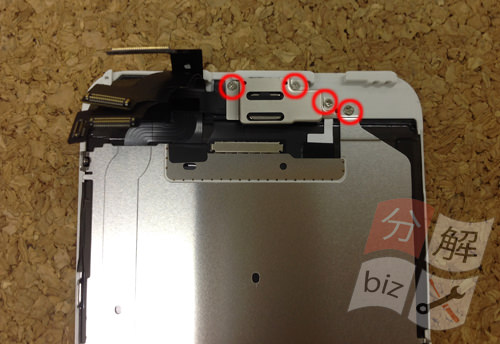
First of all, the front camera side is disassembled, but remove all screws in the place that is surrounded by a red circle.
Then, the iron plate comes off, so remove the camera cable hidden under it.
The cable is only attached to the main body with light double-sided tape, but let's not break it.
If the tape does not peel off easily, it is easy to peel off because the tape swells when the heat of the dryer is lightly applied.
[iPhone6plus LCD glass, panel replacement STEP 9]
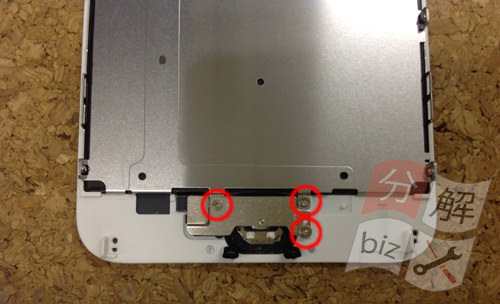
Next, we will disassemble the home button side, but remove all the screws because we remove the iron plate of the red circle part.
The iPhone6Plus has a fingerprint authentication function, but if you break or scratch the home button cable, you need to be careful because fingerprint authentication will not work.
Fingerprint authentication does not work even if you buy a replacement part by breaking the home button and replace it.
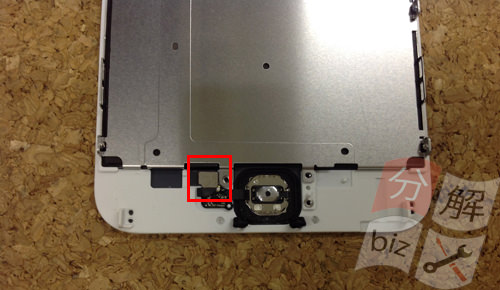
When the iron plate can be removed, it becomes a state like an image, but there is a small connector in the place where it is enclosed in red, so that it lifts from the bottom to the top and it removes it.
If you can remove the connector of the previous, you only need to remove the home button.
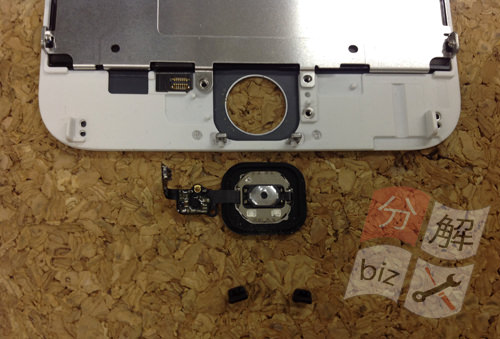
If you press it inward from the front side, it can be removed, but if it does not come off easily, please remove the rubber part slowly.
There are two rubber tubes under the home button, so don't forget to remove them.
(There may be no rubber.))
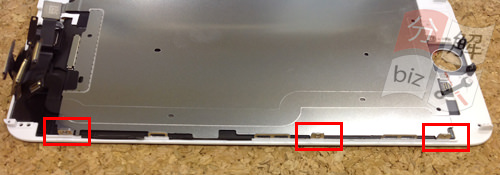
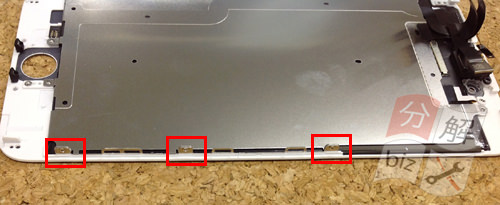
Next, the heat shield in the center is removed, but the heat shield is fixed with a small screw on both sides.
Let's use out the thin Phillips screwdriver at the tip.
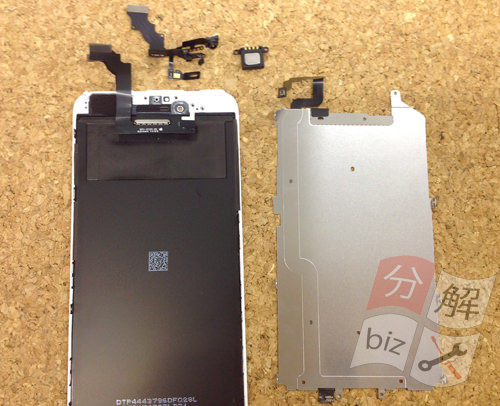
All parts attached to the LCD could be removed.
The LCD replacement of the iPhone6Plus is completed by porting a camera, ear speakers, and home button to the newly prepared LCD.

コメントを残す